

Build an airtight container for the glue roller
A step-by-step tutorial
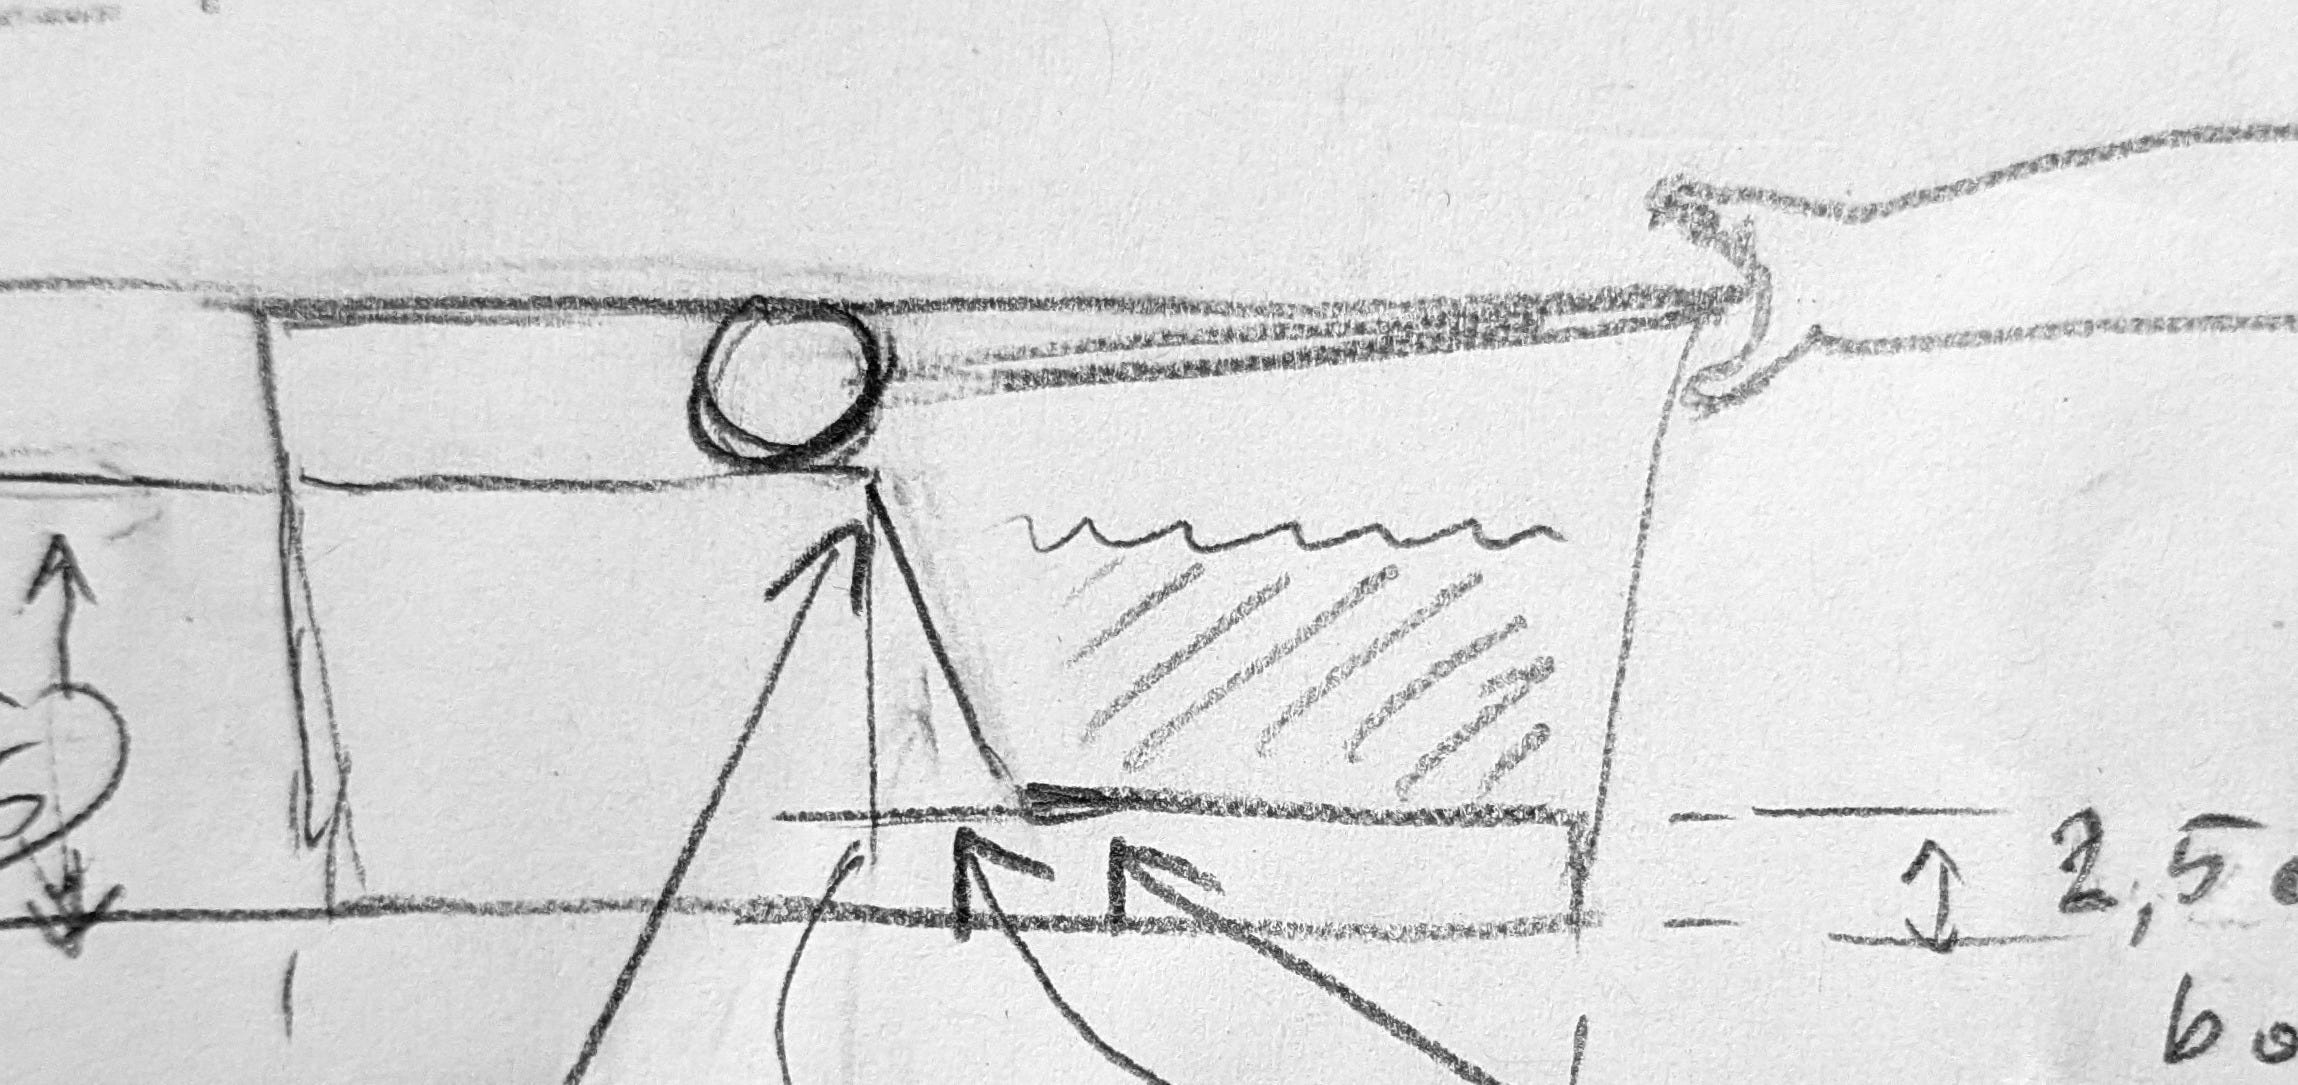
Now that we know that paint rollers do a better job of applying PVA than traditional brushes (read article here), our next step is to build a custom container that keeps the roller and glue ready to use when needed—and maintained in good condition when not in use.
PVA dries fast, and while this is great when it comes to our finished products, how can we prevent this from happening inside the tray and on the roller when we are not using them? Paint trays with lids do not exist, so one common solution is to wrap it all inside a plastic bag, but it is not actually airtight and the glue will dry slowly but surely, form lumps, and you’ll have to clean everything and refresh the glue often.


Also—let’s be honest—it looks precarious and unworthy of the high standards we aspire to. Bookbinders, you deserve better than this!
Over the years I have worked out and tested a variety of solutions, complicated and less complicated. The design that I’m sharing here is my last iteration. I have used a version of this for years in the bindery and recently added two more features to make it even more effective.
-
It is easy to open and close, and when closed, remains airtight for a very long time (you can go on holiday for a month, come back, and start using it again, as if you’d left it the day before)
-
It is easy to wash, should you want once or twice a year to refresh the glue: all parts can be cleaned and dried separately
-
It is heavy and therefore does not move away from you as you use it, as do all the standard paint roller trays (this is a very enjoyable point of ease of use/comfort)
-
It is a stackable design, which is enjoyable if you are going to make a bunch for your studio or school
-
Last but not least: it is inexpensive to make and all ingredients are relatively easy to procure.
………………………
Supplies:
-
Roller: must be stainless steel (otherwise it will rust in contact with the water-based adhesive). Recommended is brand Colorus, 31 cm long (12.2 inches), width 10 cm (4 inches), Mohair (velours) sleeve (see substack about rollers for more info)
Suppliers: EU / UK / USA
-
A food storage container (also known colloquially as “Tupperware”). I use one from Hema (NL) capacity 2.3 L (0.61 gallons), size ~W19 x L25 x D9 cm (W7.48” × L9.84” × D3.54”). It should be wide enough to fit the roller sleeve and the part of the steel handle that comes out of it (∿11.5 cm, or 4.53 inches). It should be entirely in plastic, and have a ‘clamp’ on each side of the lid (these are very common). Suppliers: EU / UK / USA
-
Ready-to-use concrete (e.g. Rayher Kreativ-Beton). I found that ready-to-use mortar, which is normally used as an adhesive (e.g. binding bricks together) also works (ParexLanko Mortier gris fin, 5 KG). Concrete will give a smoother result, but is more expensive. In both cases you will need 2.5 - 3 kg (5.5 to 6.6 lbs) of it.
Suppliers: at the hardware store, or online EU / UK / USA (not tested!)
-
Acrylic fixative spray (e.g. Lascaux Acrylic Fixative 2070)
Suppliers: UK / USA -
Few basic tools such as ruler, marker pen, sandpaper, a coping saw, a small saw, tape, etc. and scraps of cardboard
……………………………
The project consists of two main steps : casting the platform, and adapting the container to fit the roller. It should take you only 2-3 hours of work in total, but there will be at least a week of drying time between step 1 and step 2 to allow the concrete block to fully dry. This is not a last minute project!
To fully grasp the concept, read the entire tutorial before starting!
……………………………
Step 1: Casting the platform
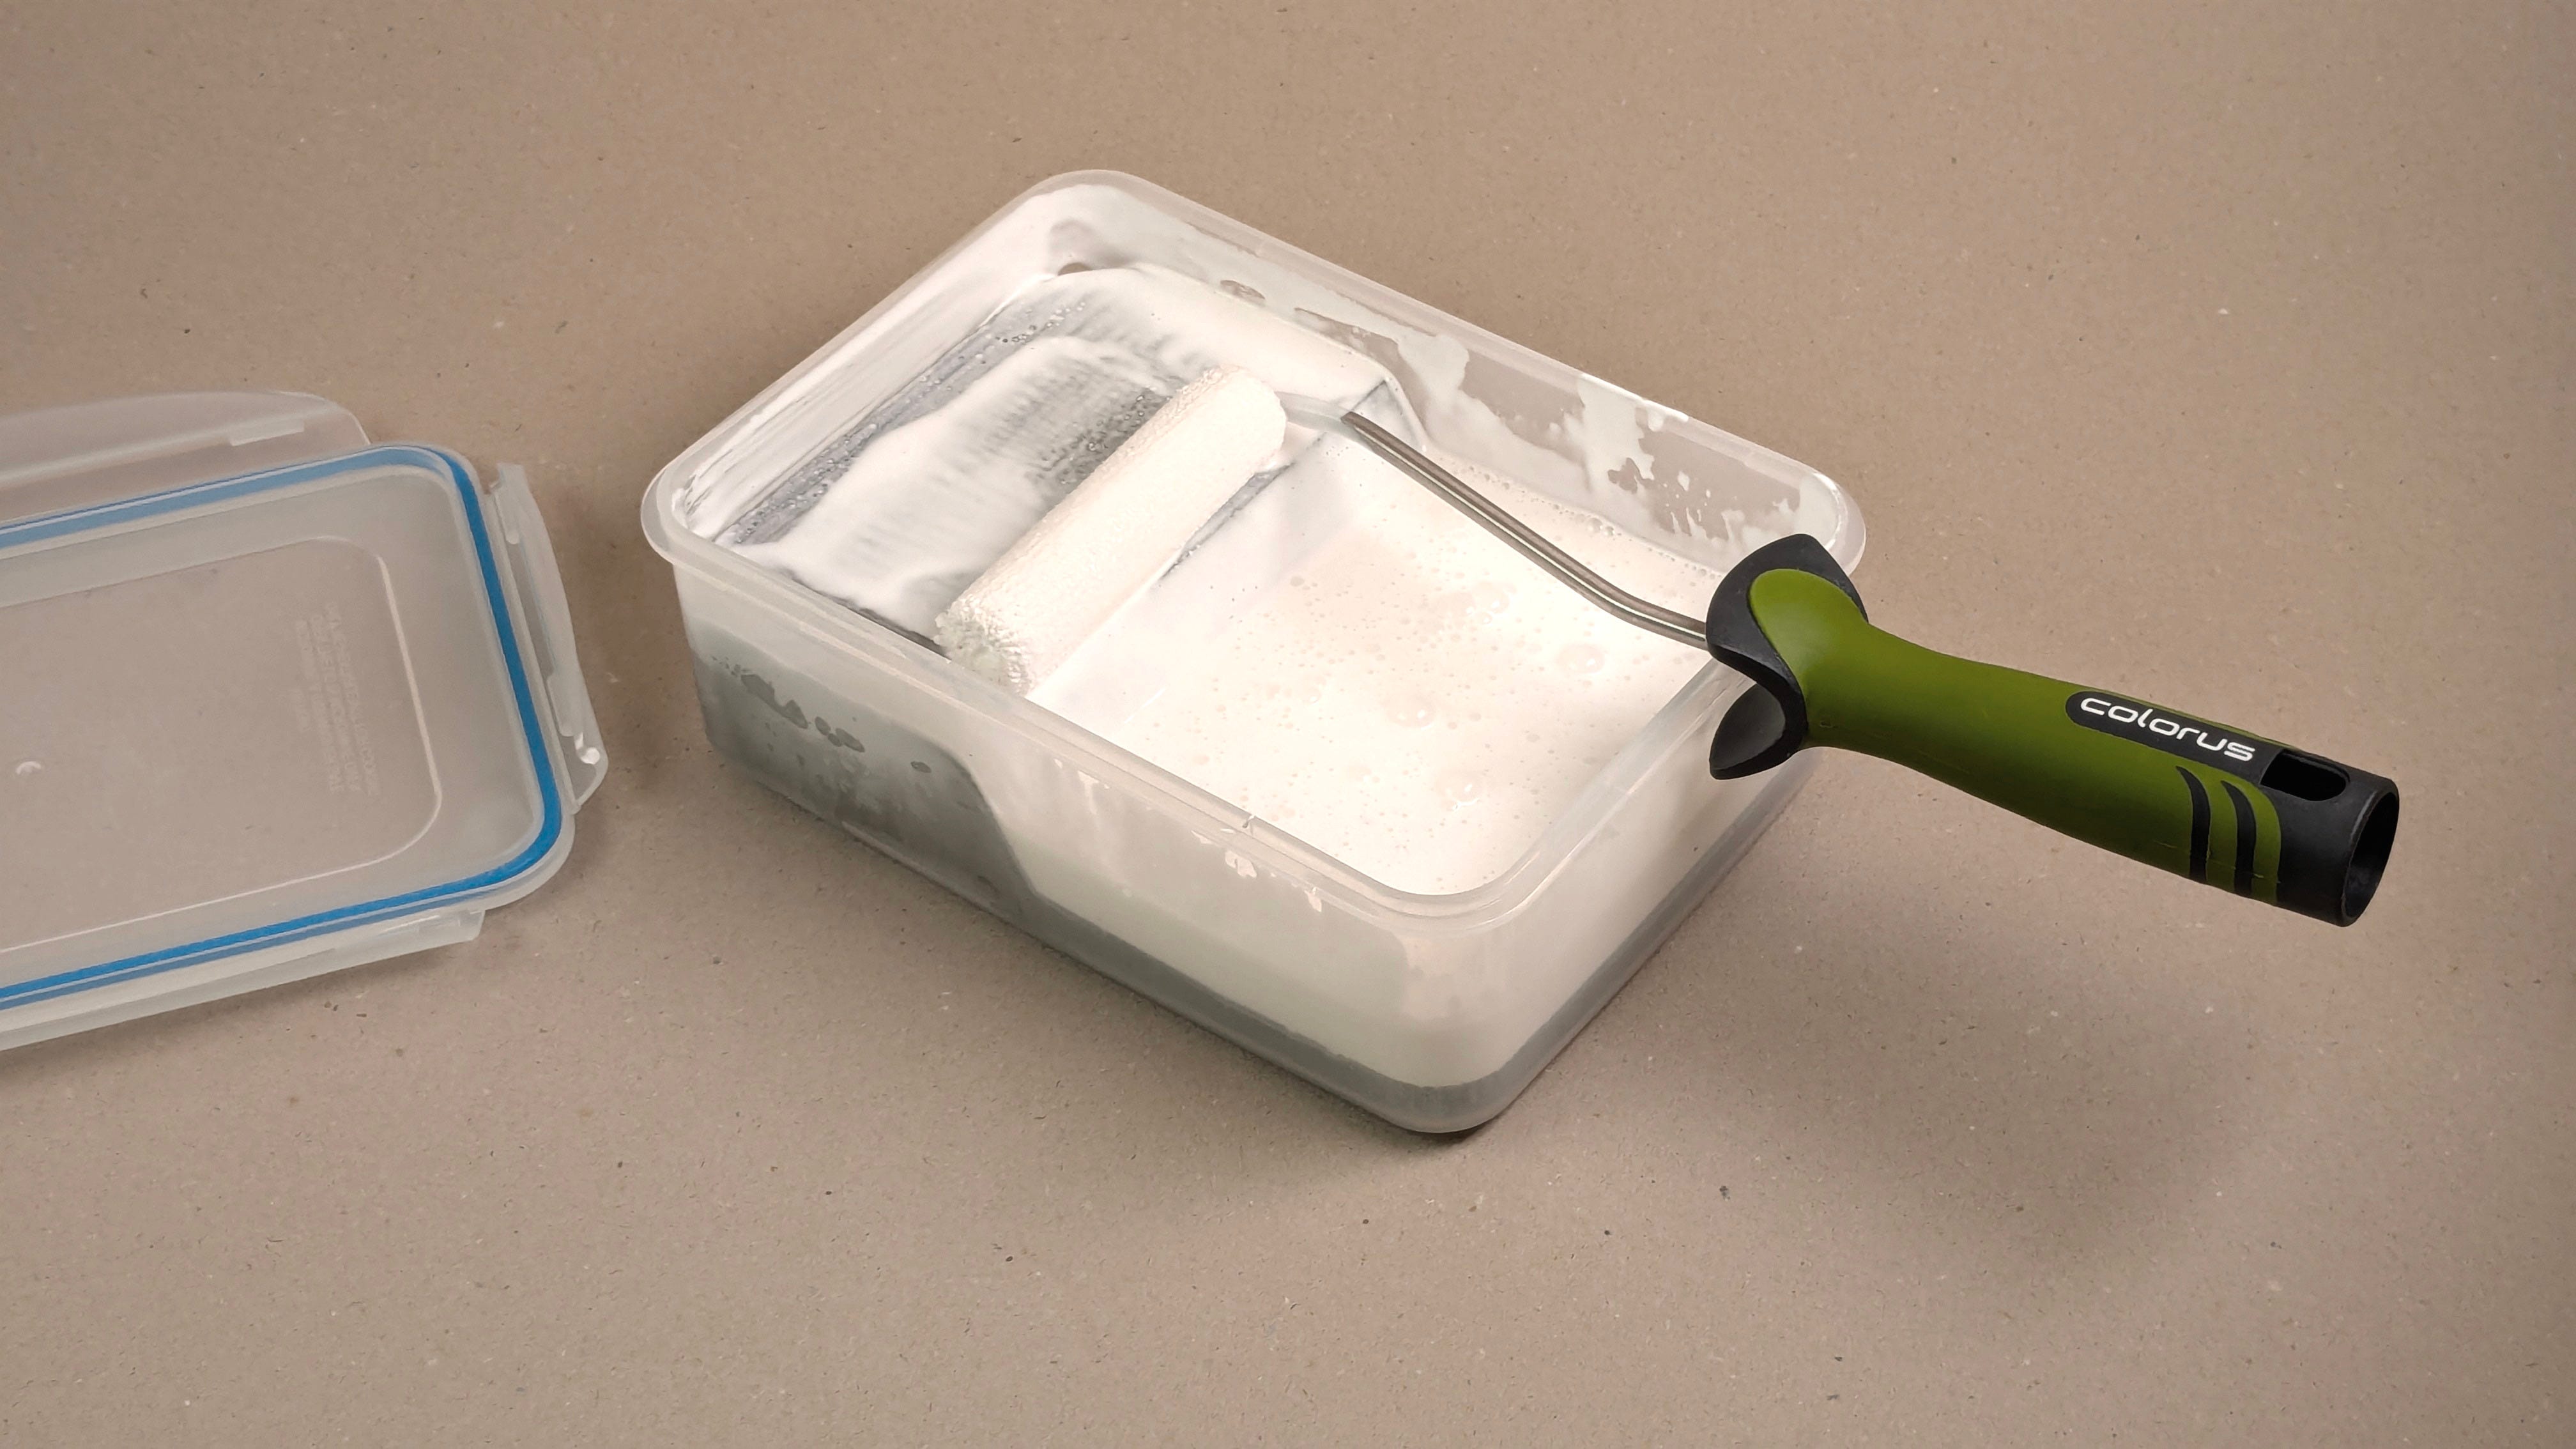
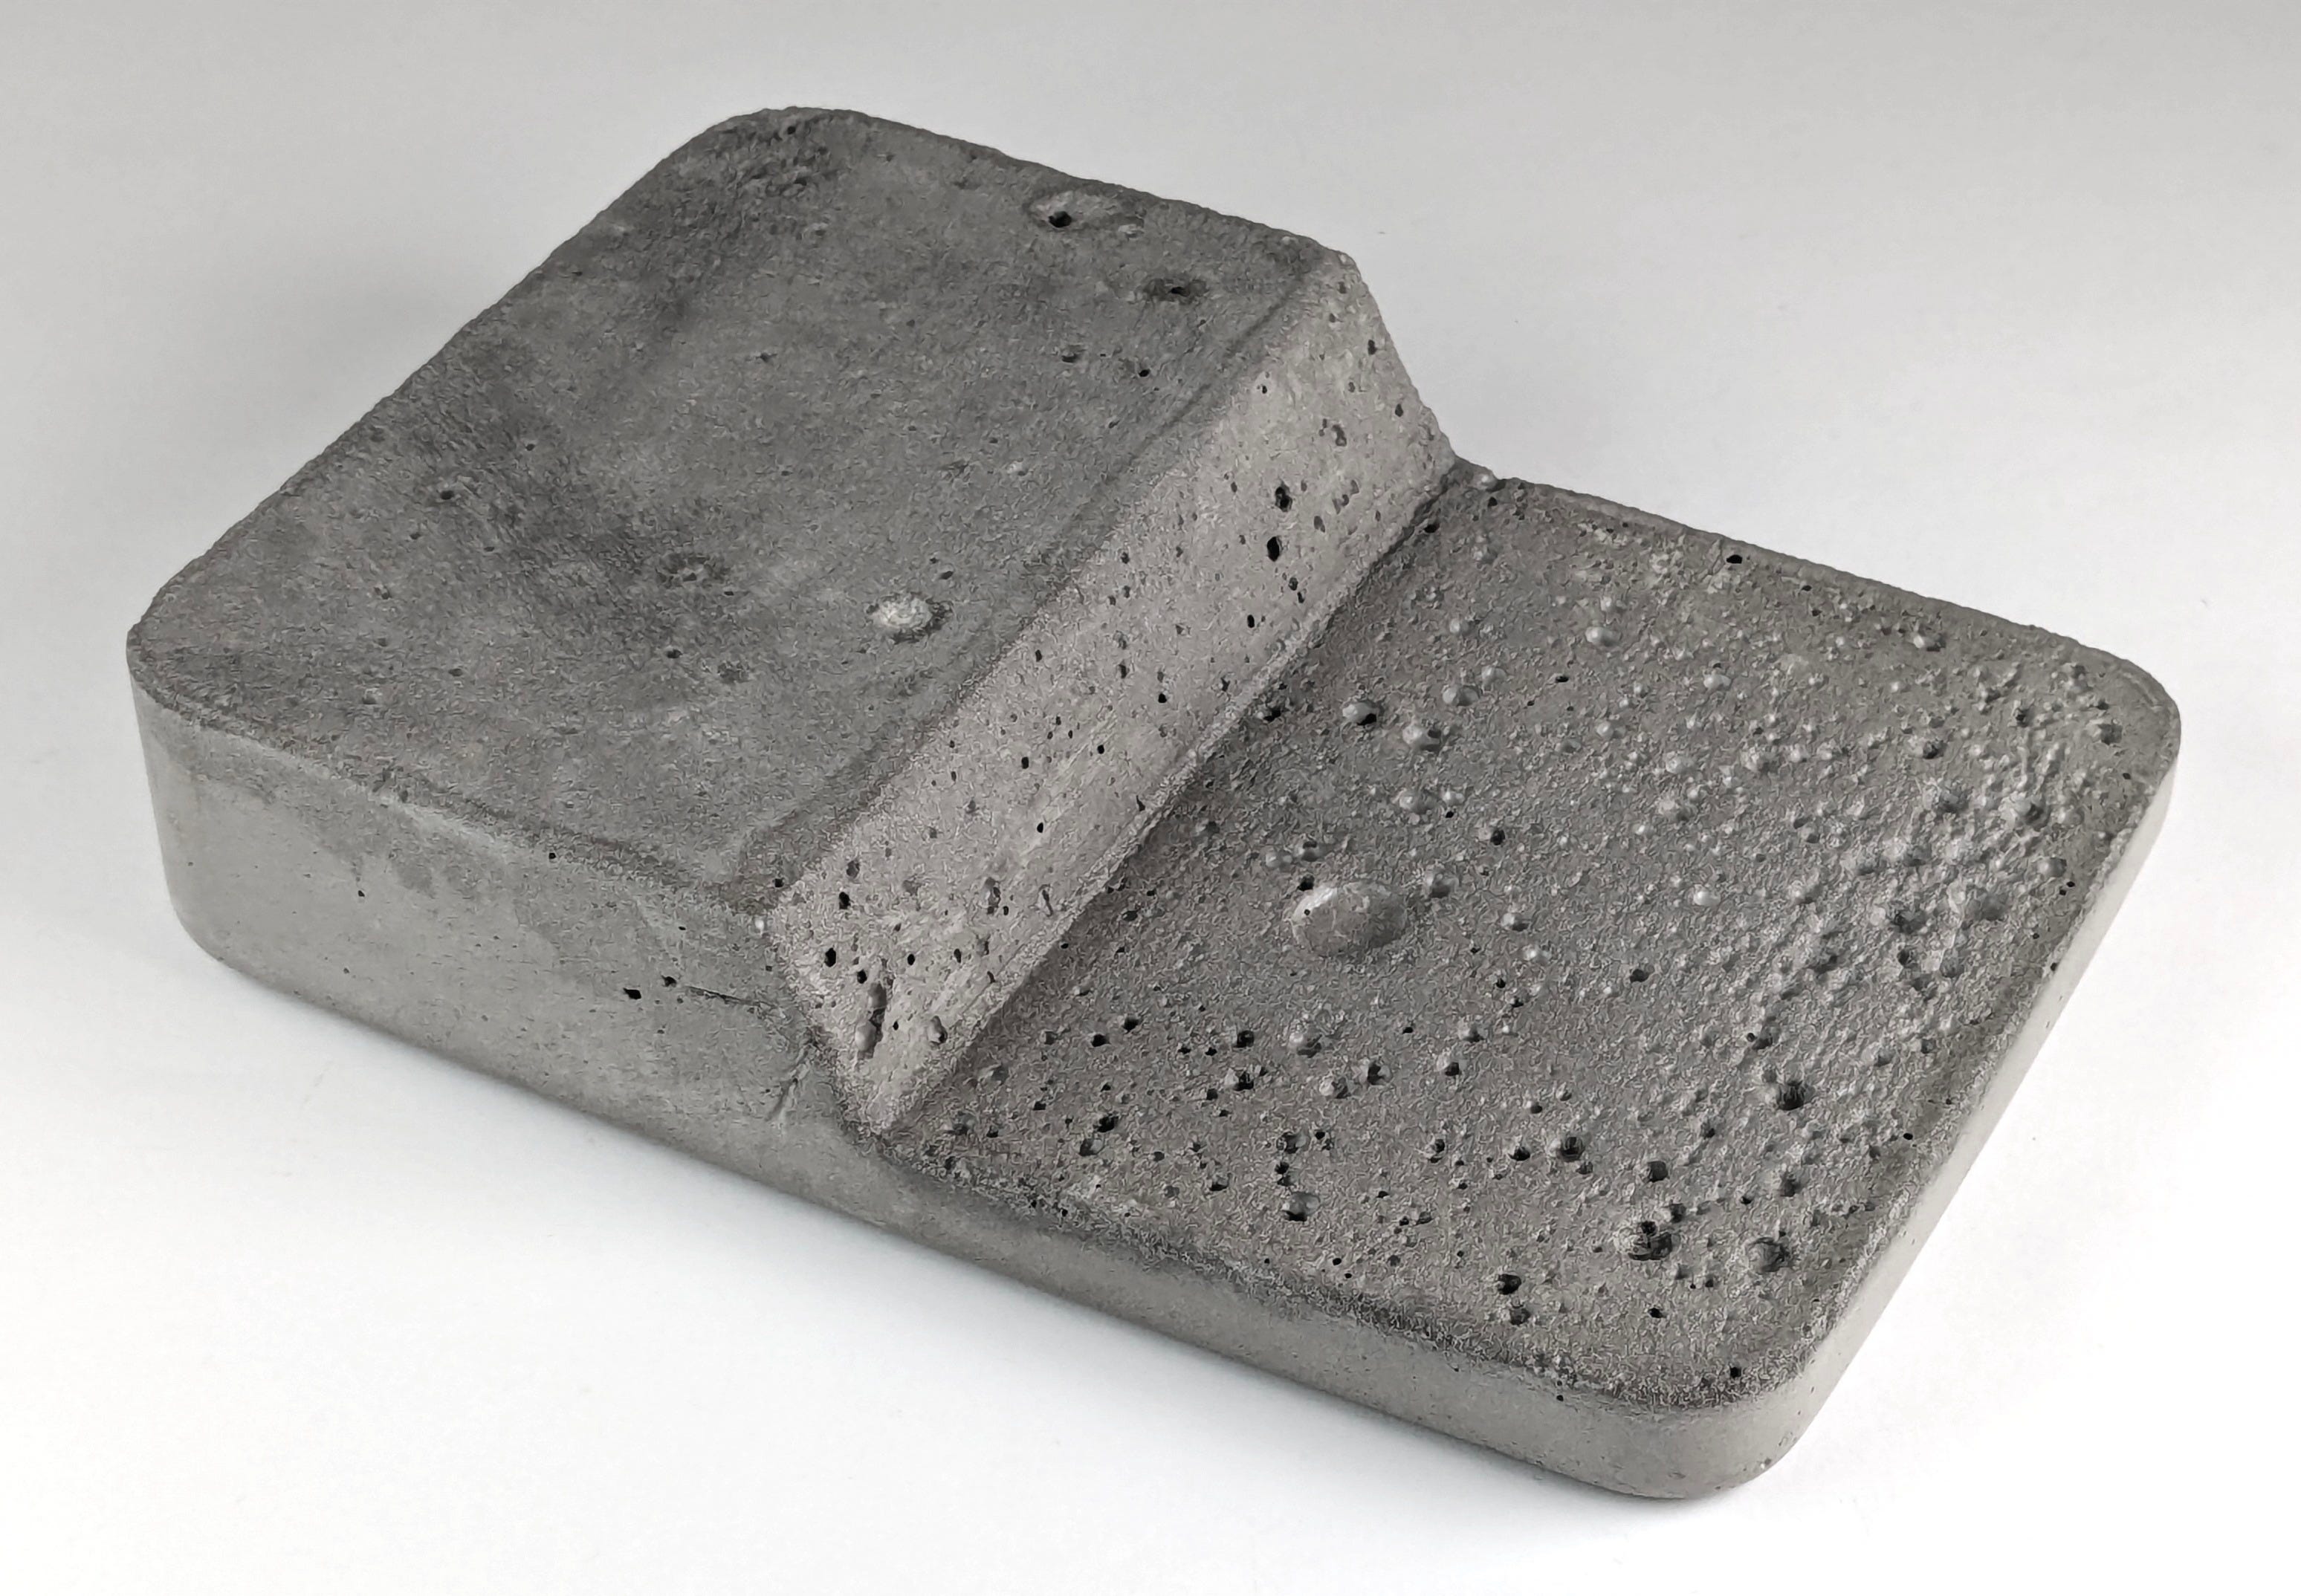
What I call the platform is a block of concrete with two levels, a lower one which acts as a reservoir for the glue, and an upper which is where the roller is rolled, and where it sits when not in use.
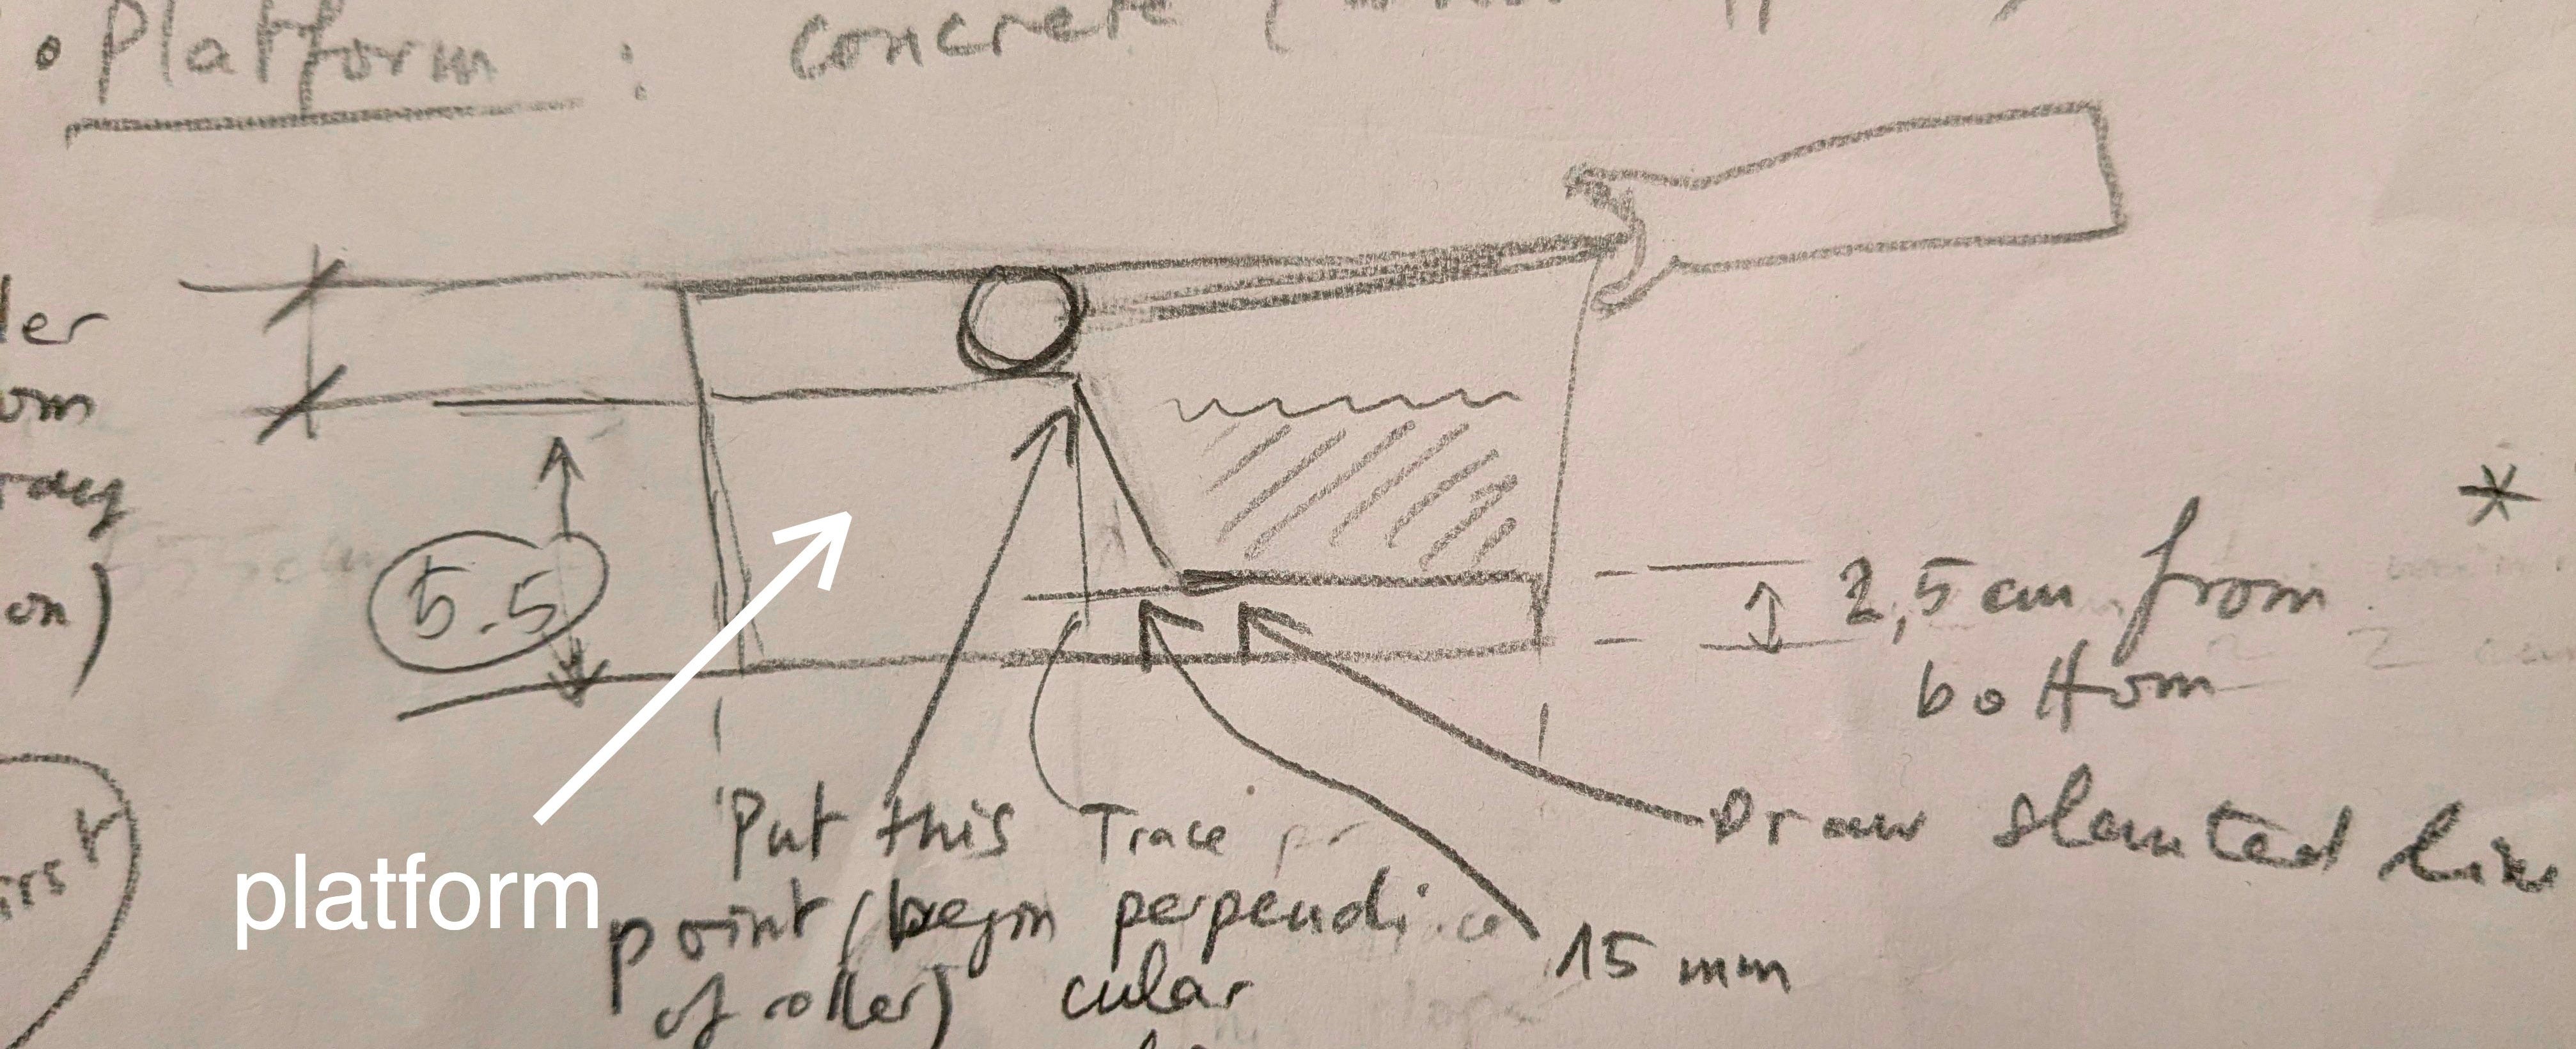
The platform is cast directly inside the food storage box. This way it adopts the exact shape of the box, fits perfectly, and can be removed for cleaning if necessary.
The first steps are to draw the outlines of this platform on the sides of the box so we can use it as a mold.
To begin with, trace a horizontal line 2.5cm from the floor around one half of your food storage box. This is your lower level, the bottom of the glue reservoir.
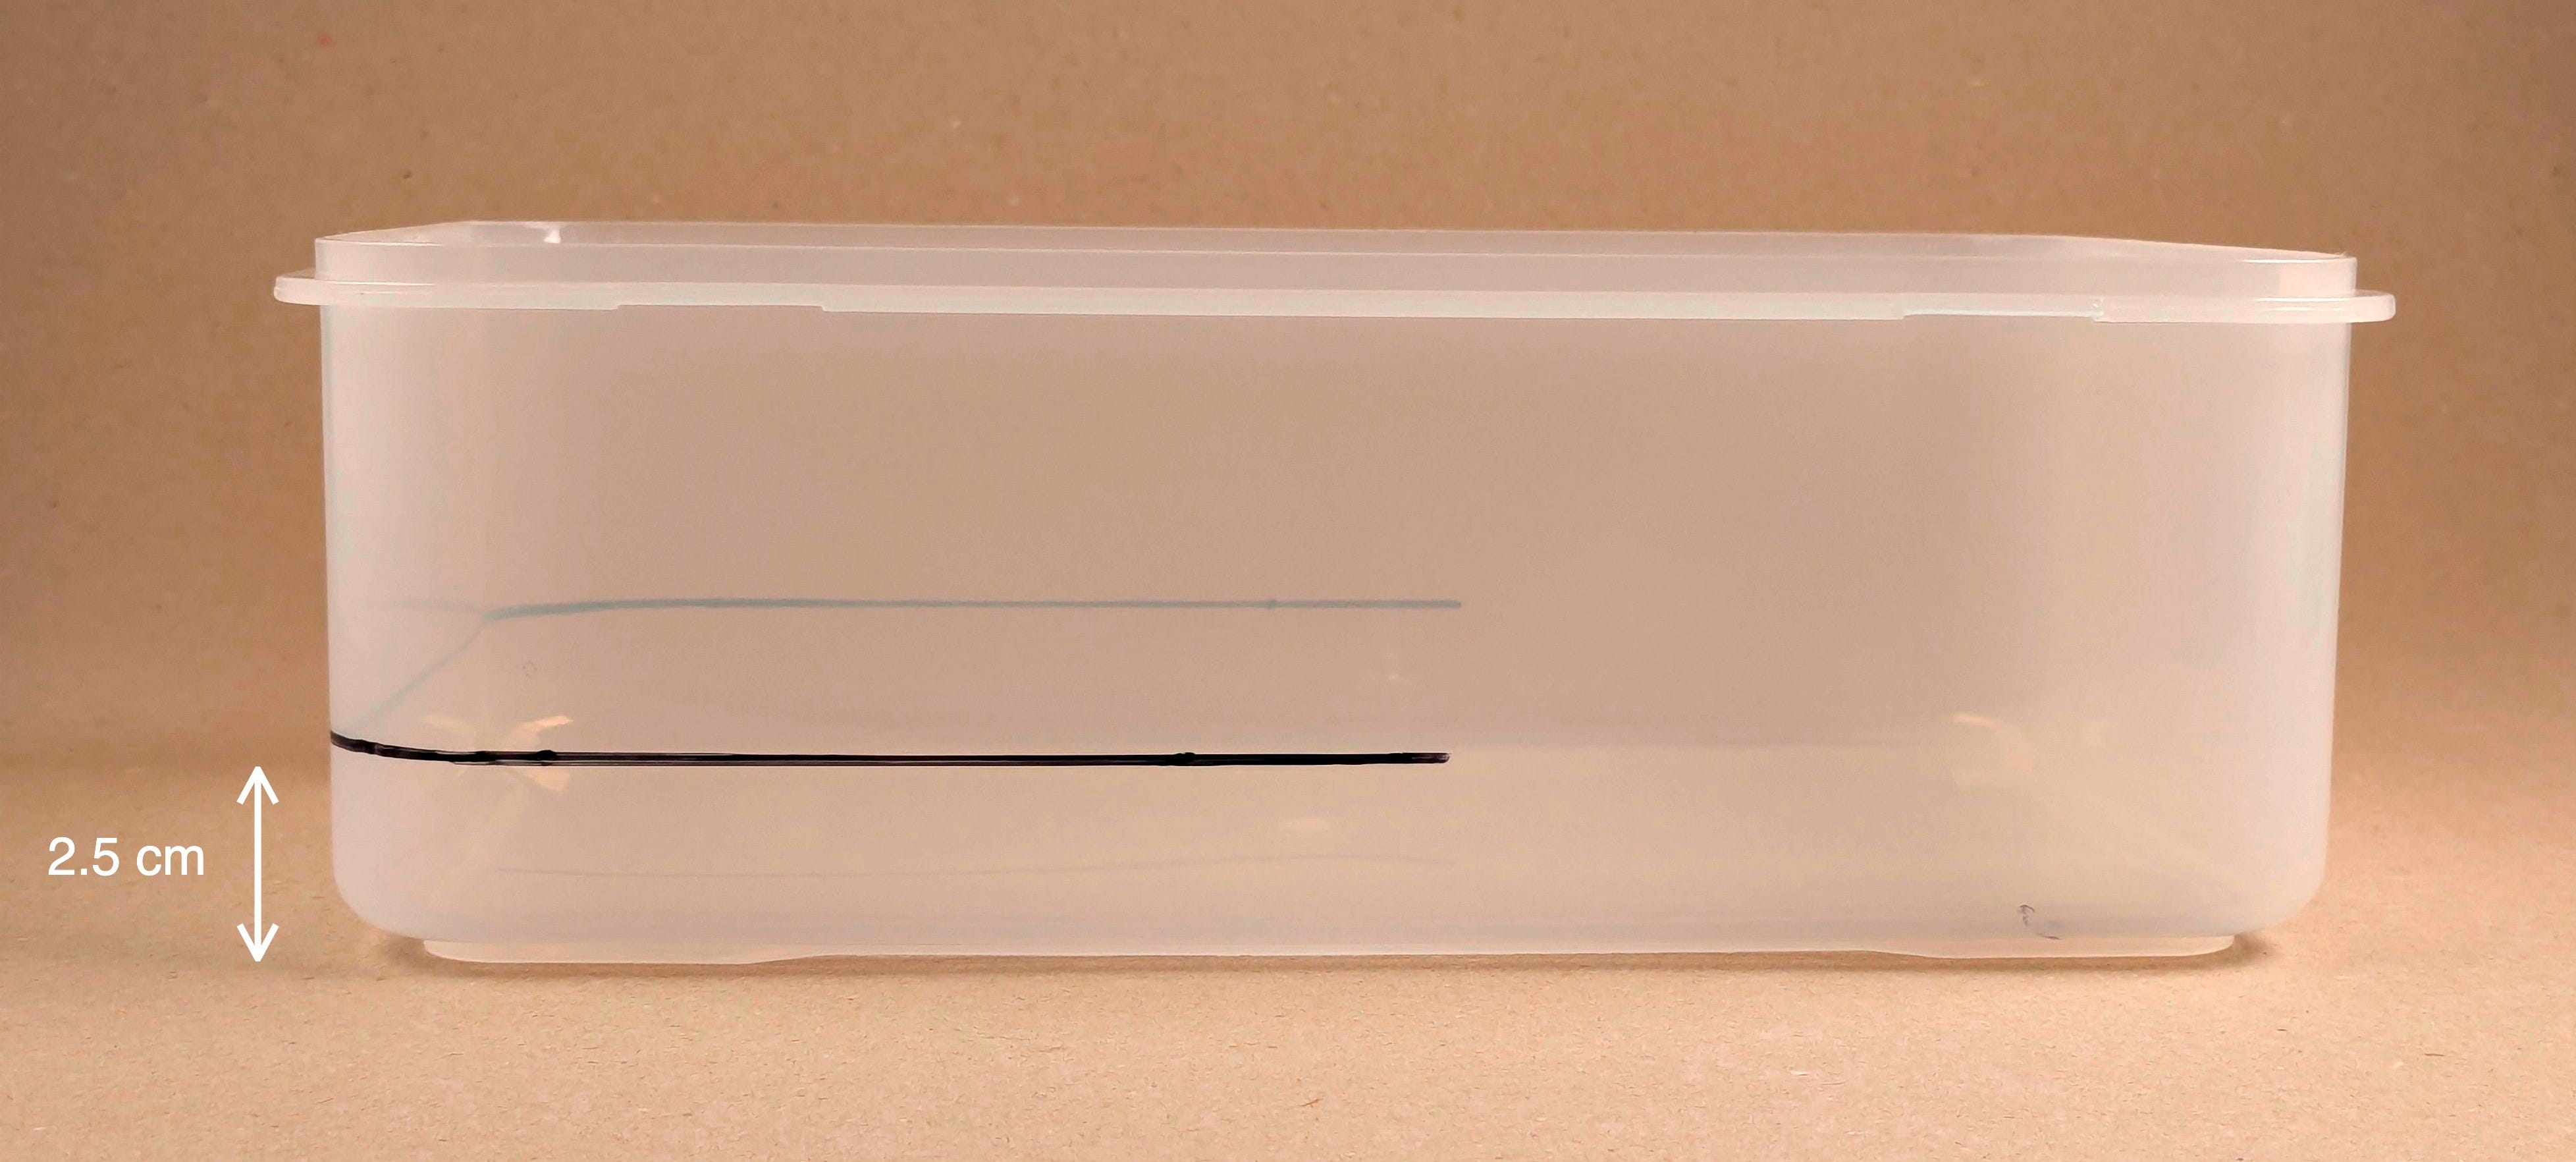
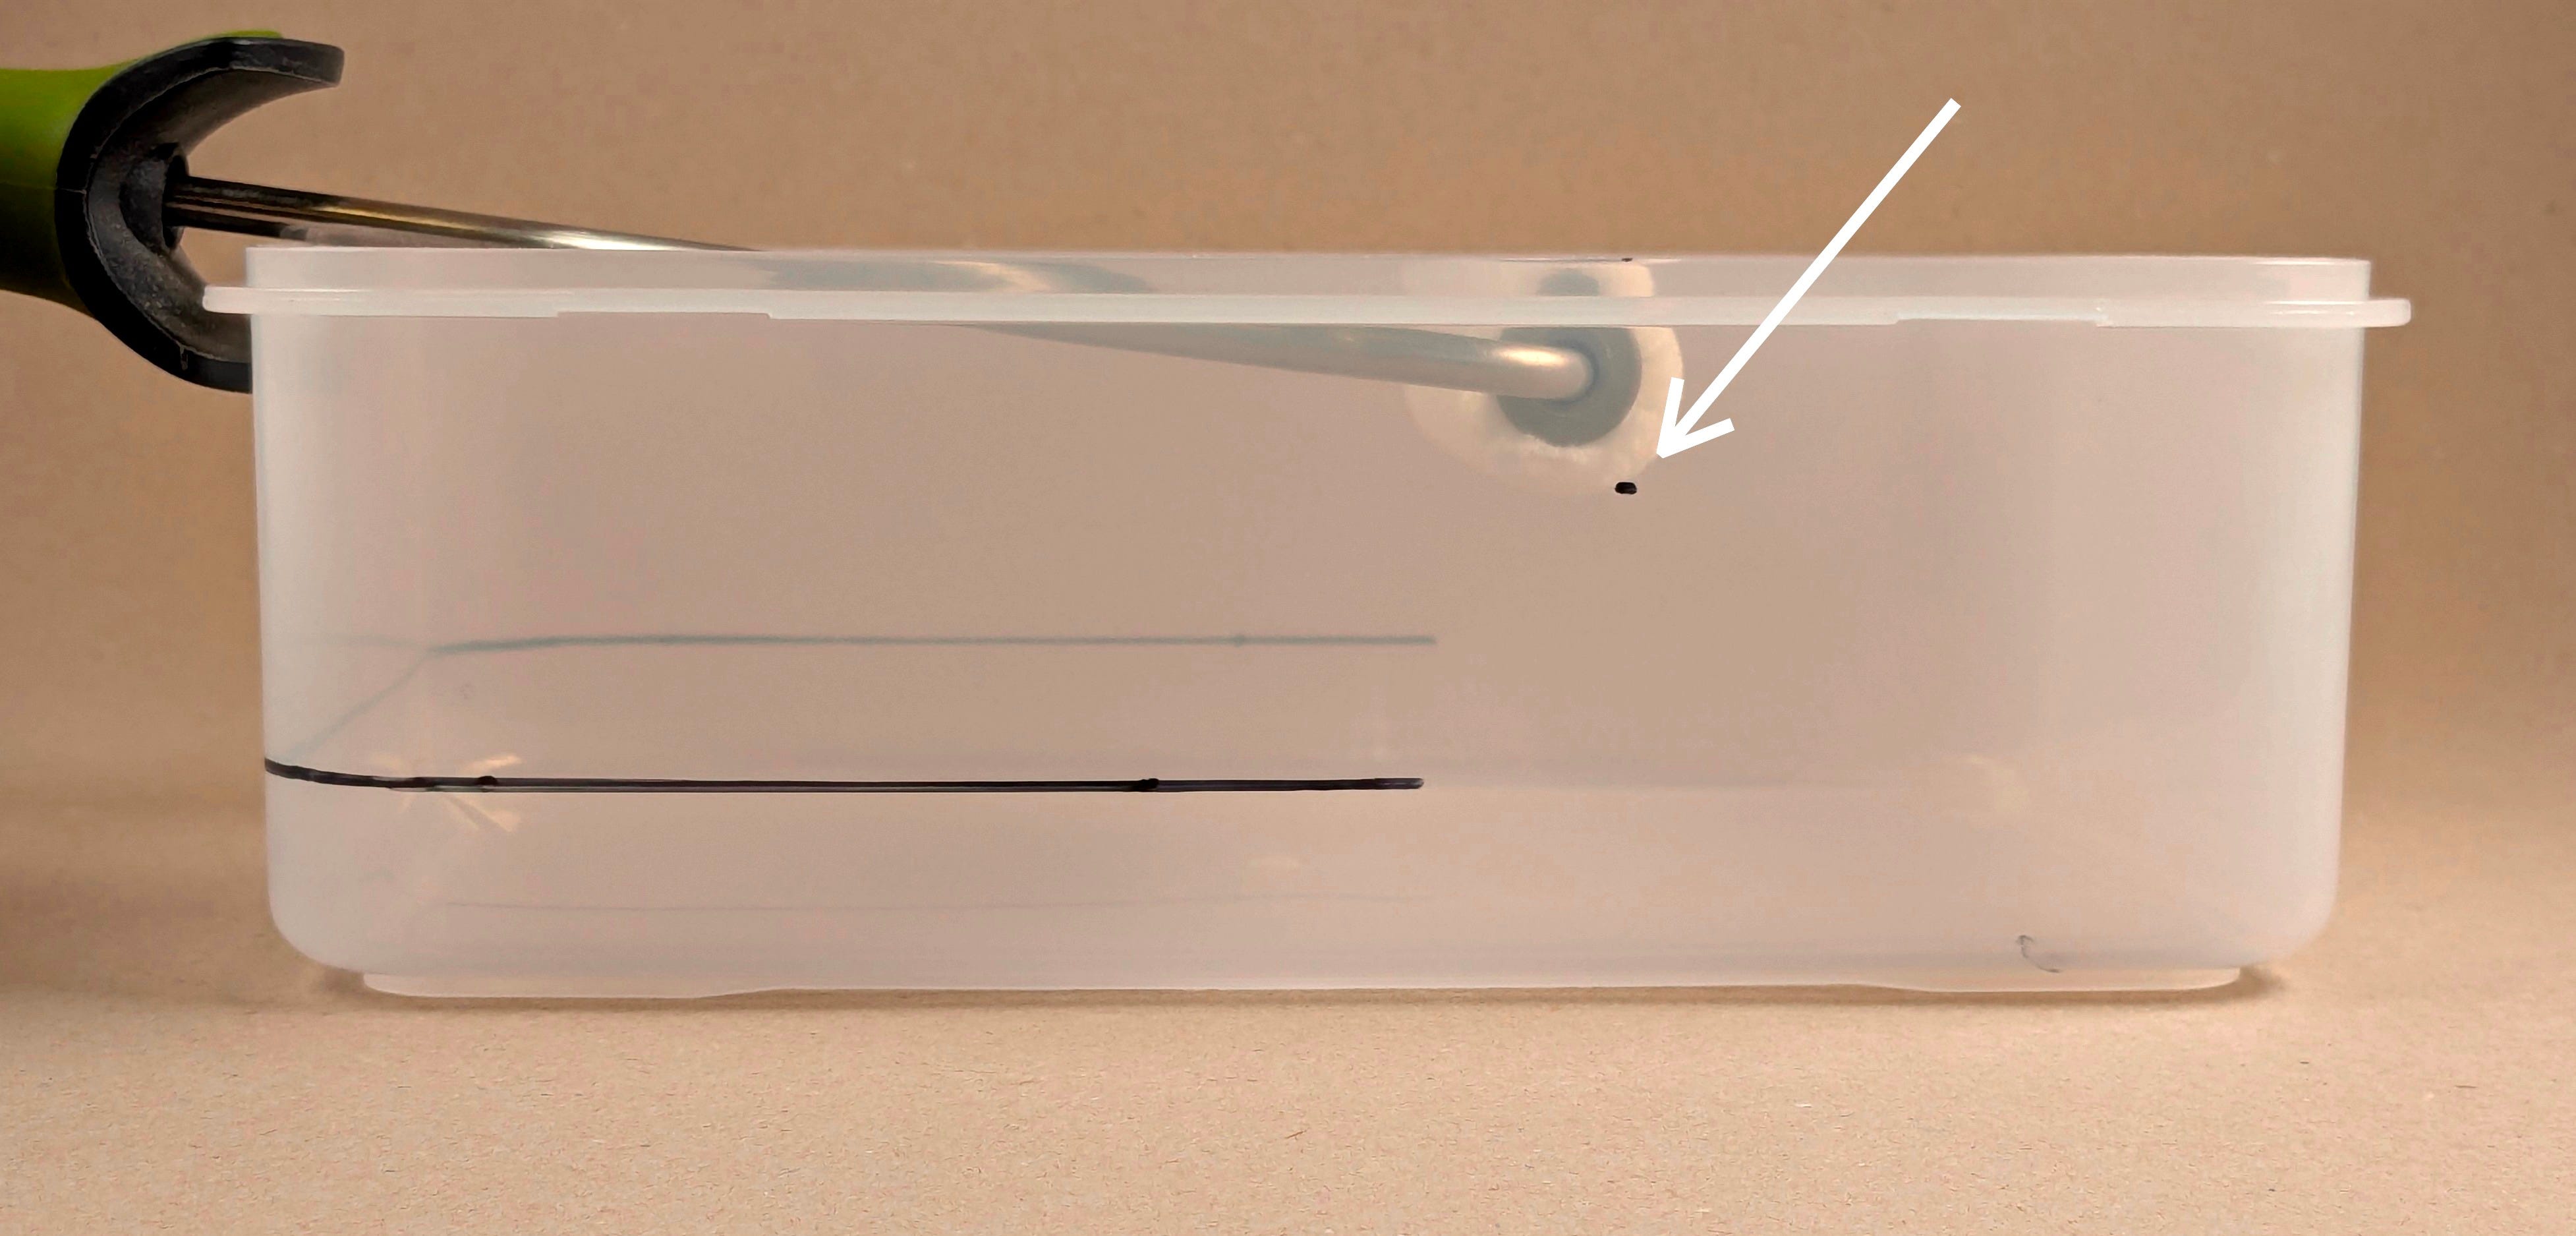
Next, insert the roller so it is flush with the top and mark its lower end position.
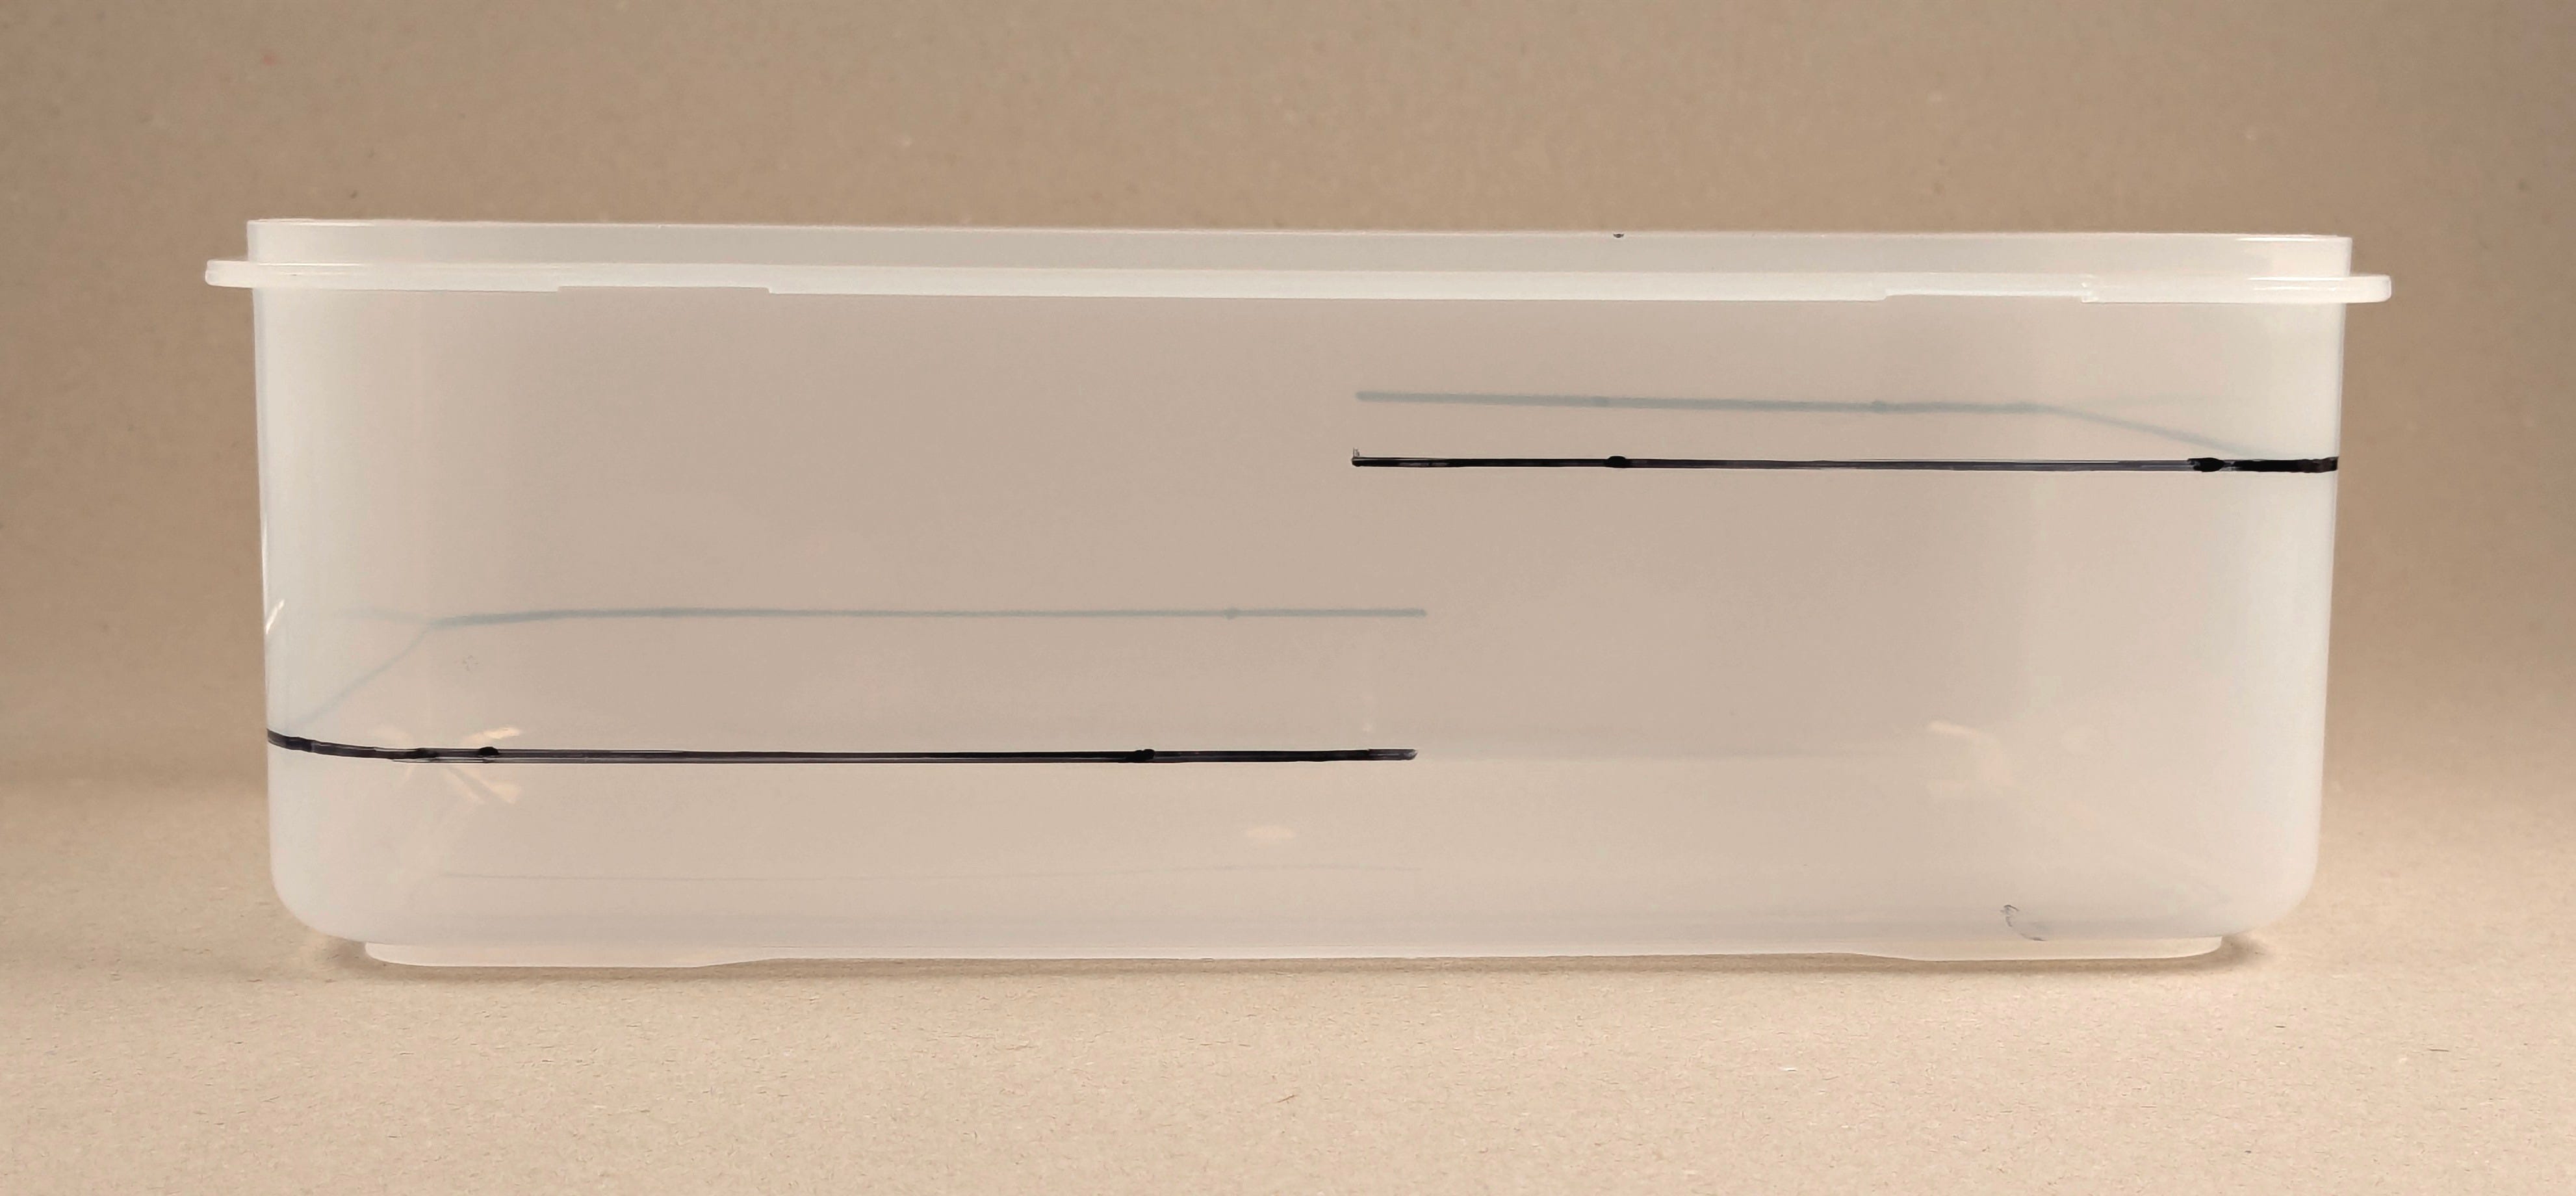
Draw a horizontal line around the other half of the box. This is your upper level, where the roller will rest.
Now, insert the roller again so the handle hits the edge of the tray, and locate the position of roller on the upper level line a few mm before it begins
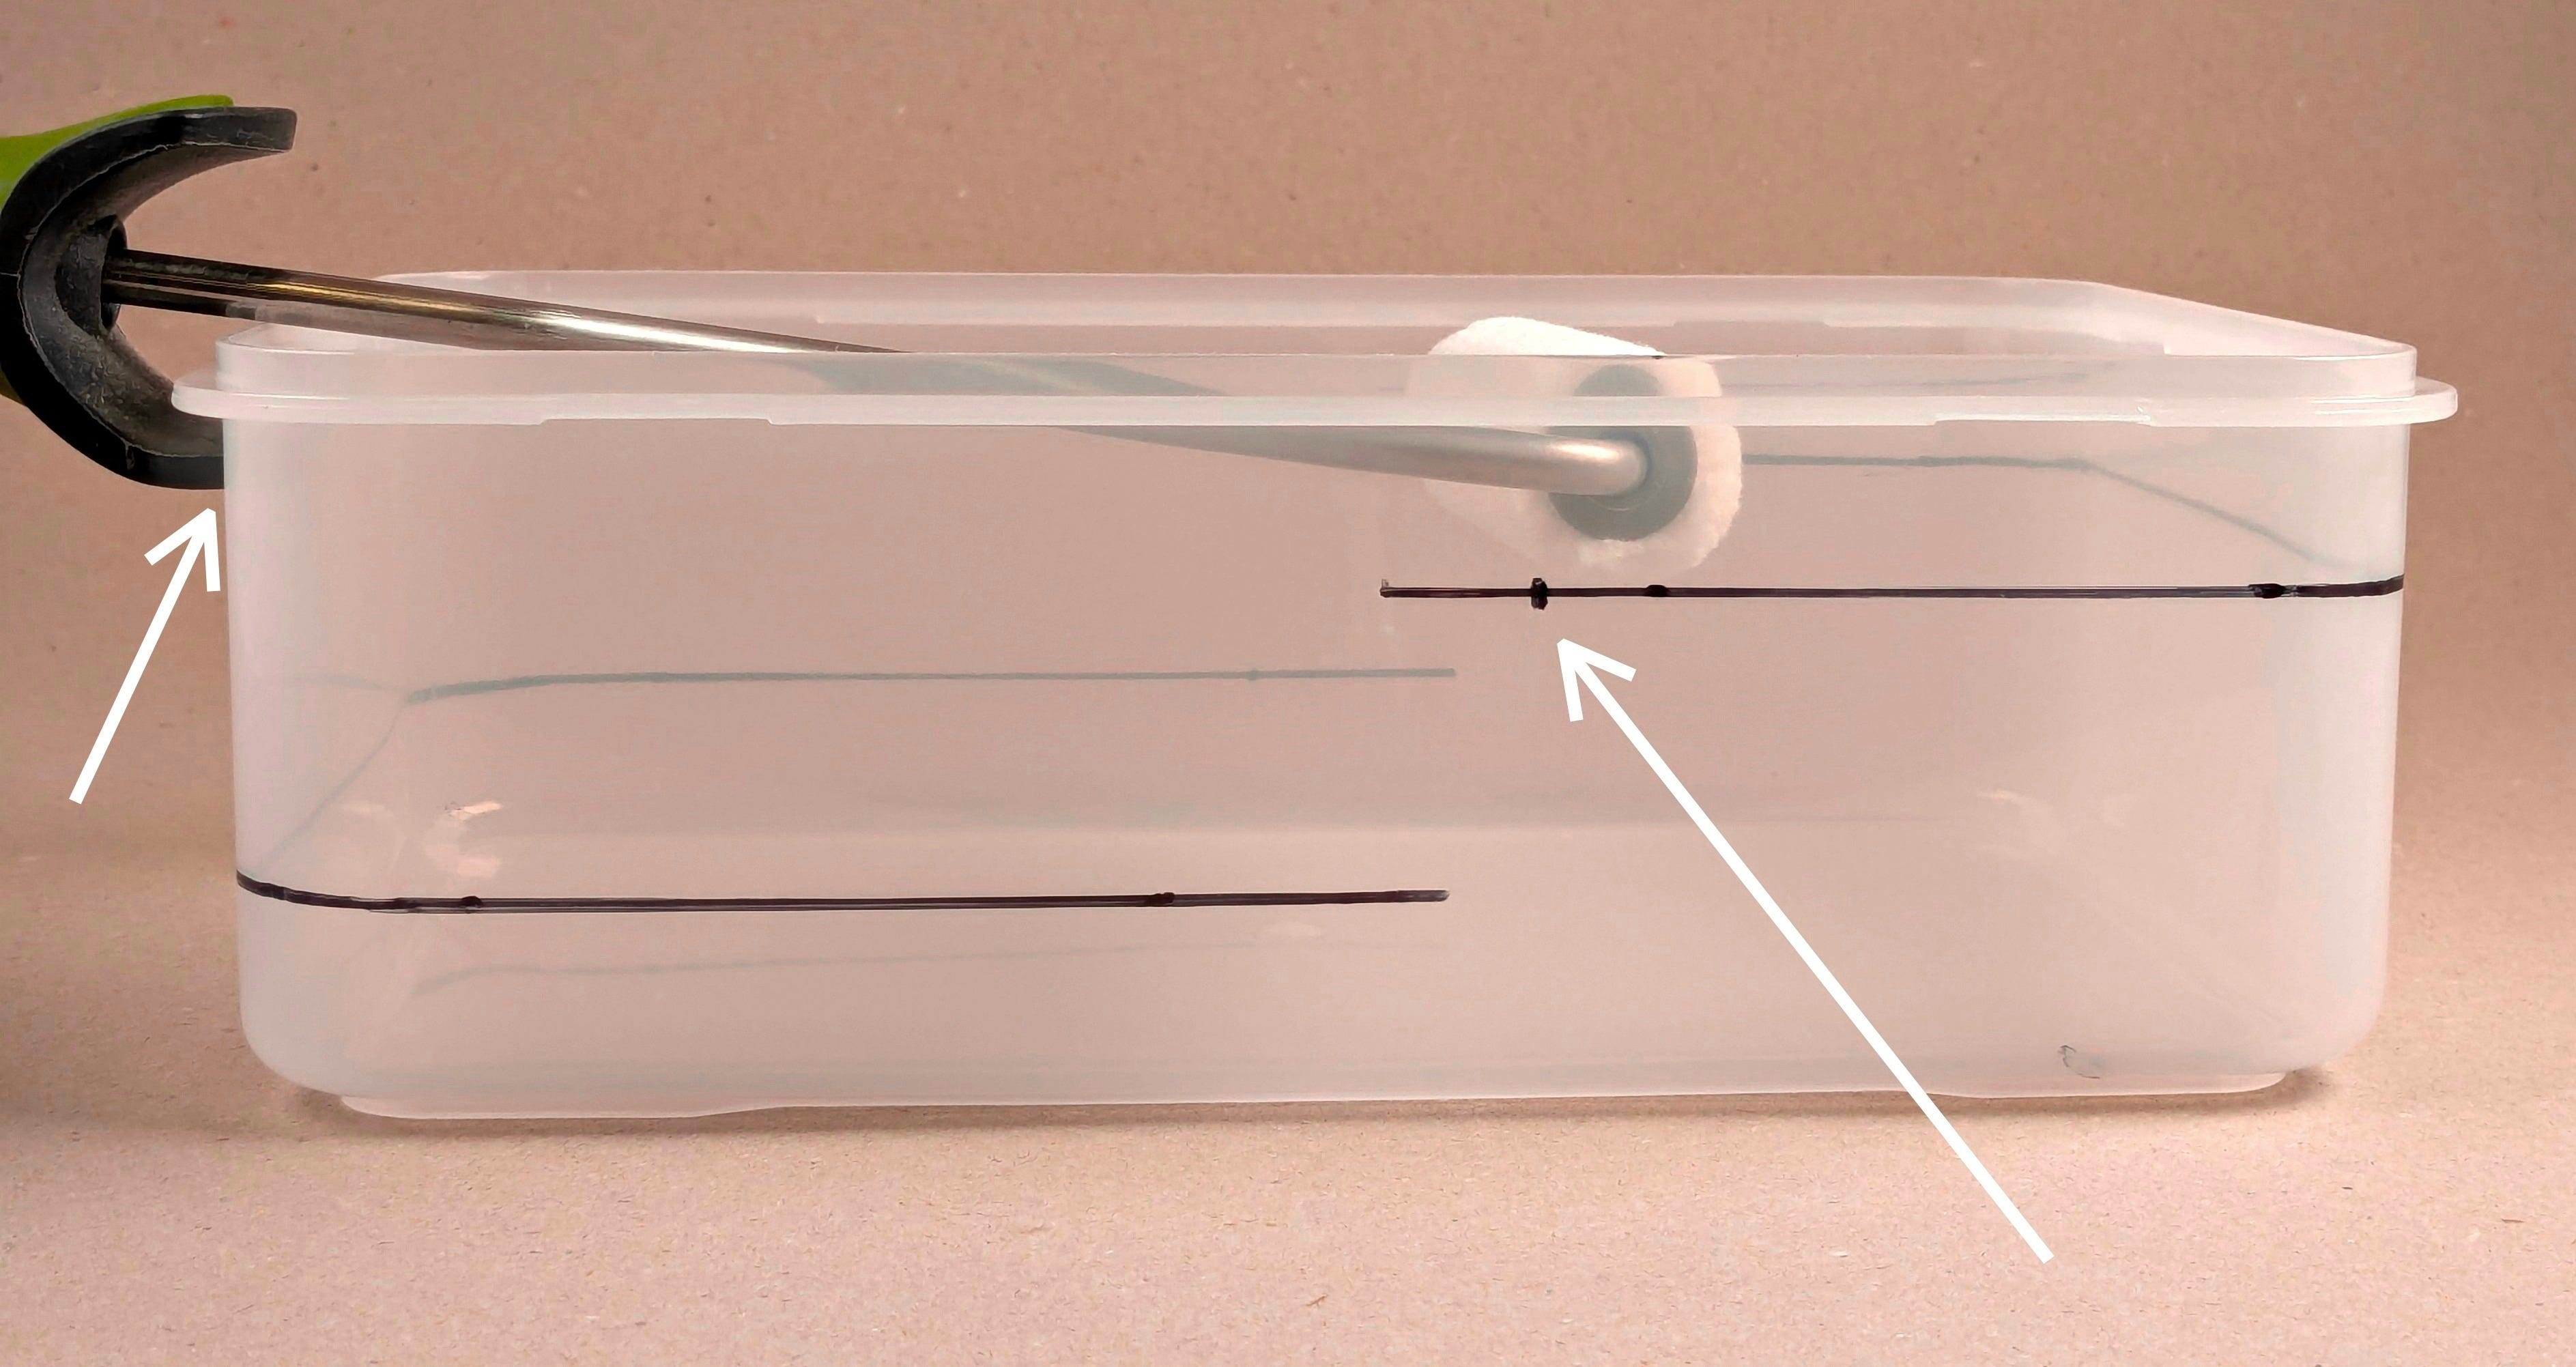
Transfer this point to the other side, and from those points, draw slanted lines to connect the upper and lower levels.
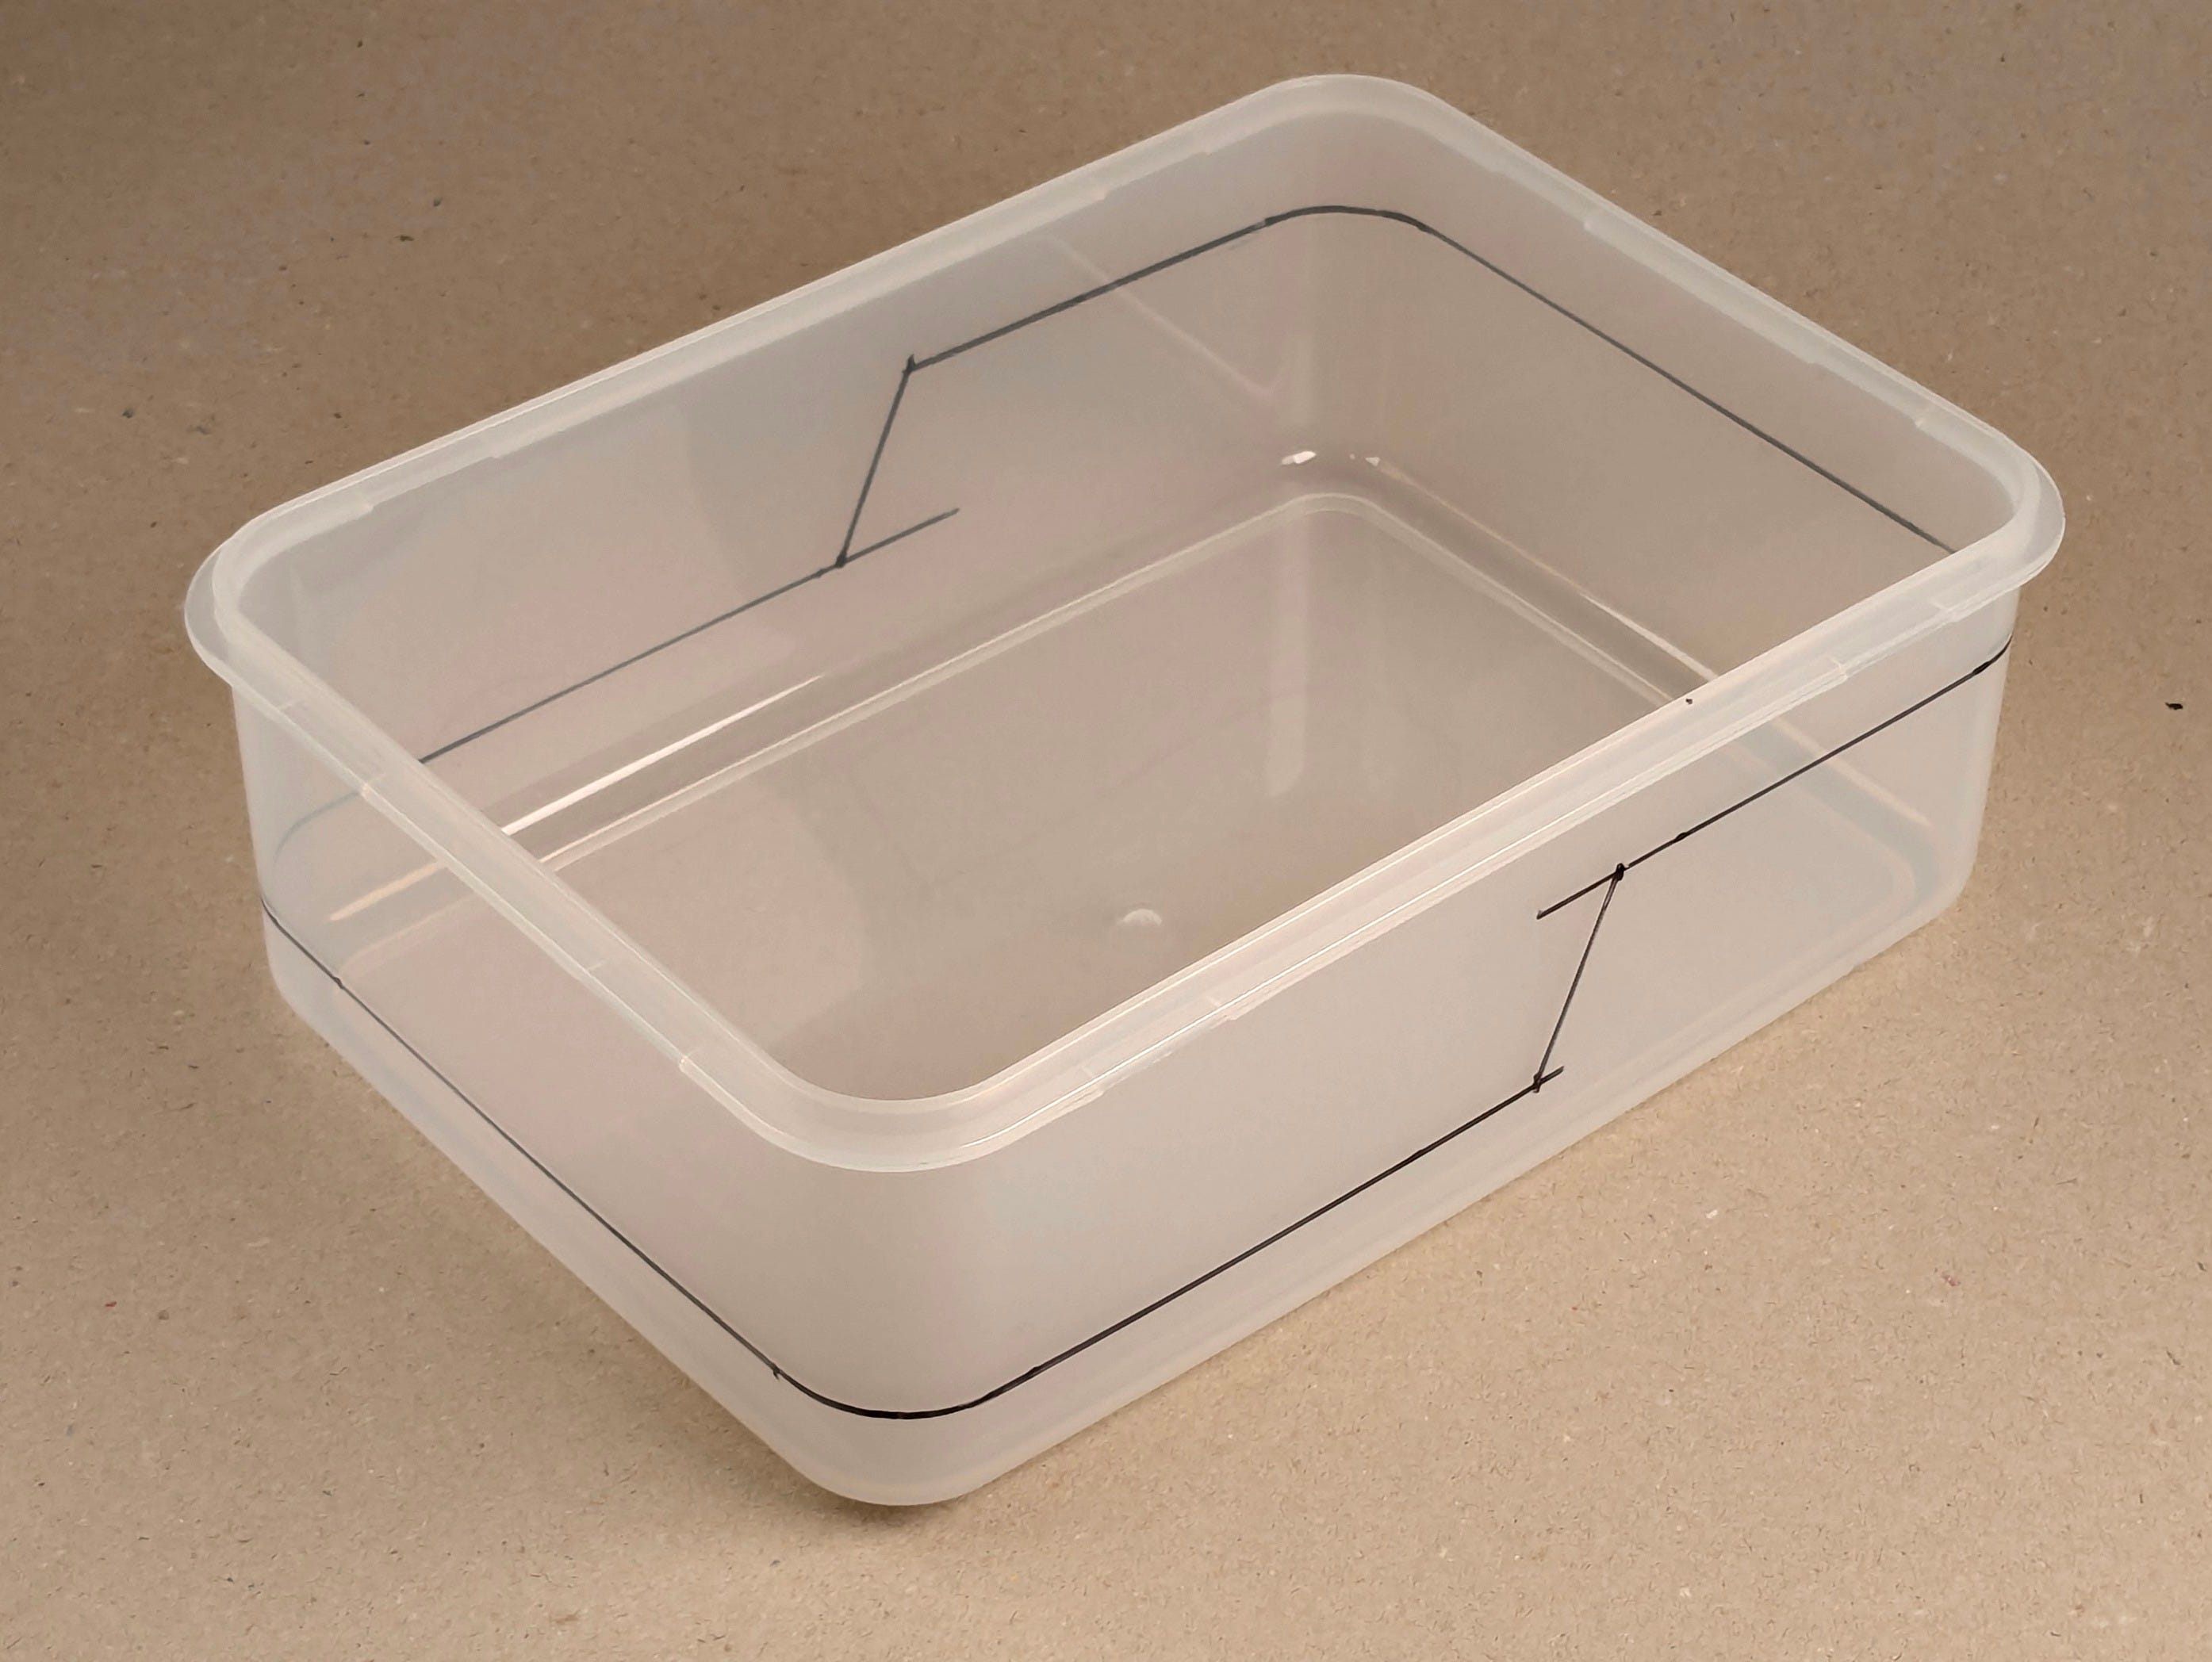
Now we need to fit in a stop to keep the concrete at low position in the lower level area when casting:
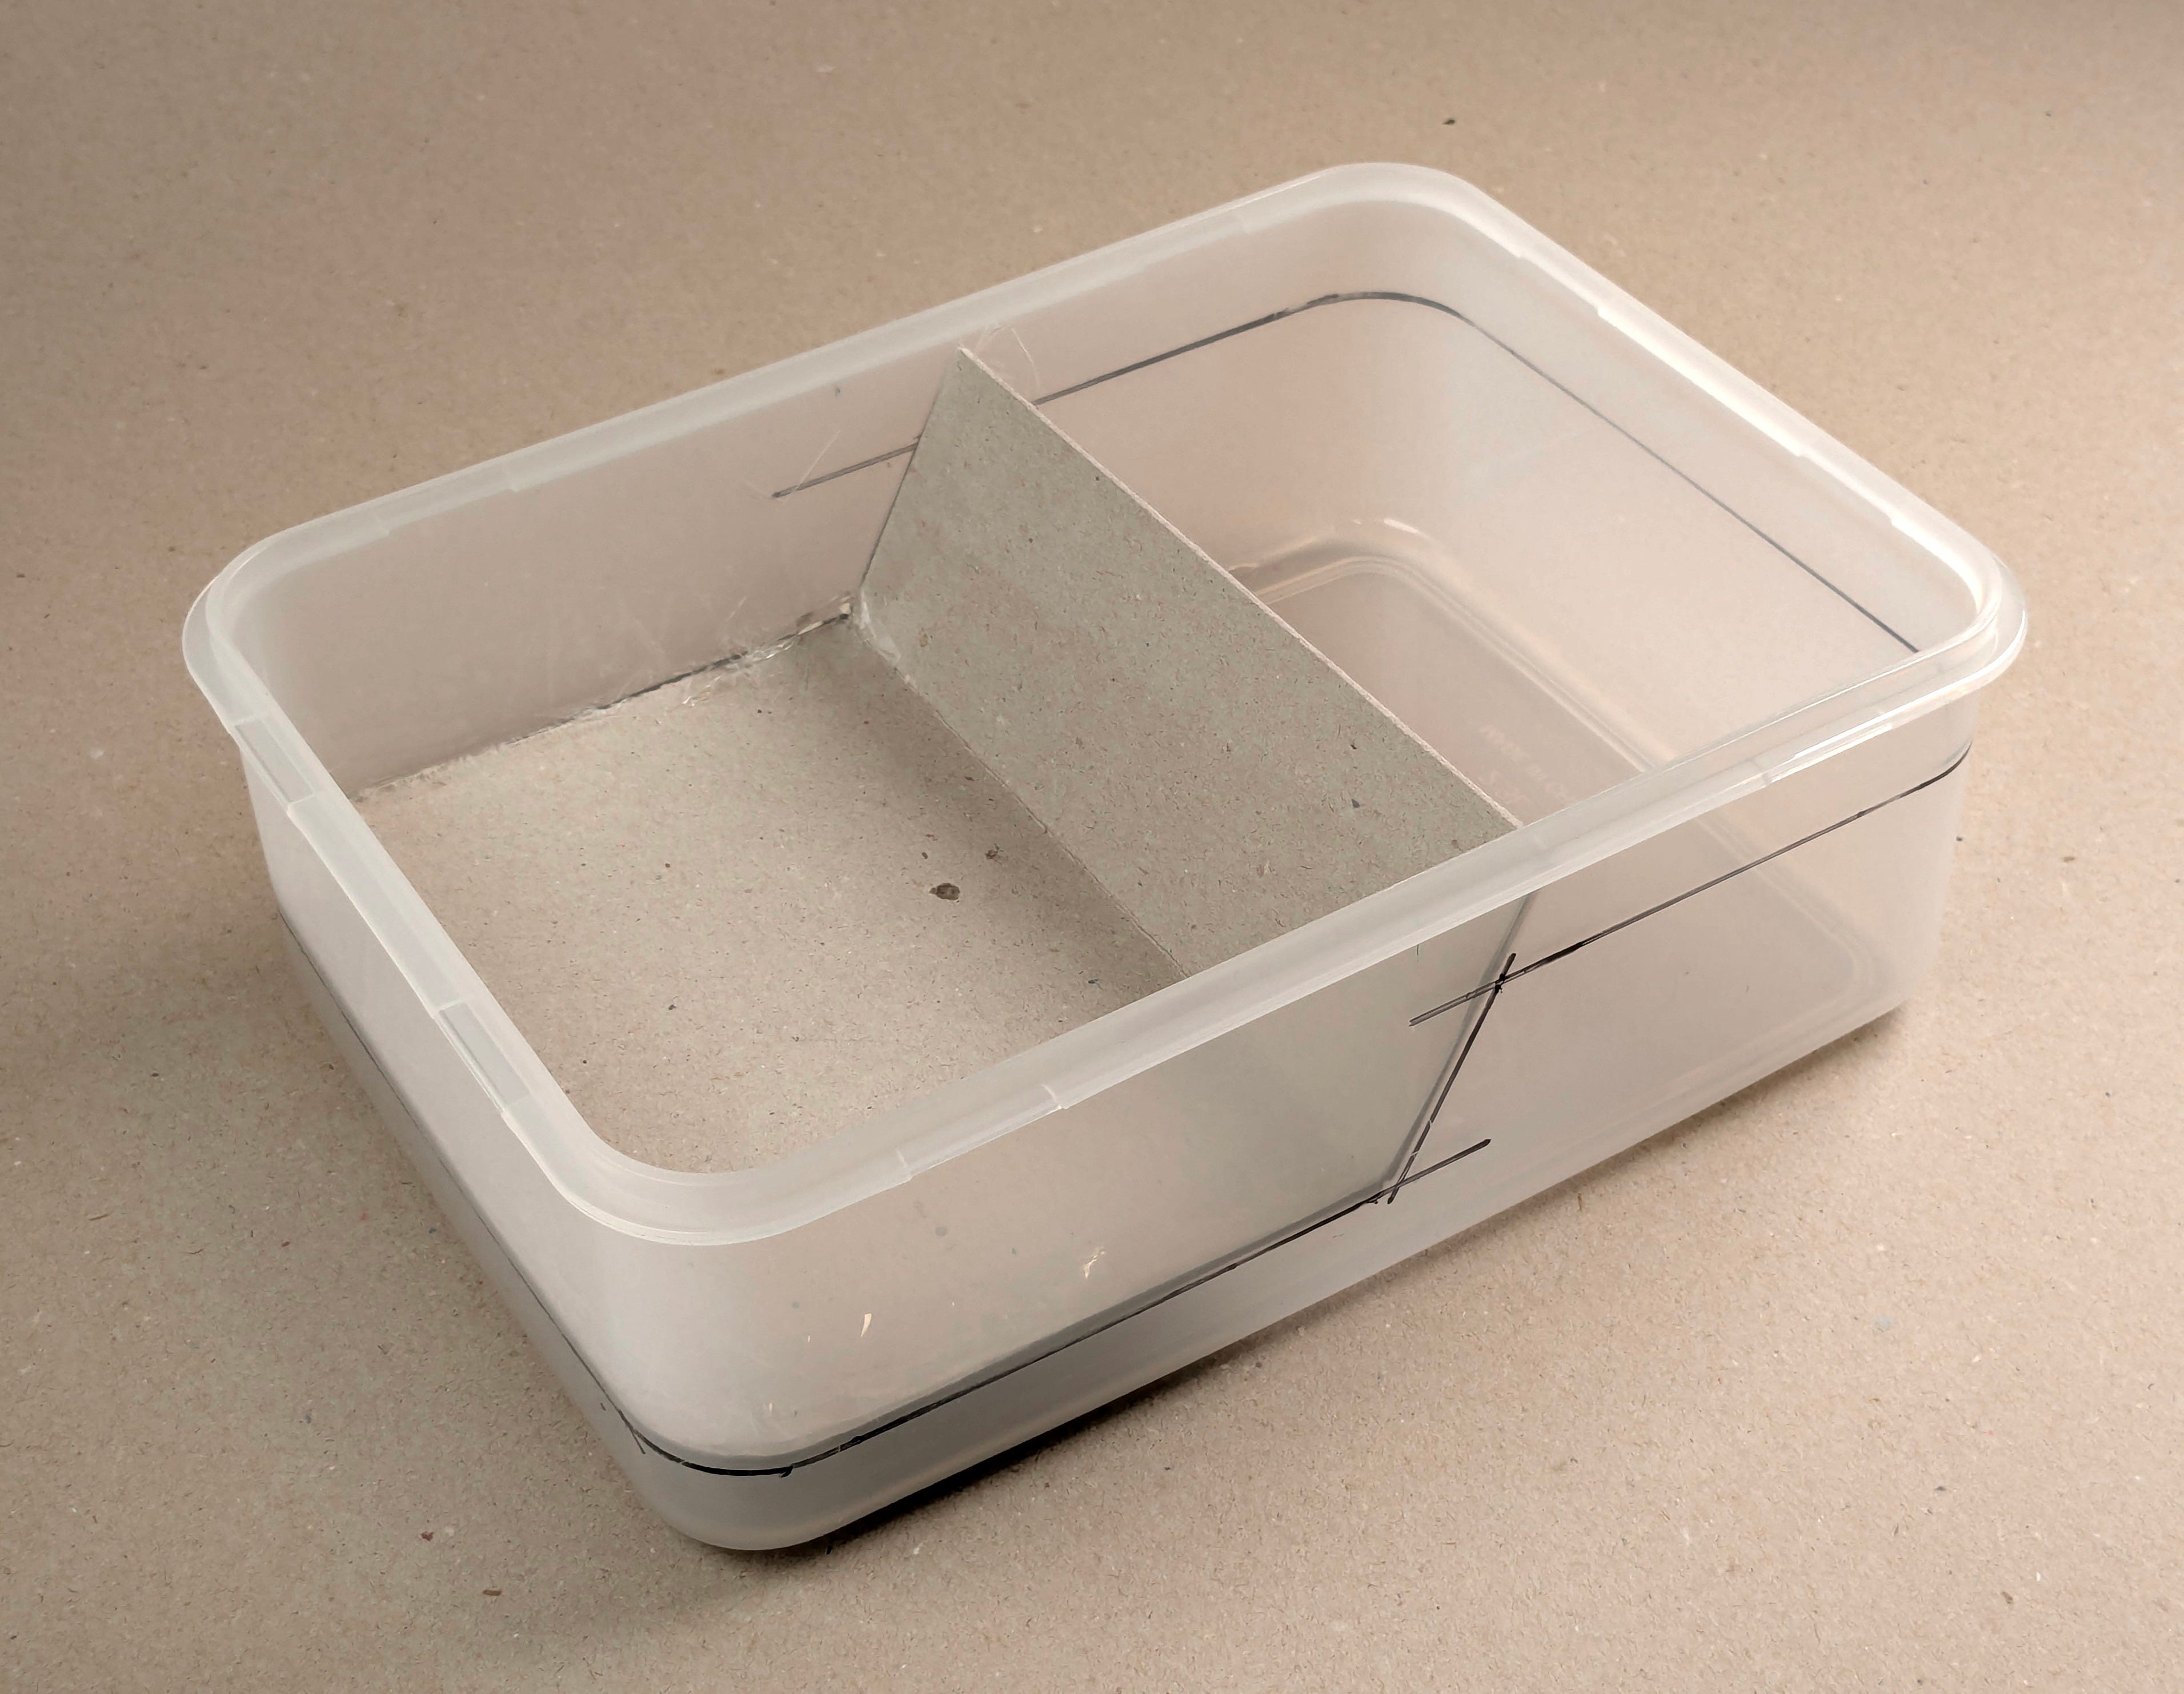
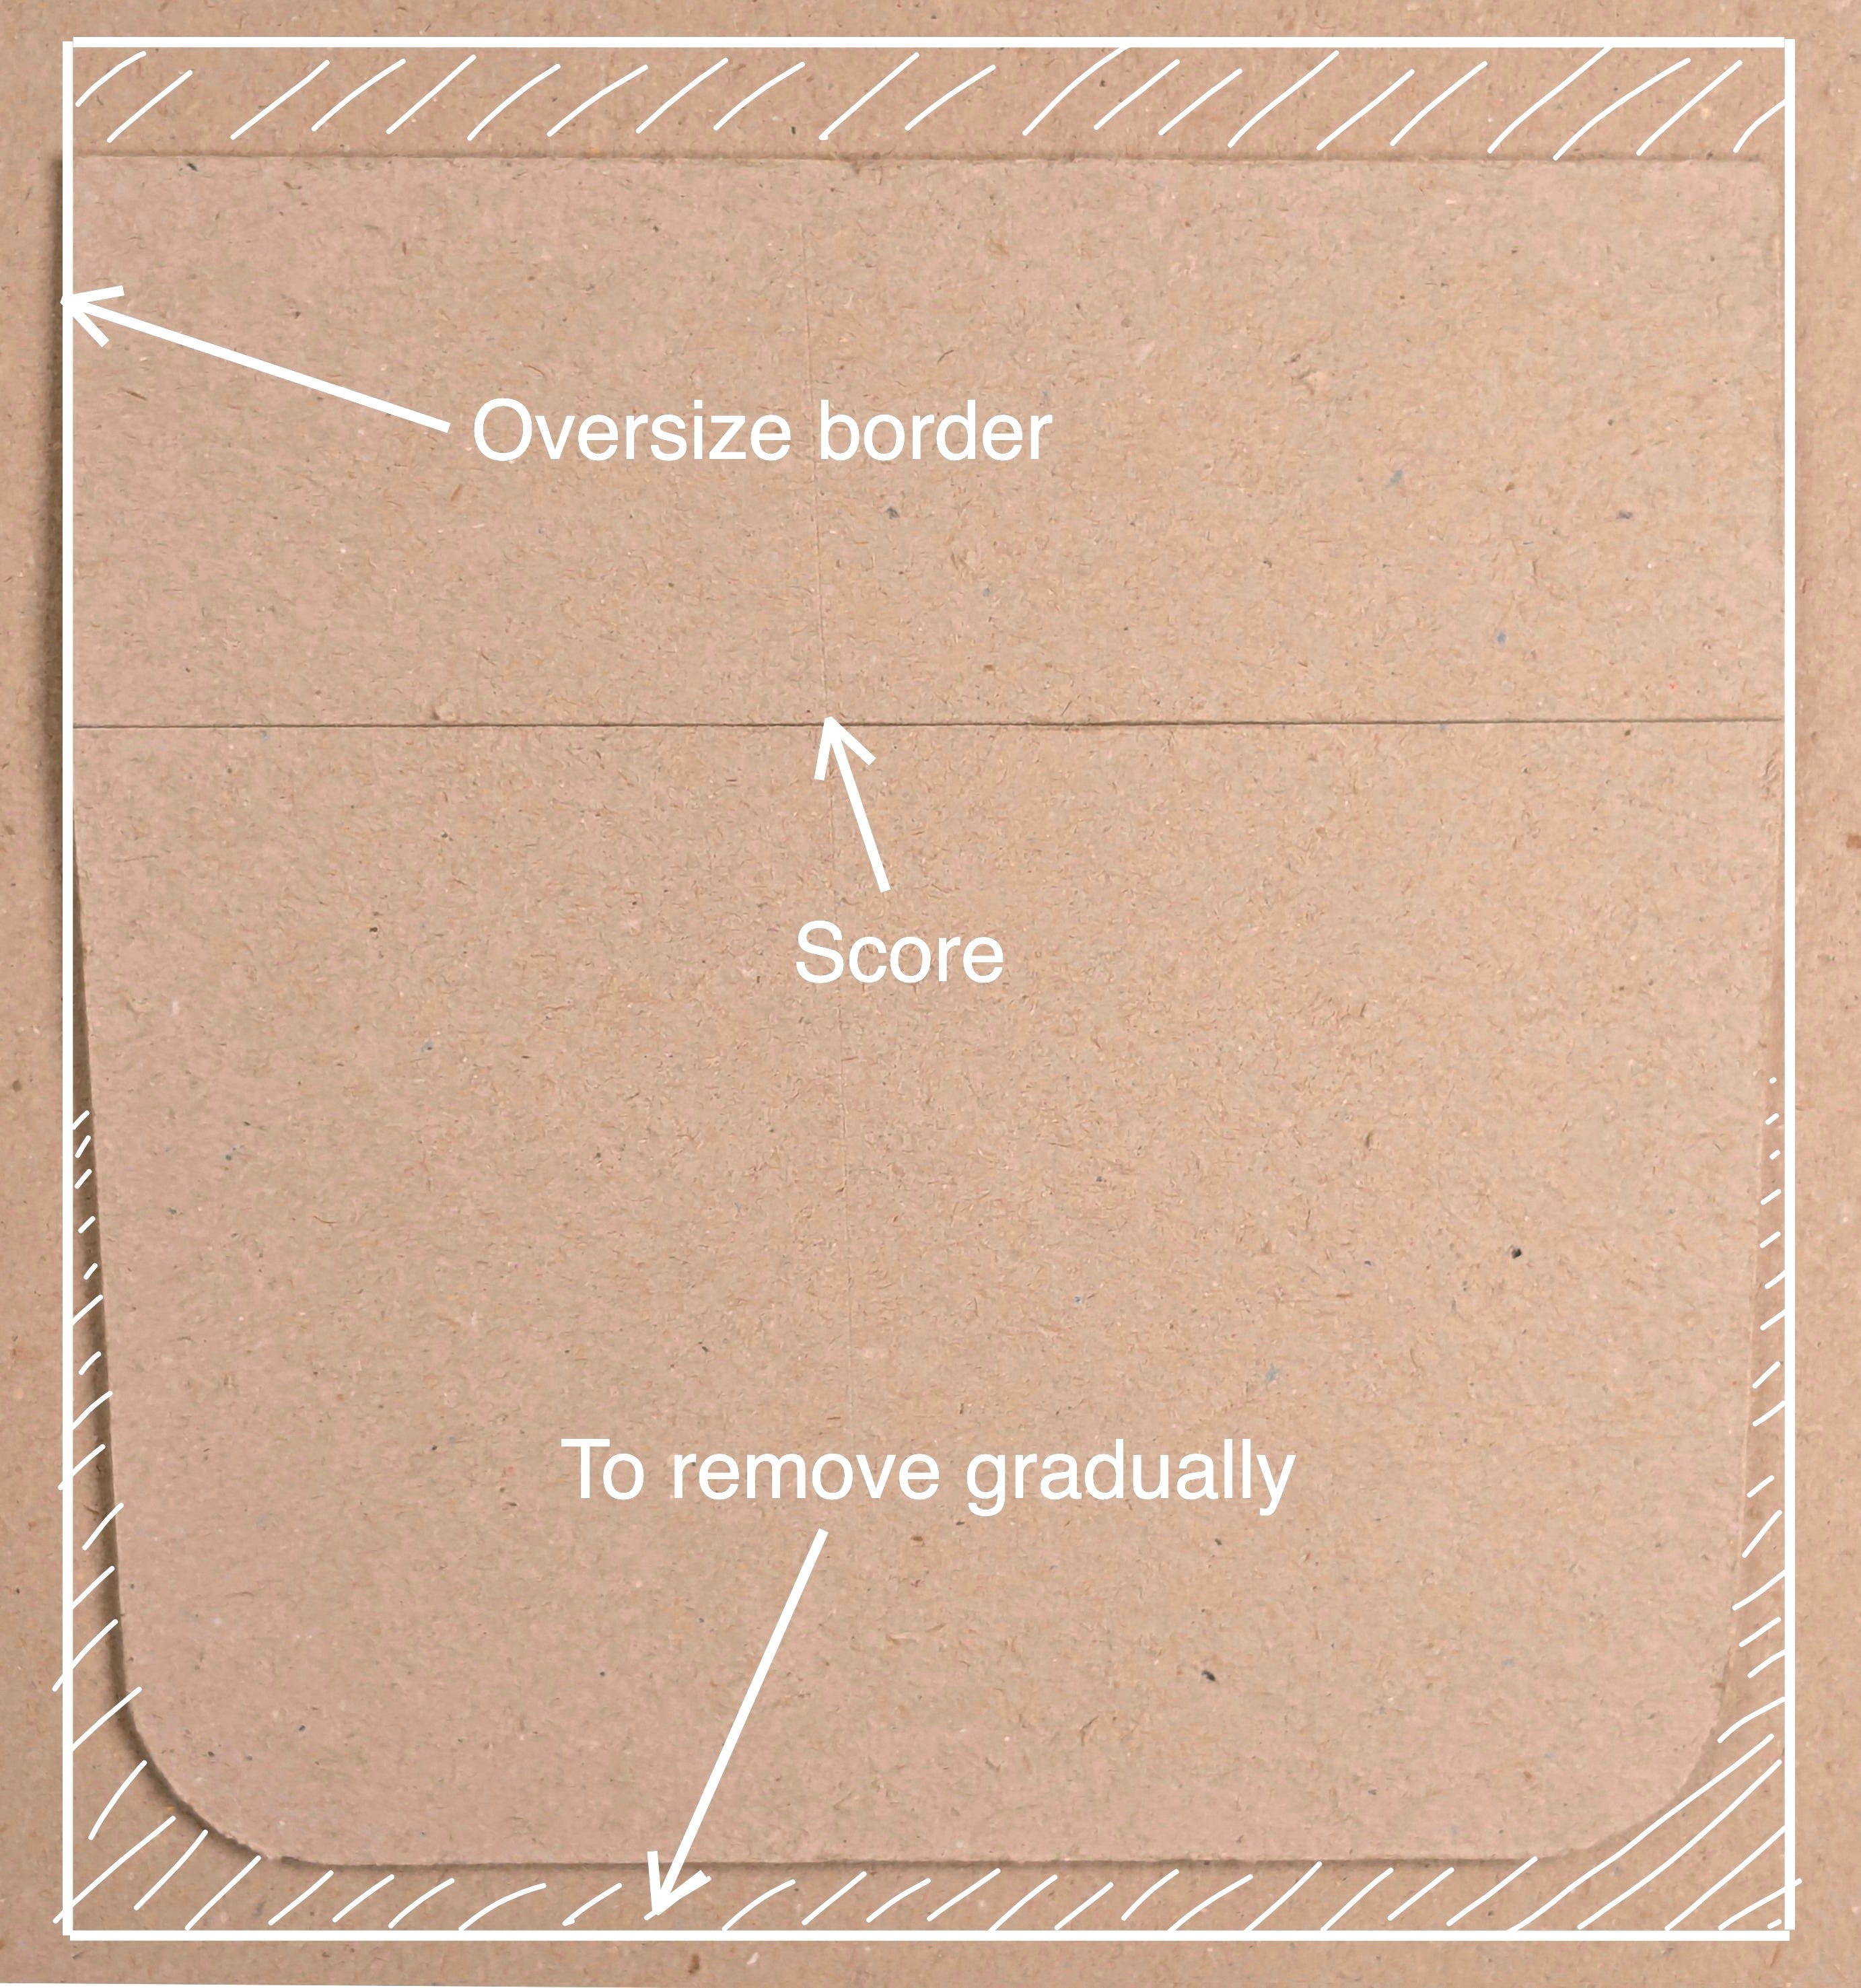
We can create this relatively easily with a piece of scrap board. Start with an oversize piece, score it (cut it halfway through to enable folding), and gradually shape it until it fits in the lower level, with the edges matching the lines drawn on the box.
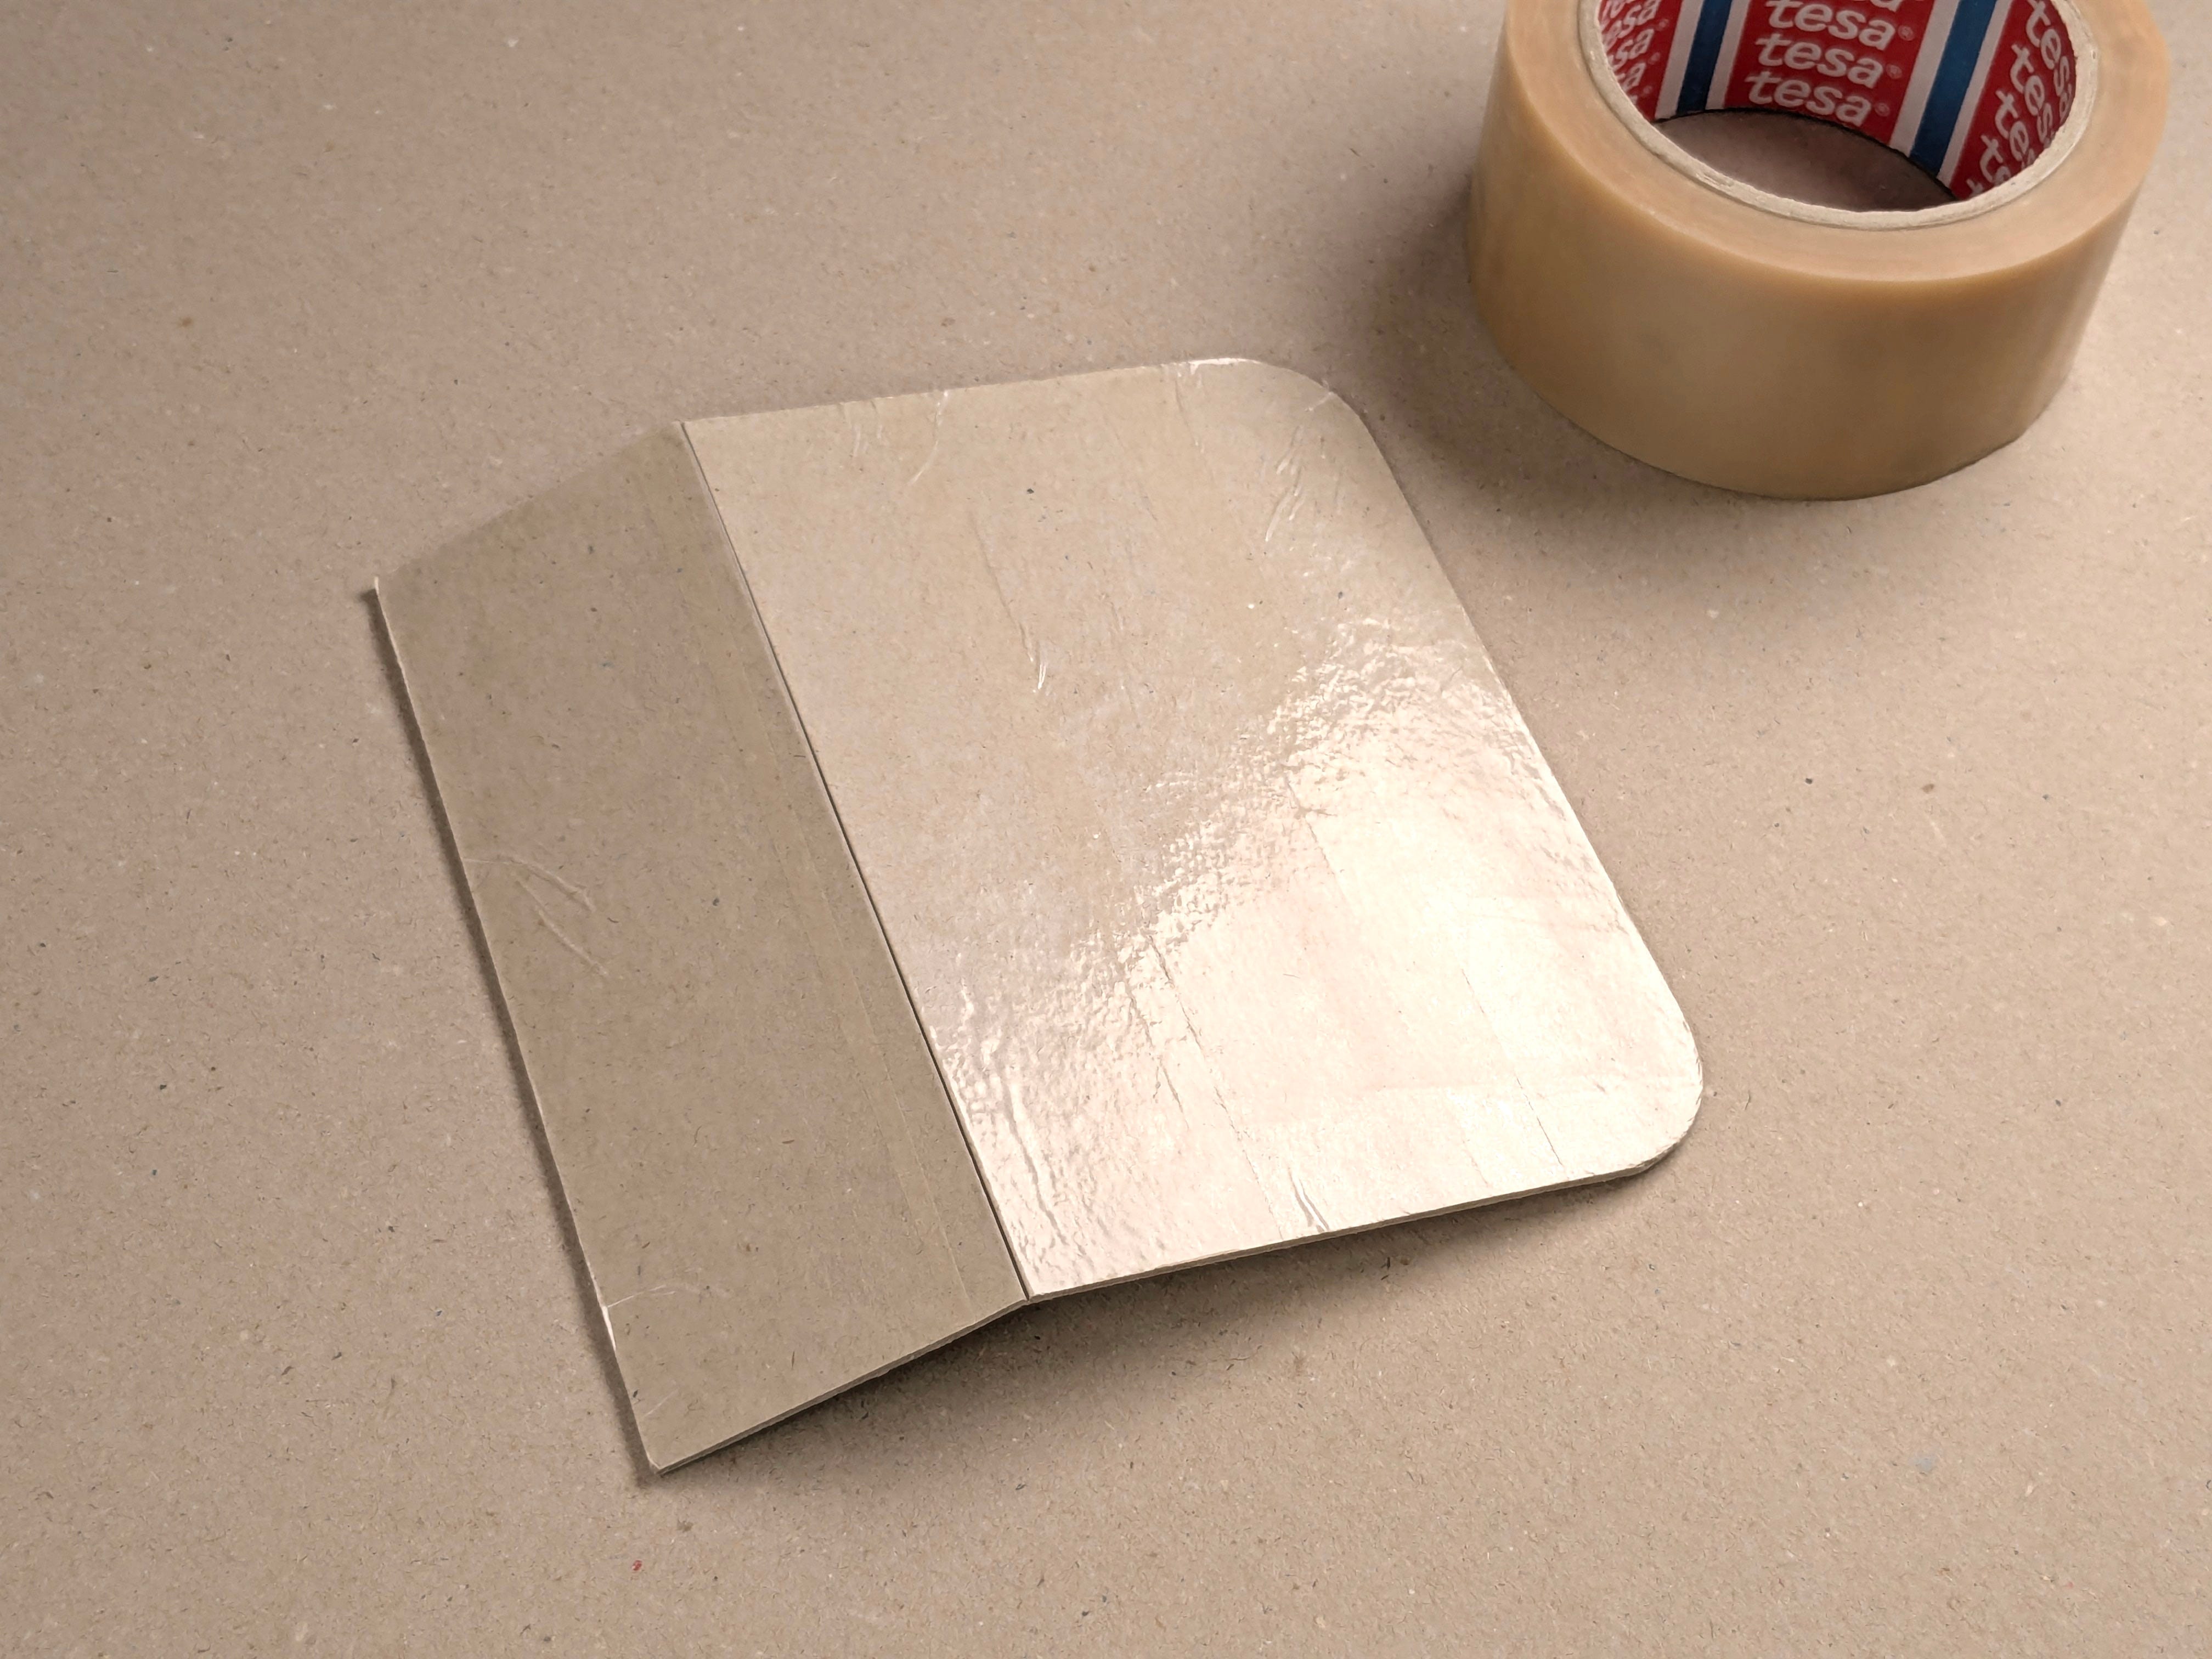
Before placing it inside the tray, line the lower face (which will be in contact with the concrete) with tape.
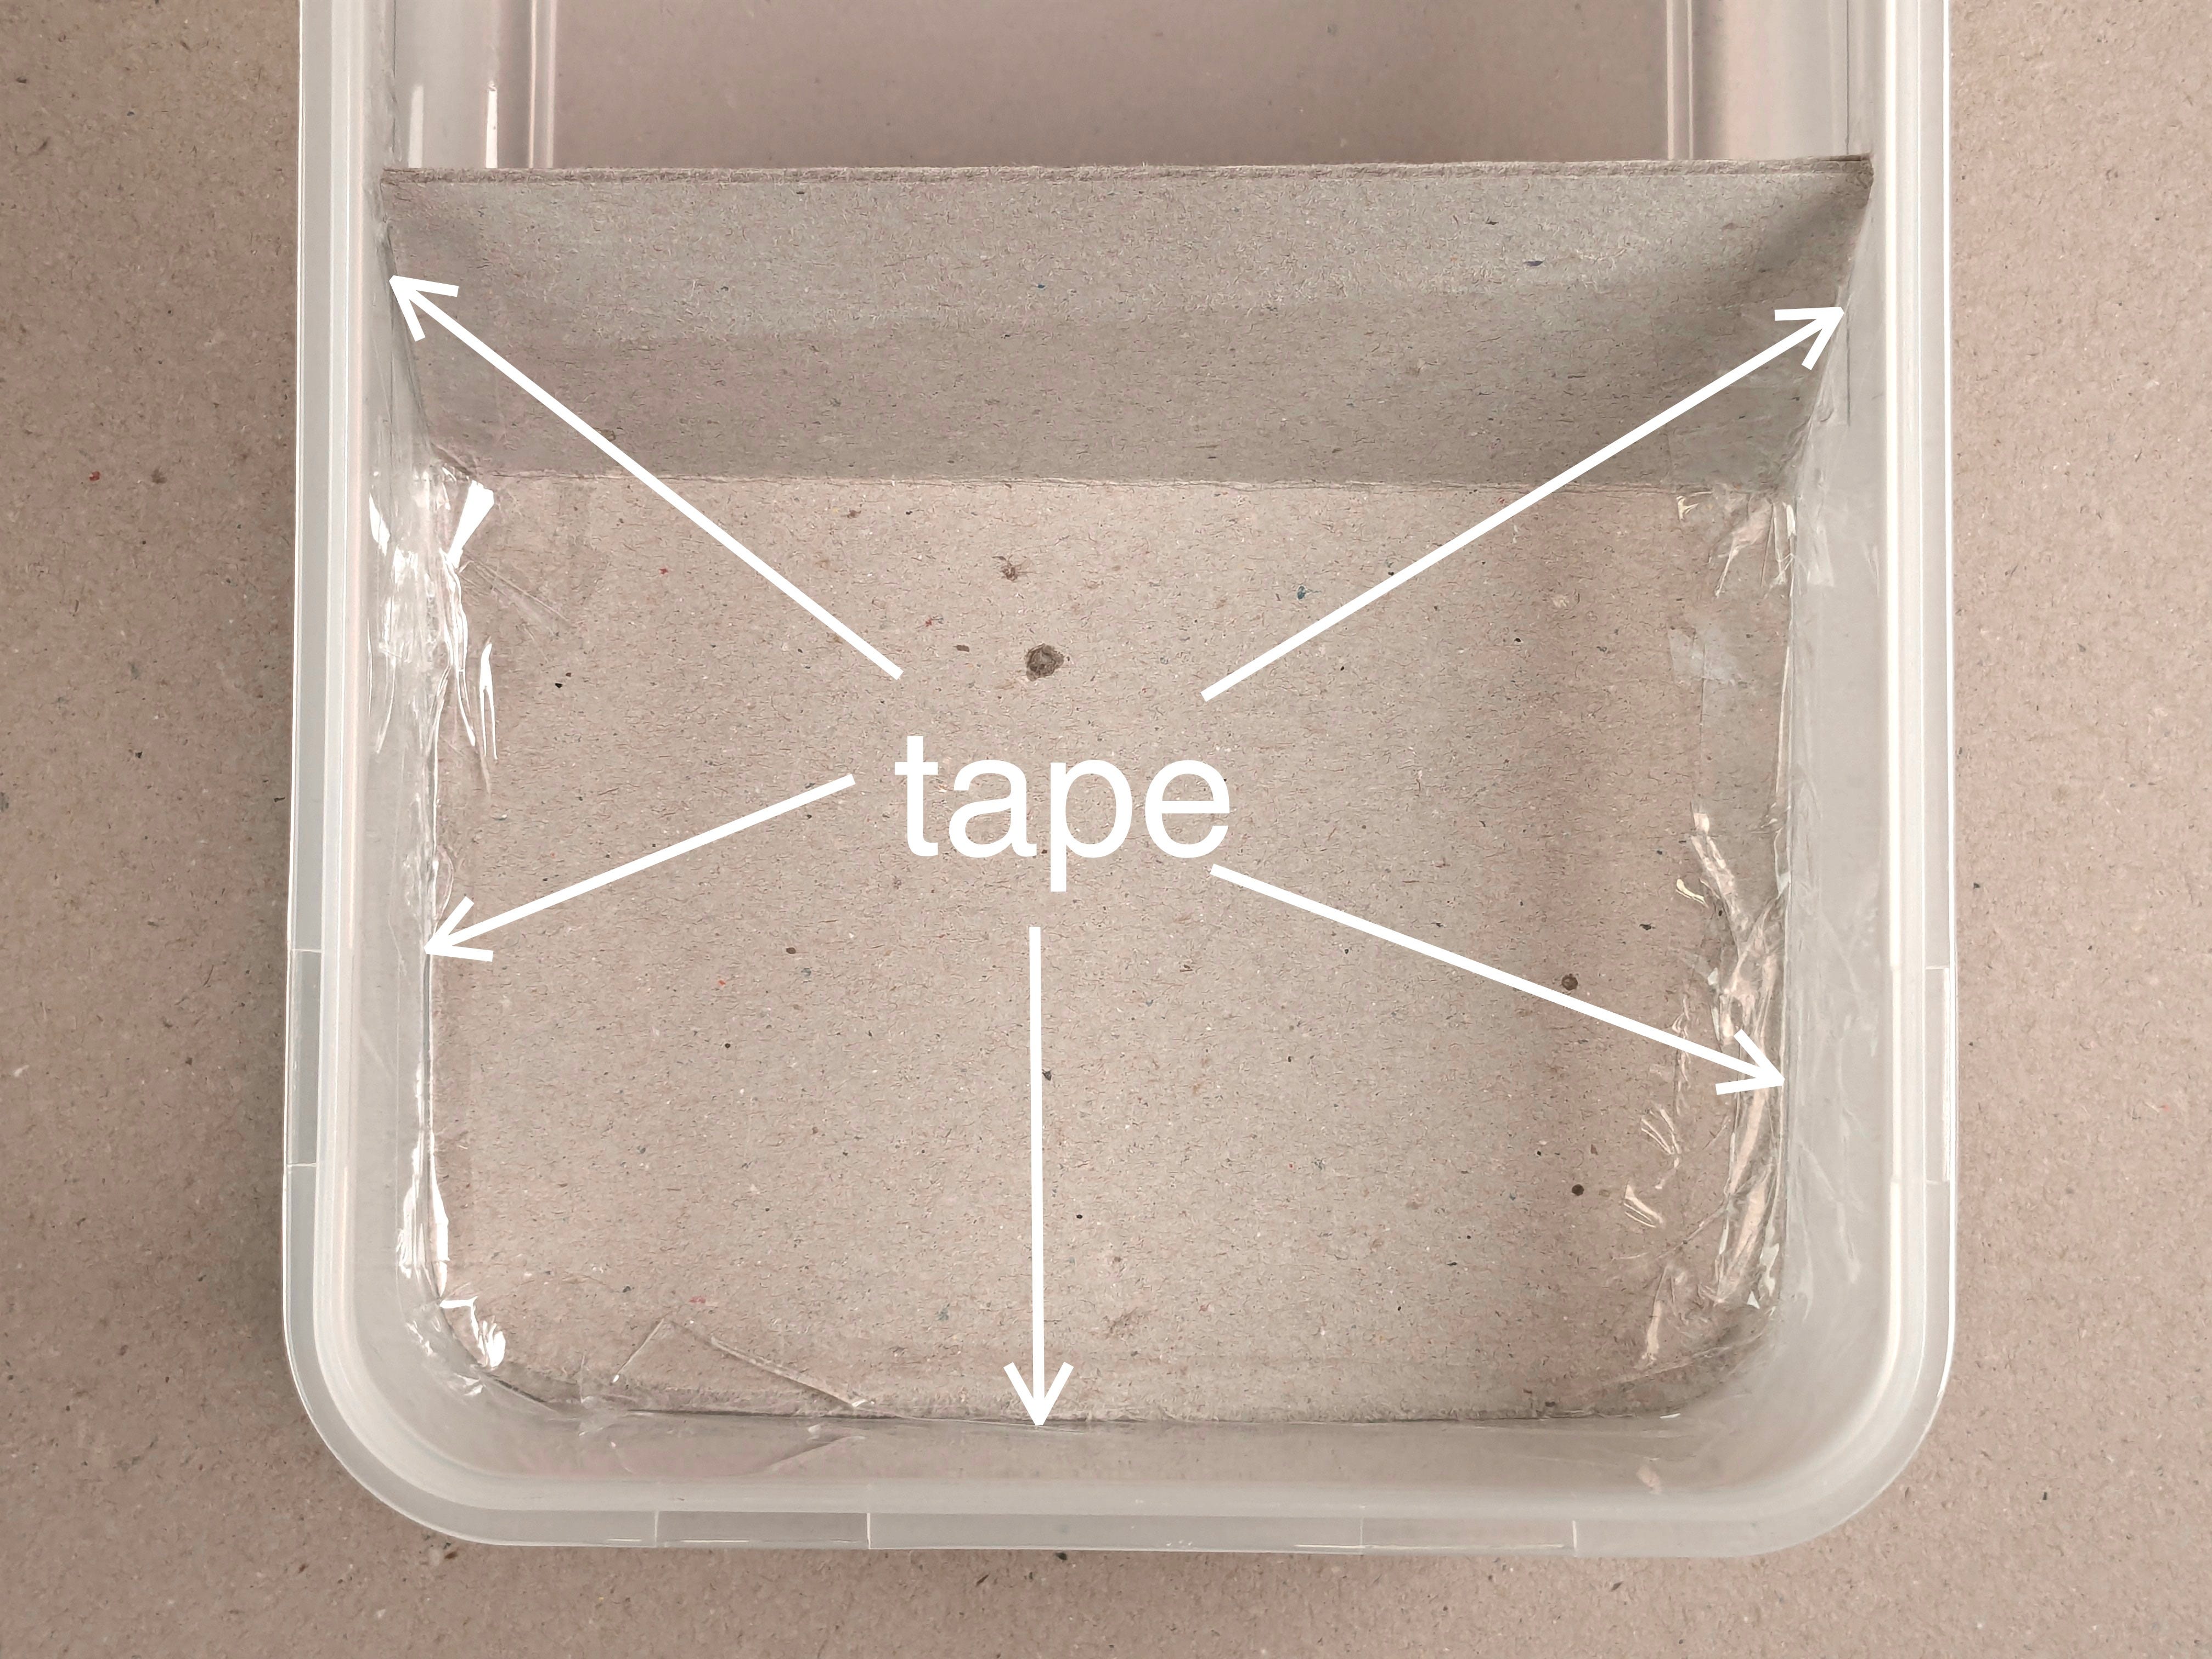
Put it in place and secure it with tape.
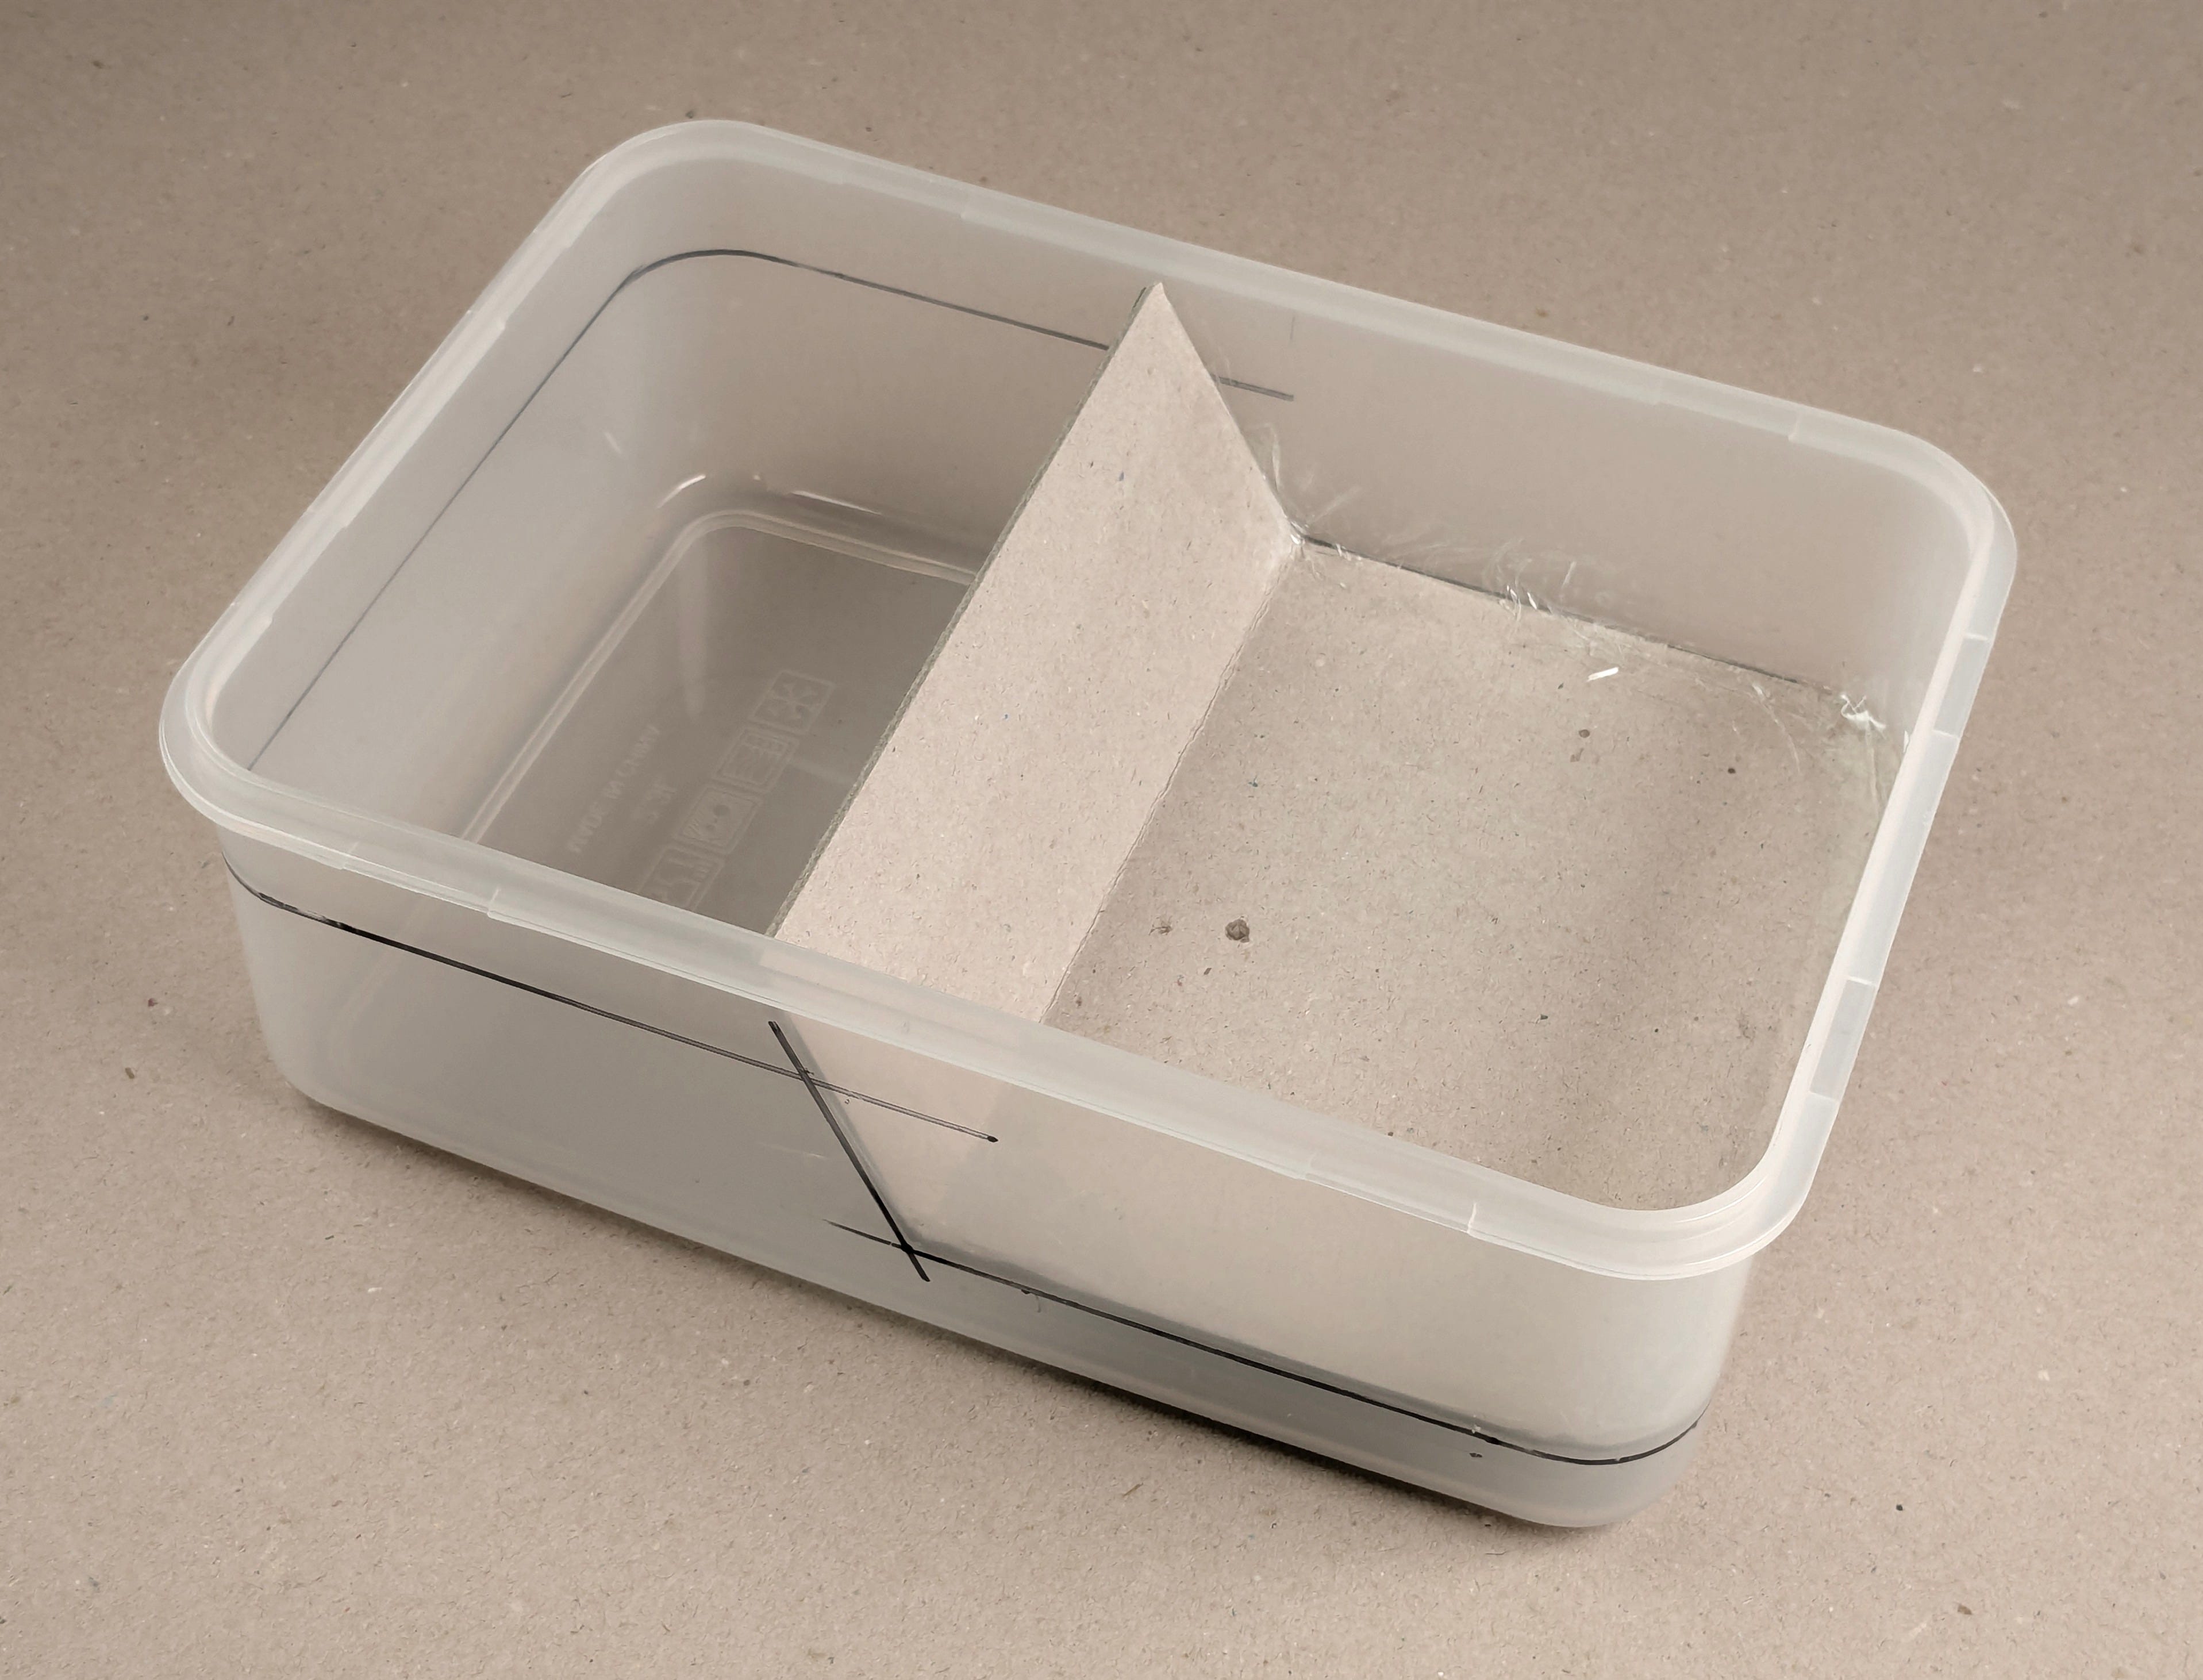
We are now ready for casting (pouring the concrete or mortar inside the mold).
Check the specifications of your concrete. I’m using mortar, it’s a 5 kg bag (11 lbs) and it is indicated that to mix it all requires 0.7L (0.74 quarts) water. I’m going to use half the bag (2500g = 5.51 lbs), and therefore 0.35L, or 350 mL (11.83 fl oz)of water. I weigh water and mortar, and do the mix by adding the mortar to the water (rather than the other way around), gradually stirring with a whisk. If I notice that a little extra water is needed, I add some carefully, just enough to allow me to get a nice homogenous mix that is also pourable.


Next, pour the mix into the mold.
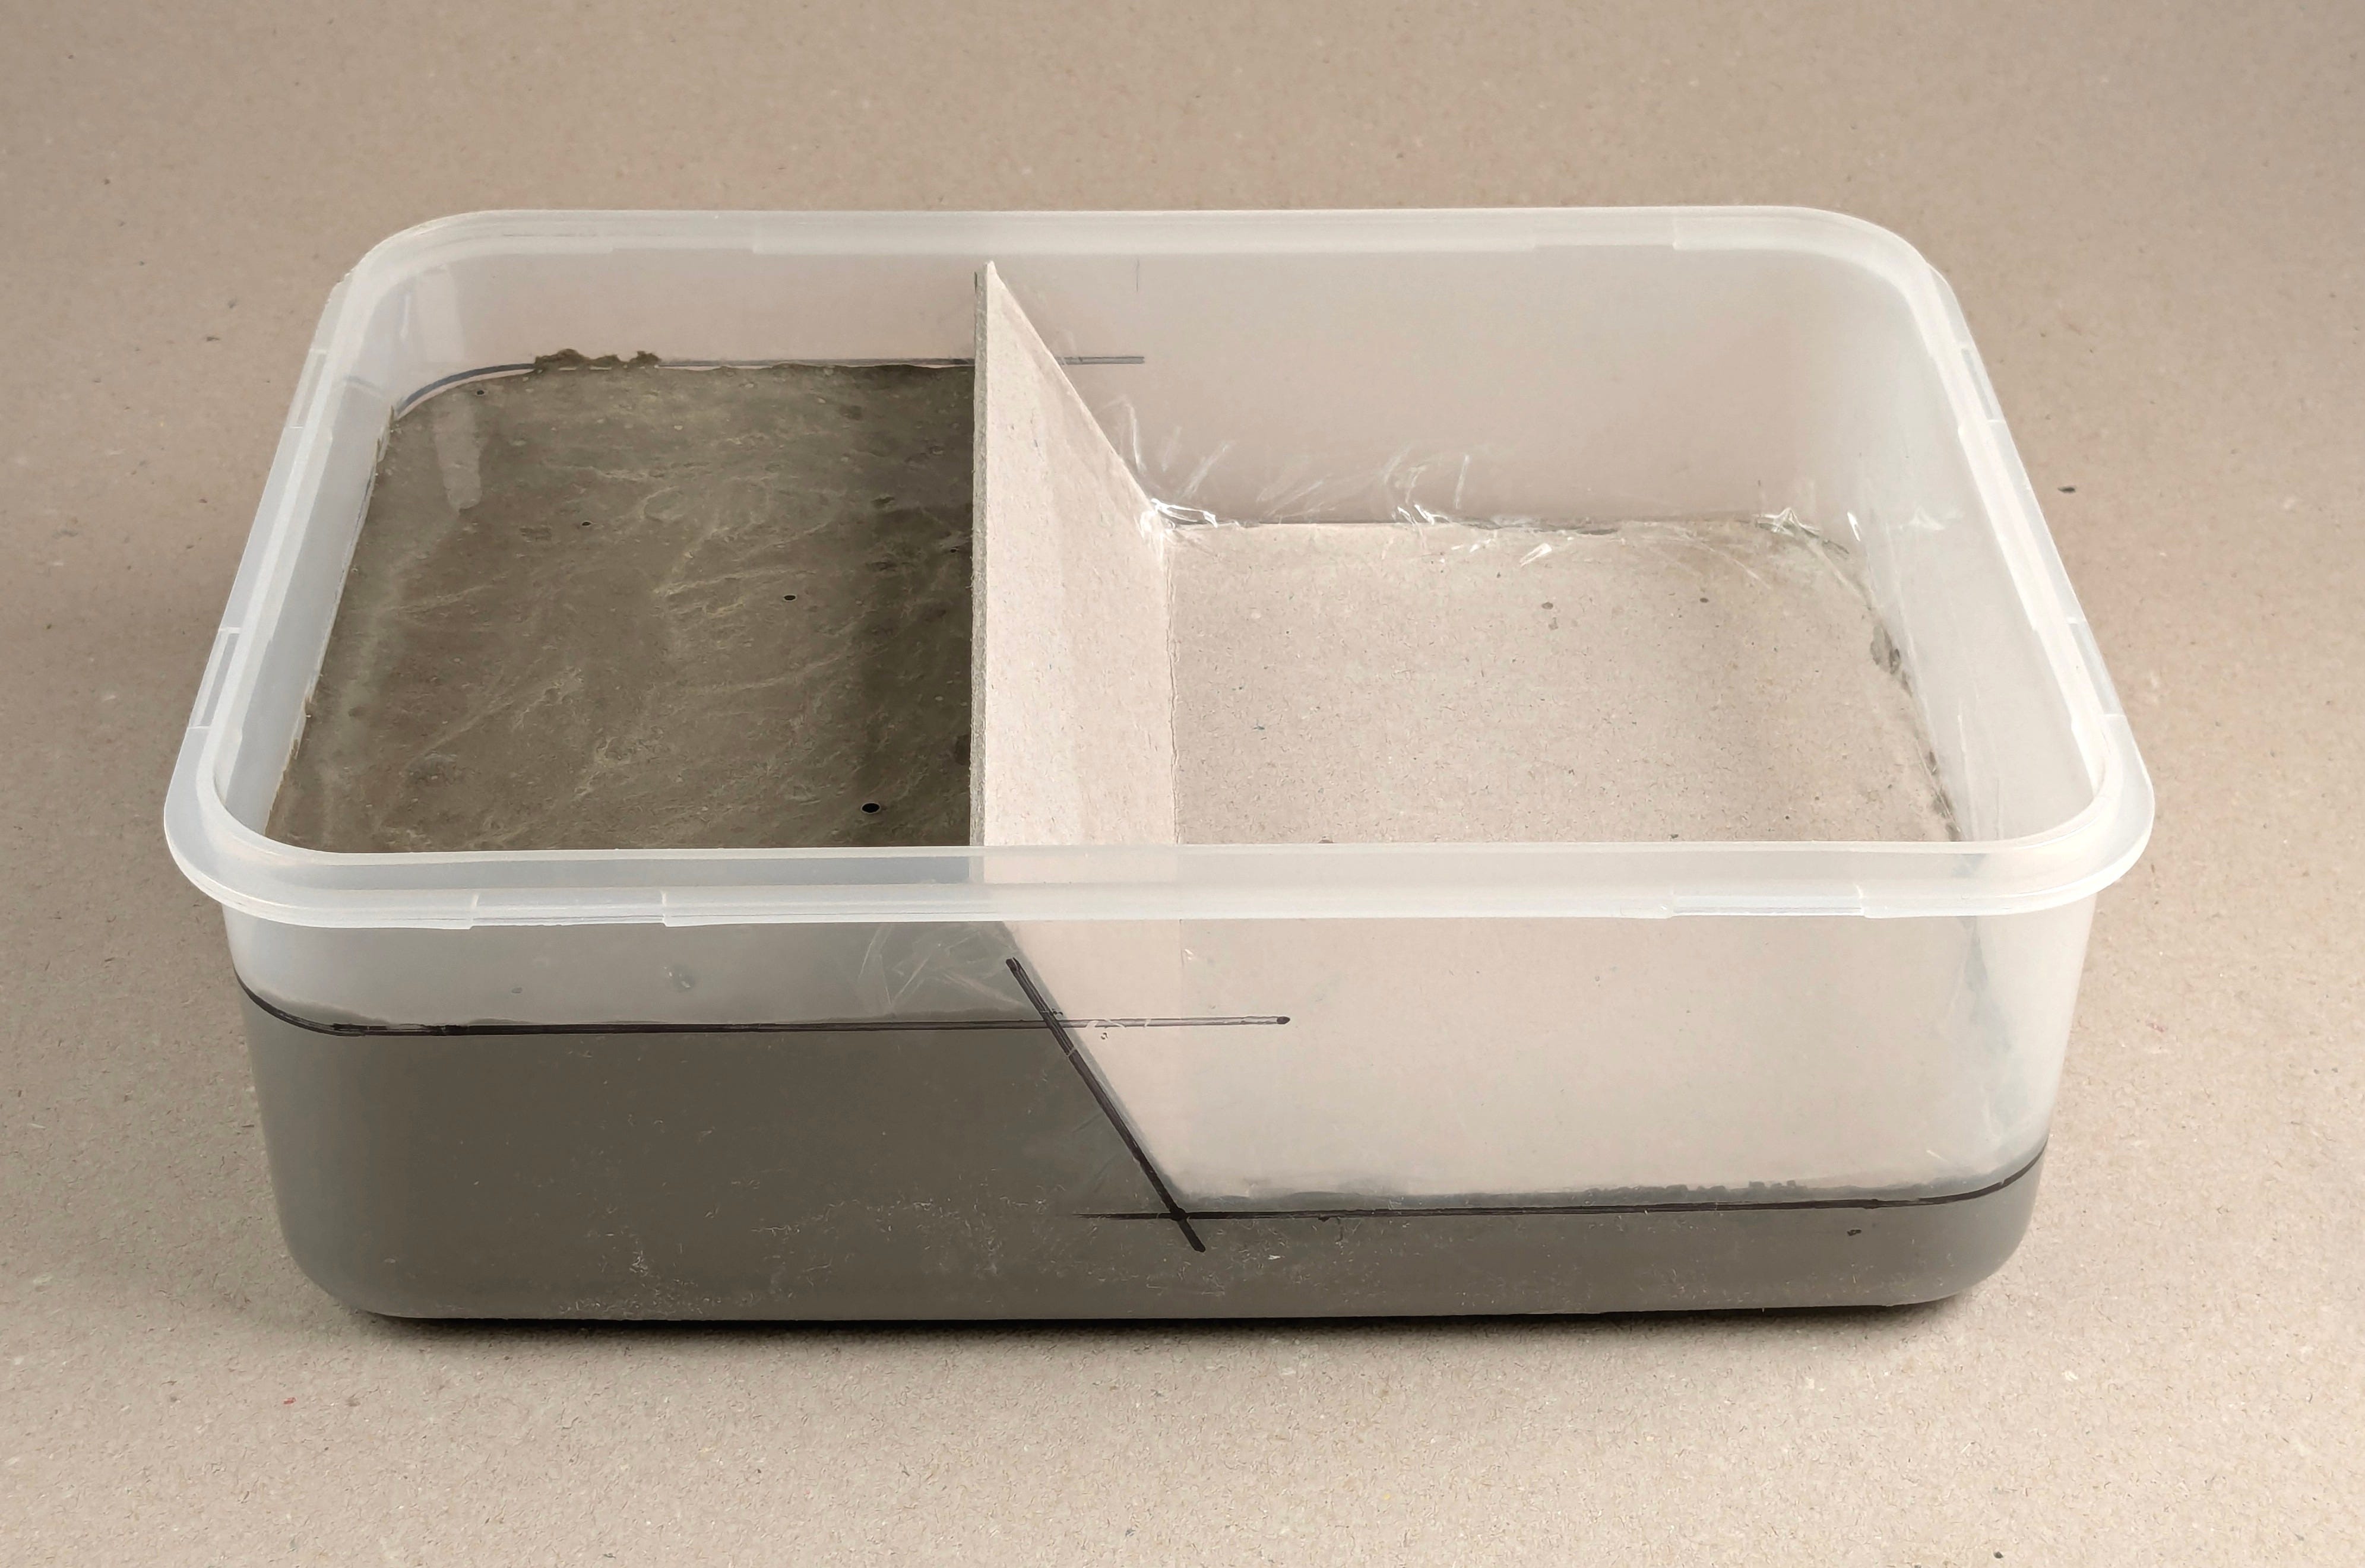
The next day, the form is usually ready to be taken out of the box: remove the cardboard stop, flip it and gently tap it against a table to release it.
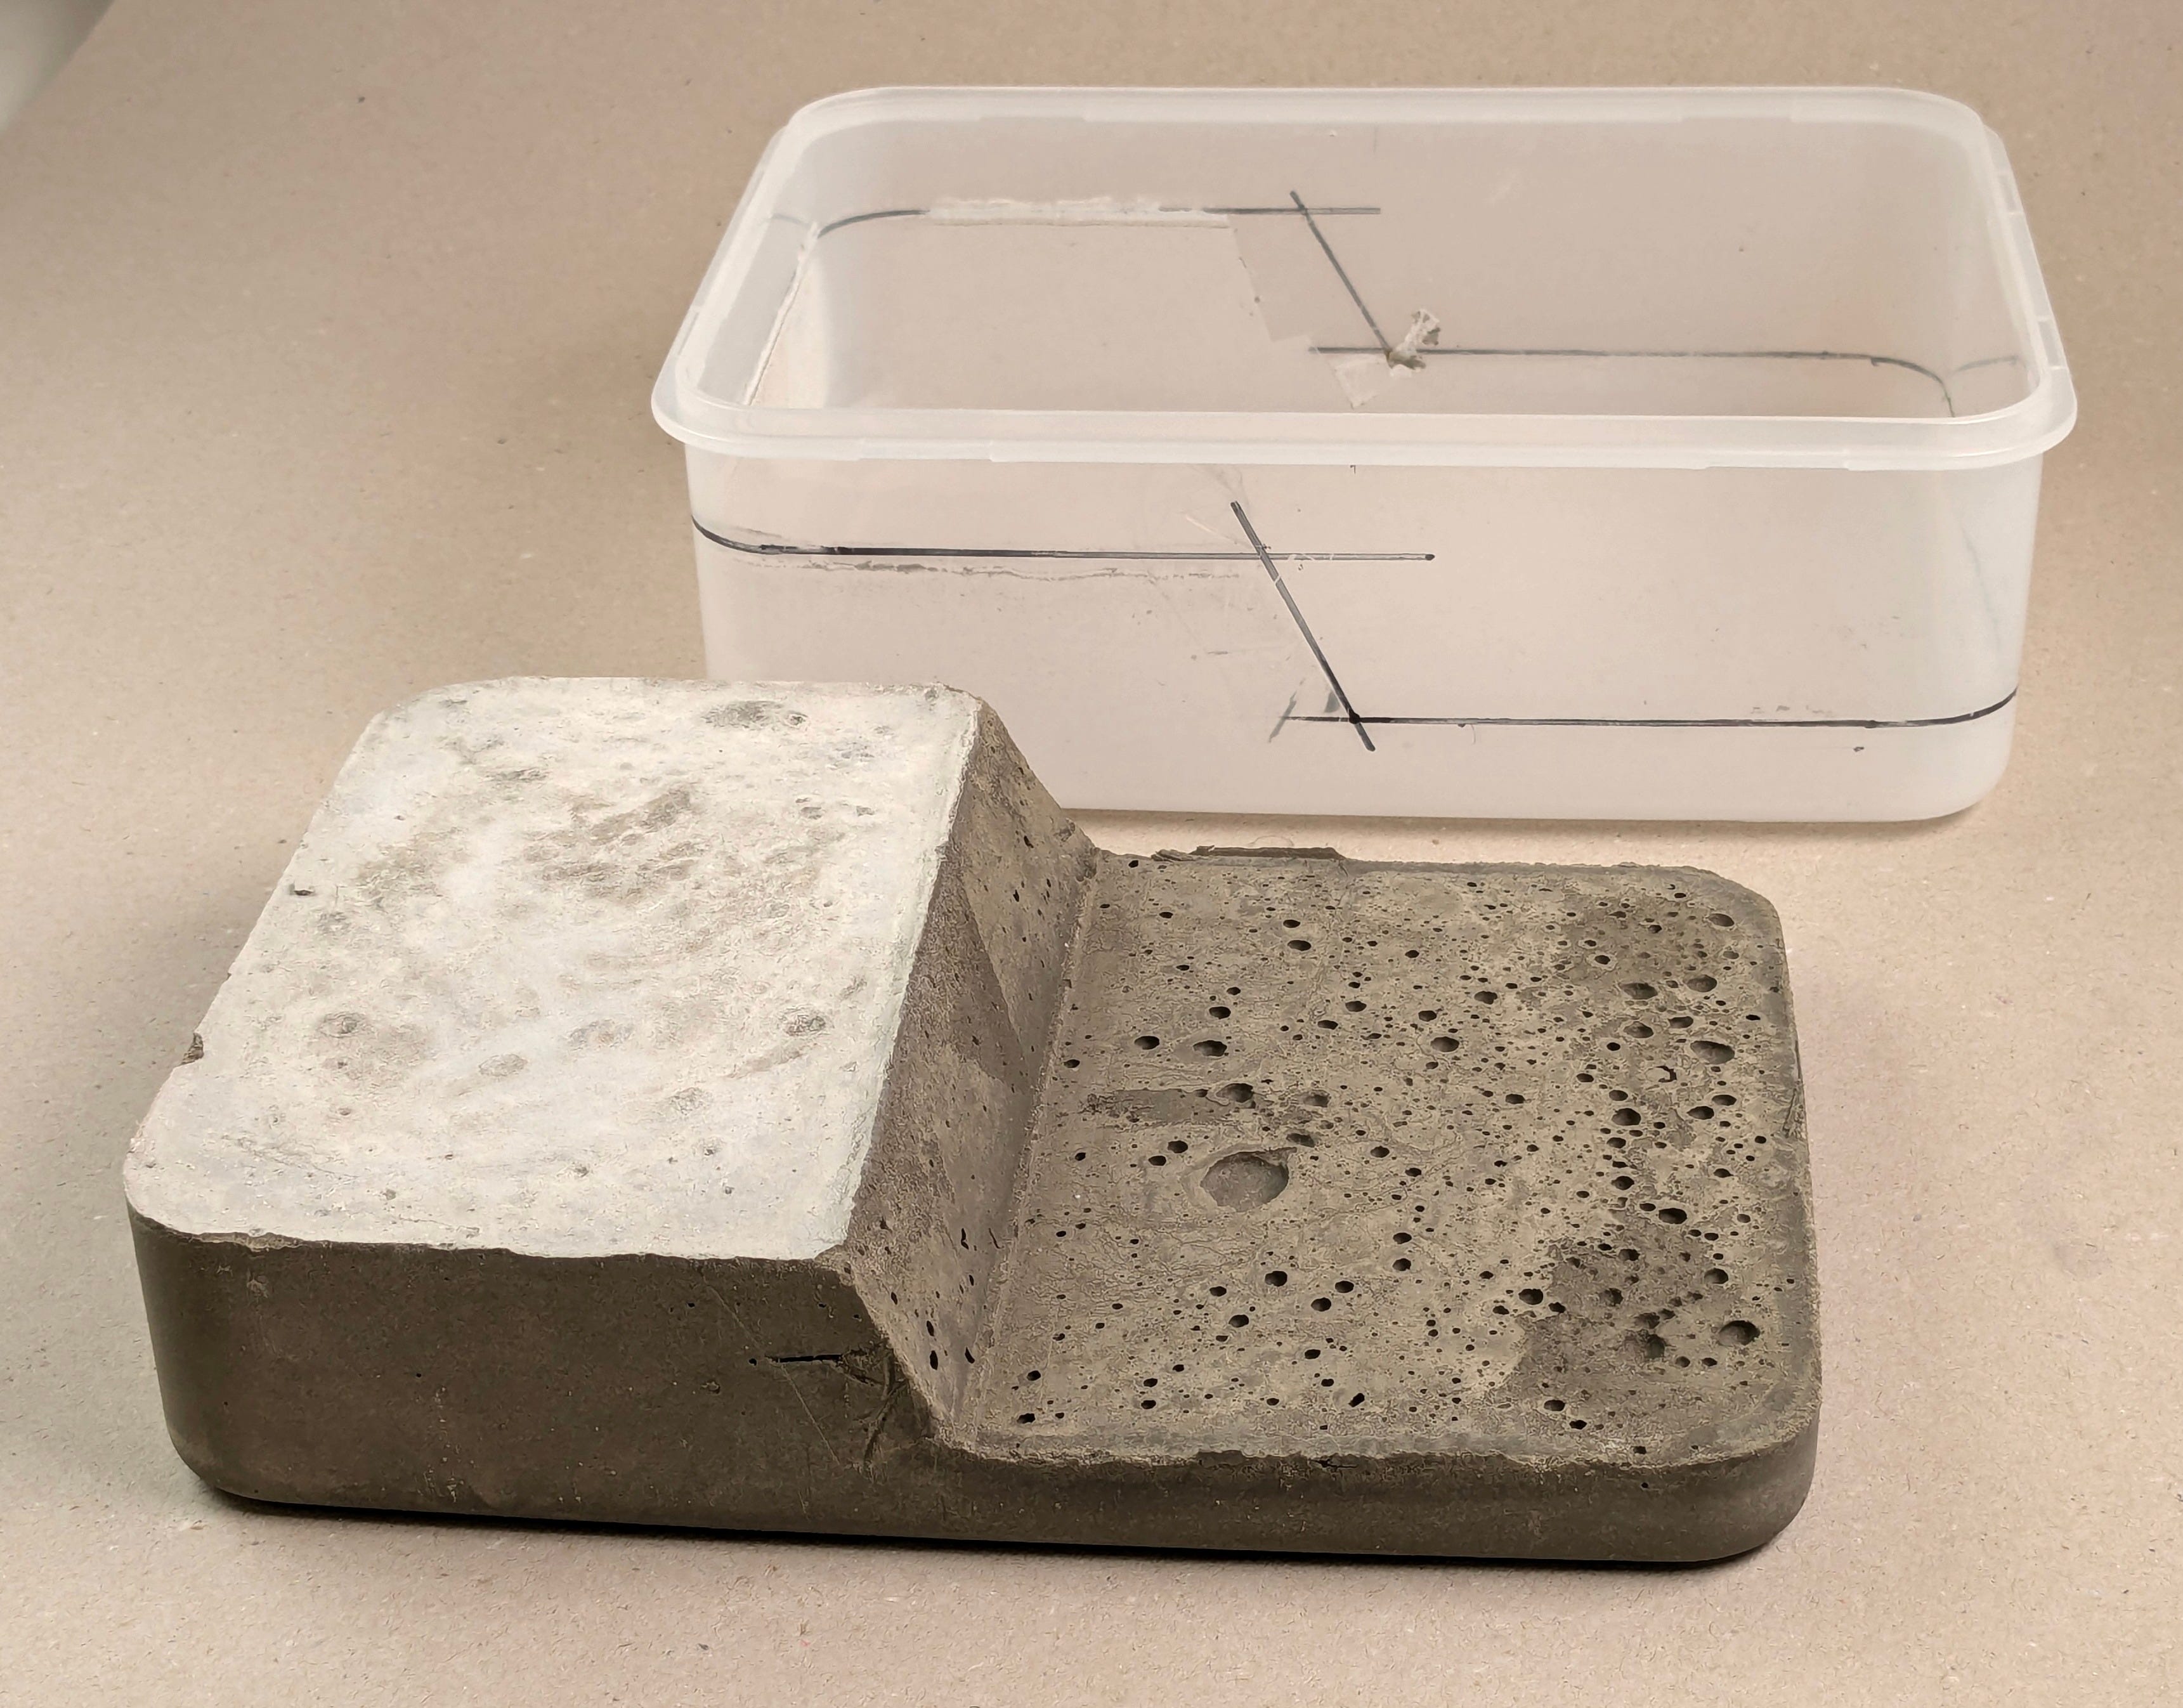
Let the block dry for a week (you will see the concrete or mortar gradually becoming lighter and lighter).
Then, you can sand the block to remove any sharp protruding bits (using a file or regular sandpaper stick), and also brush it to eliminate any dust.
Finally, you need to make it waterproof. I do this by applying 4-5 layers of acrylic fixative*. Do this gradually and allow enough time between the coats for the previous one to fully dry. The idea is to make it impermeable to water, and washable.
*You could probably use liquid varnish too, or a thin layer of epoxy. I have not tried those option and used acrylic fixative because that is what I always have in stock.
Step 2: Adapting the container
The second half of the project consists in creating a hole in the box to allow for the box to be closed while the roller sits in and the handle sticks out, and remain airtight.
Put the concrete platform back inside the tray, and the roller on top in the desired position (with the sleeve in the middle), and mark the location of the steel bar
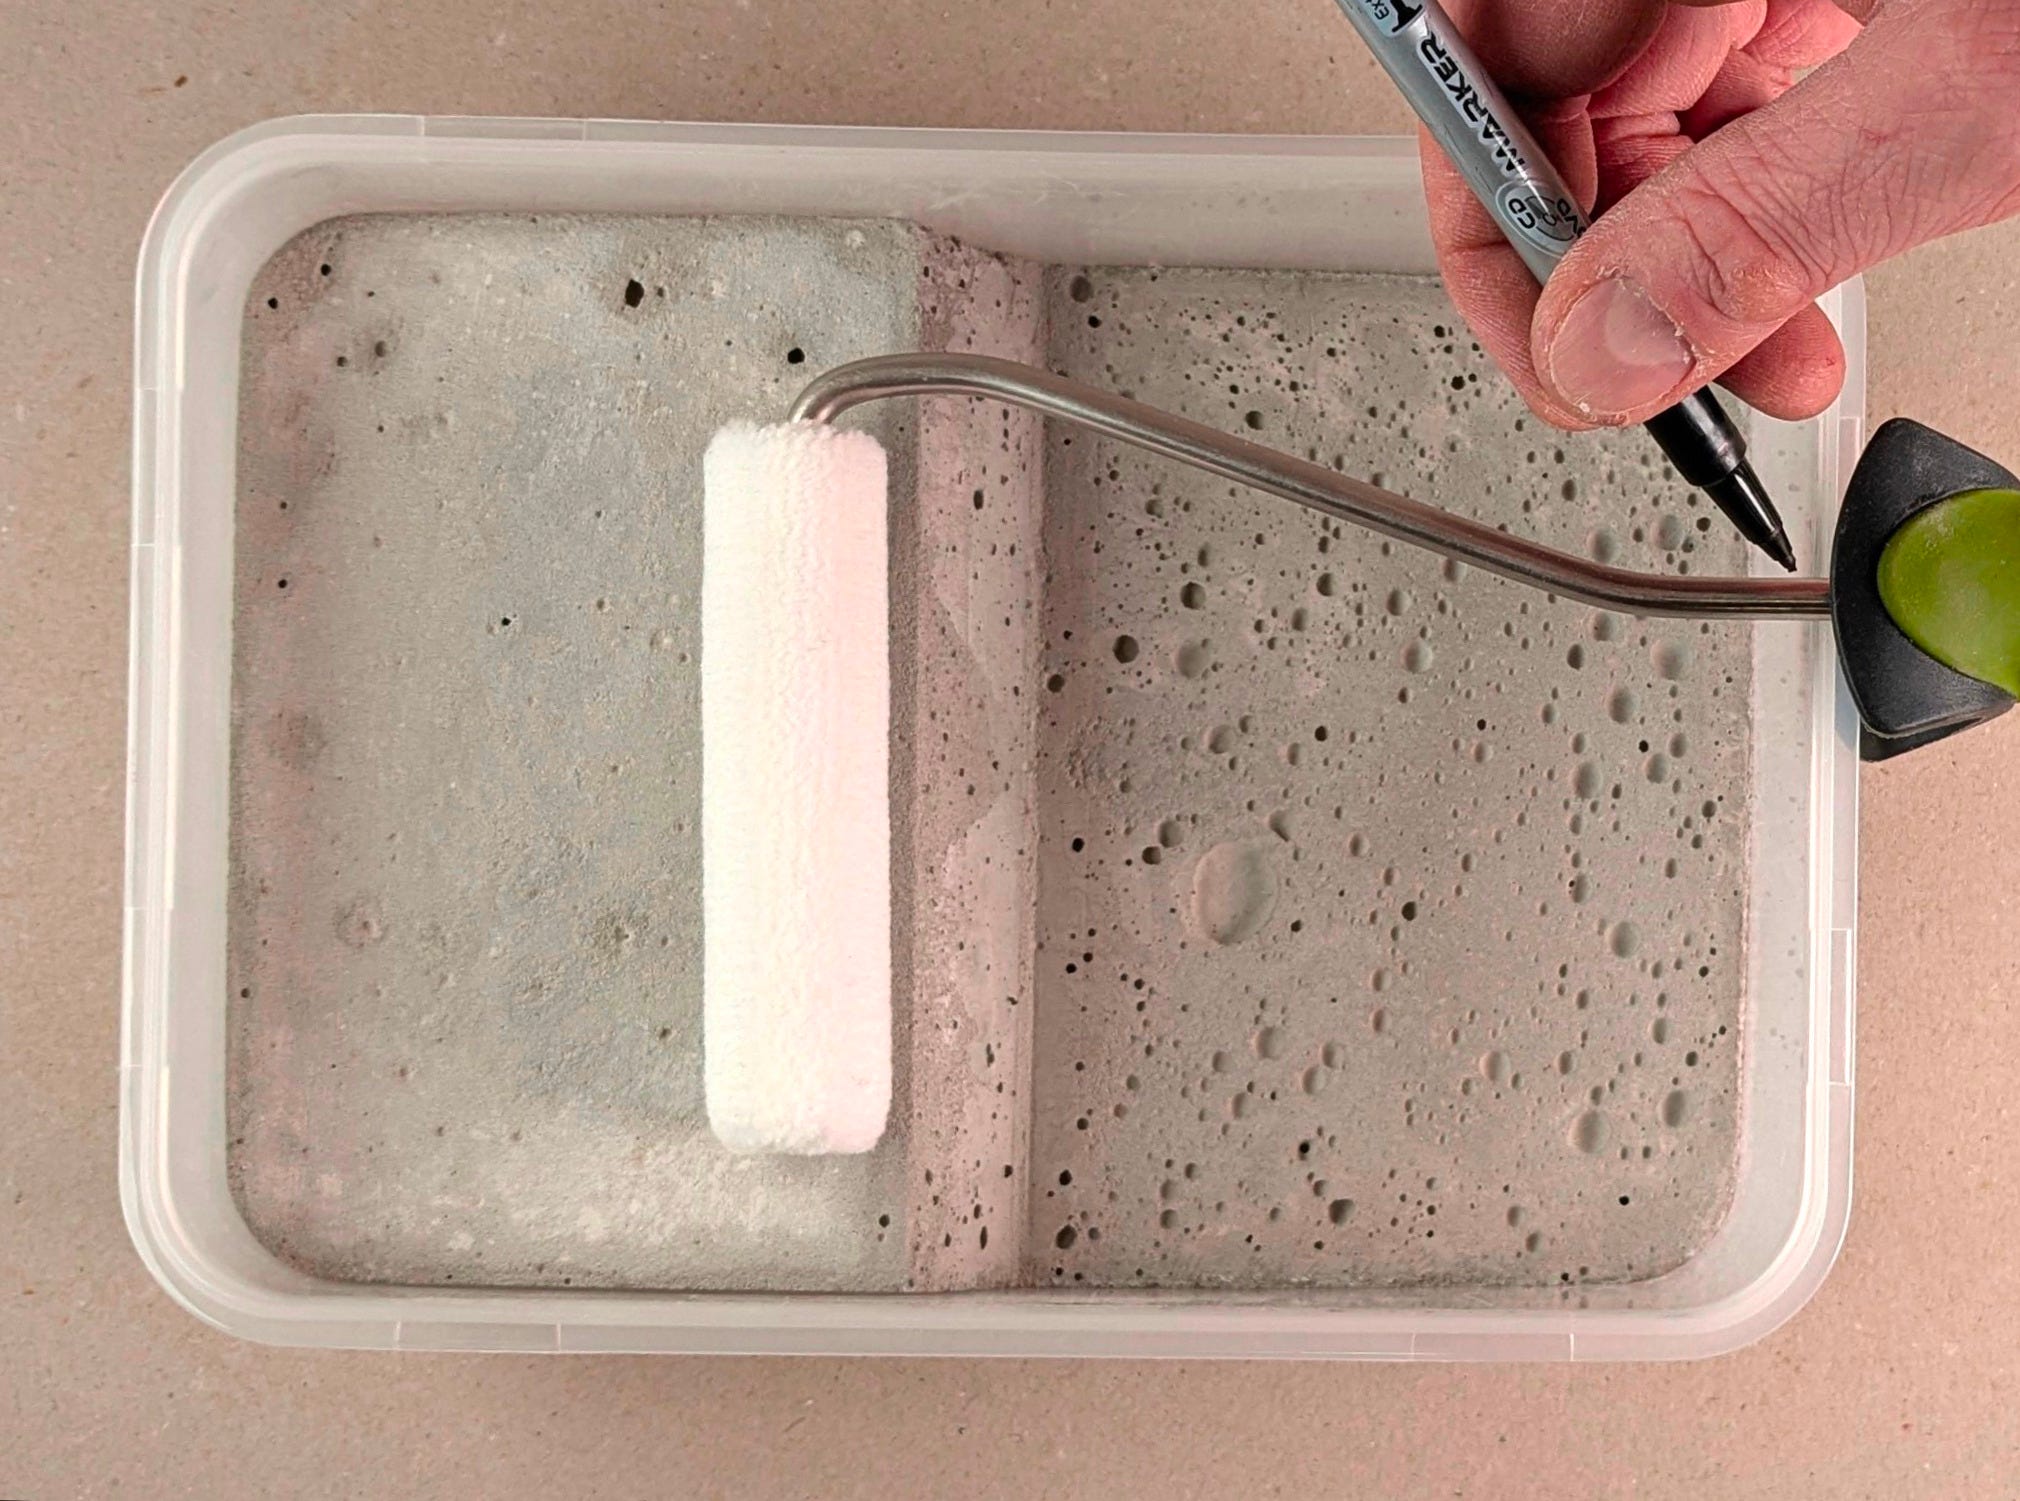
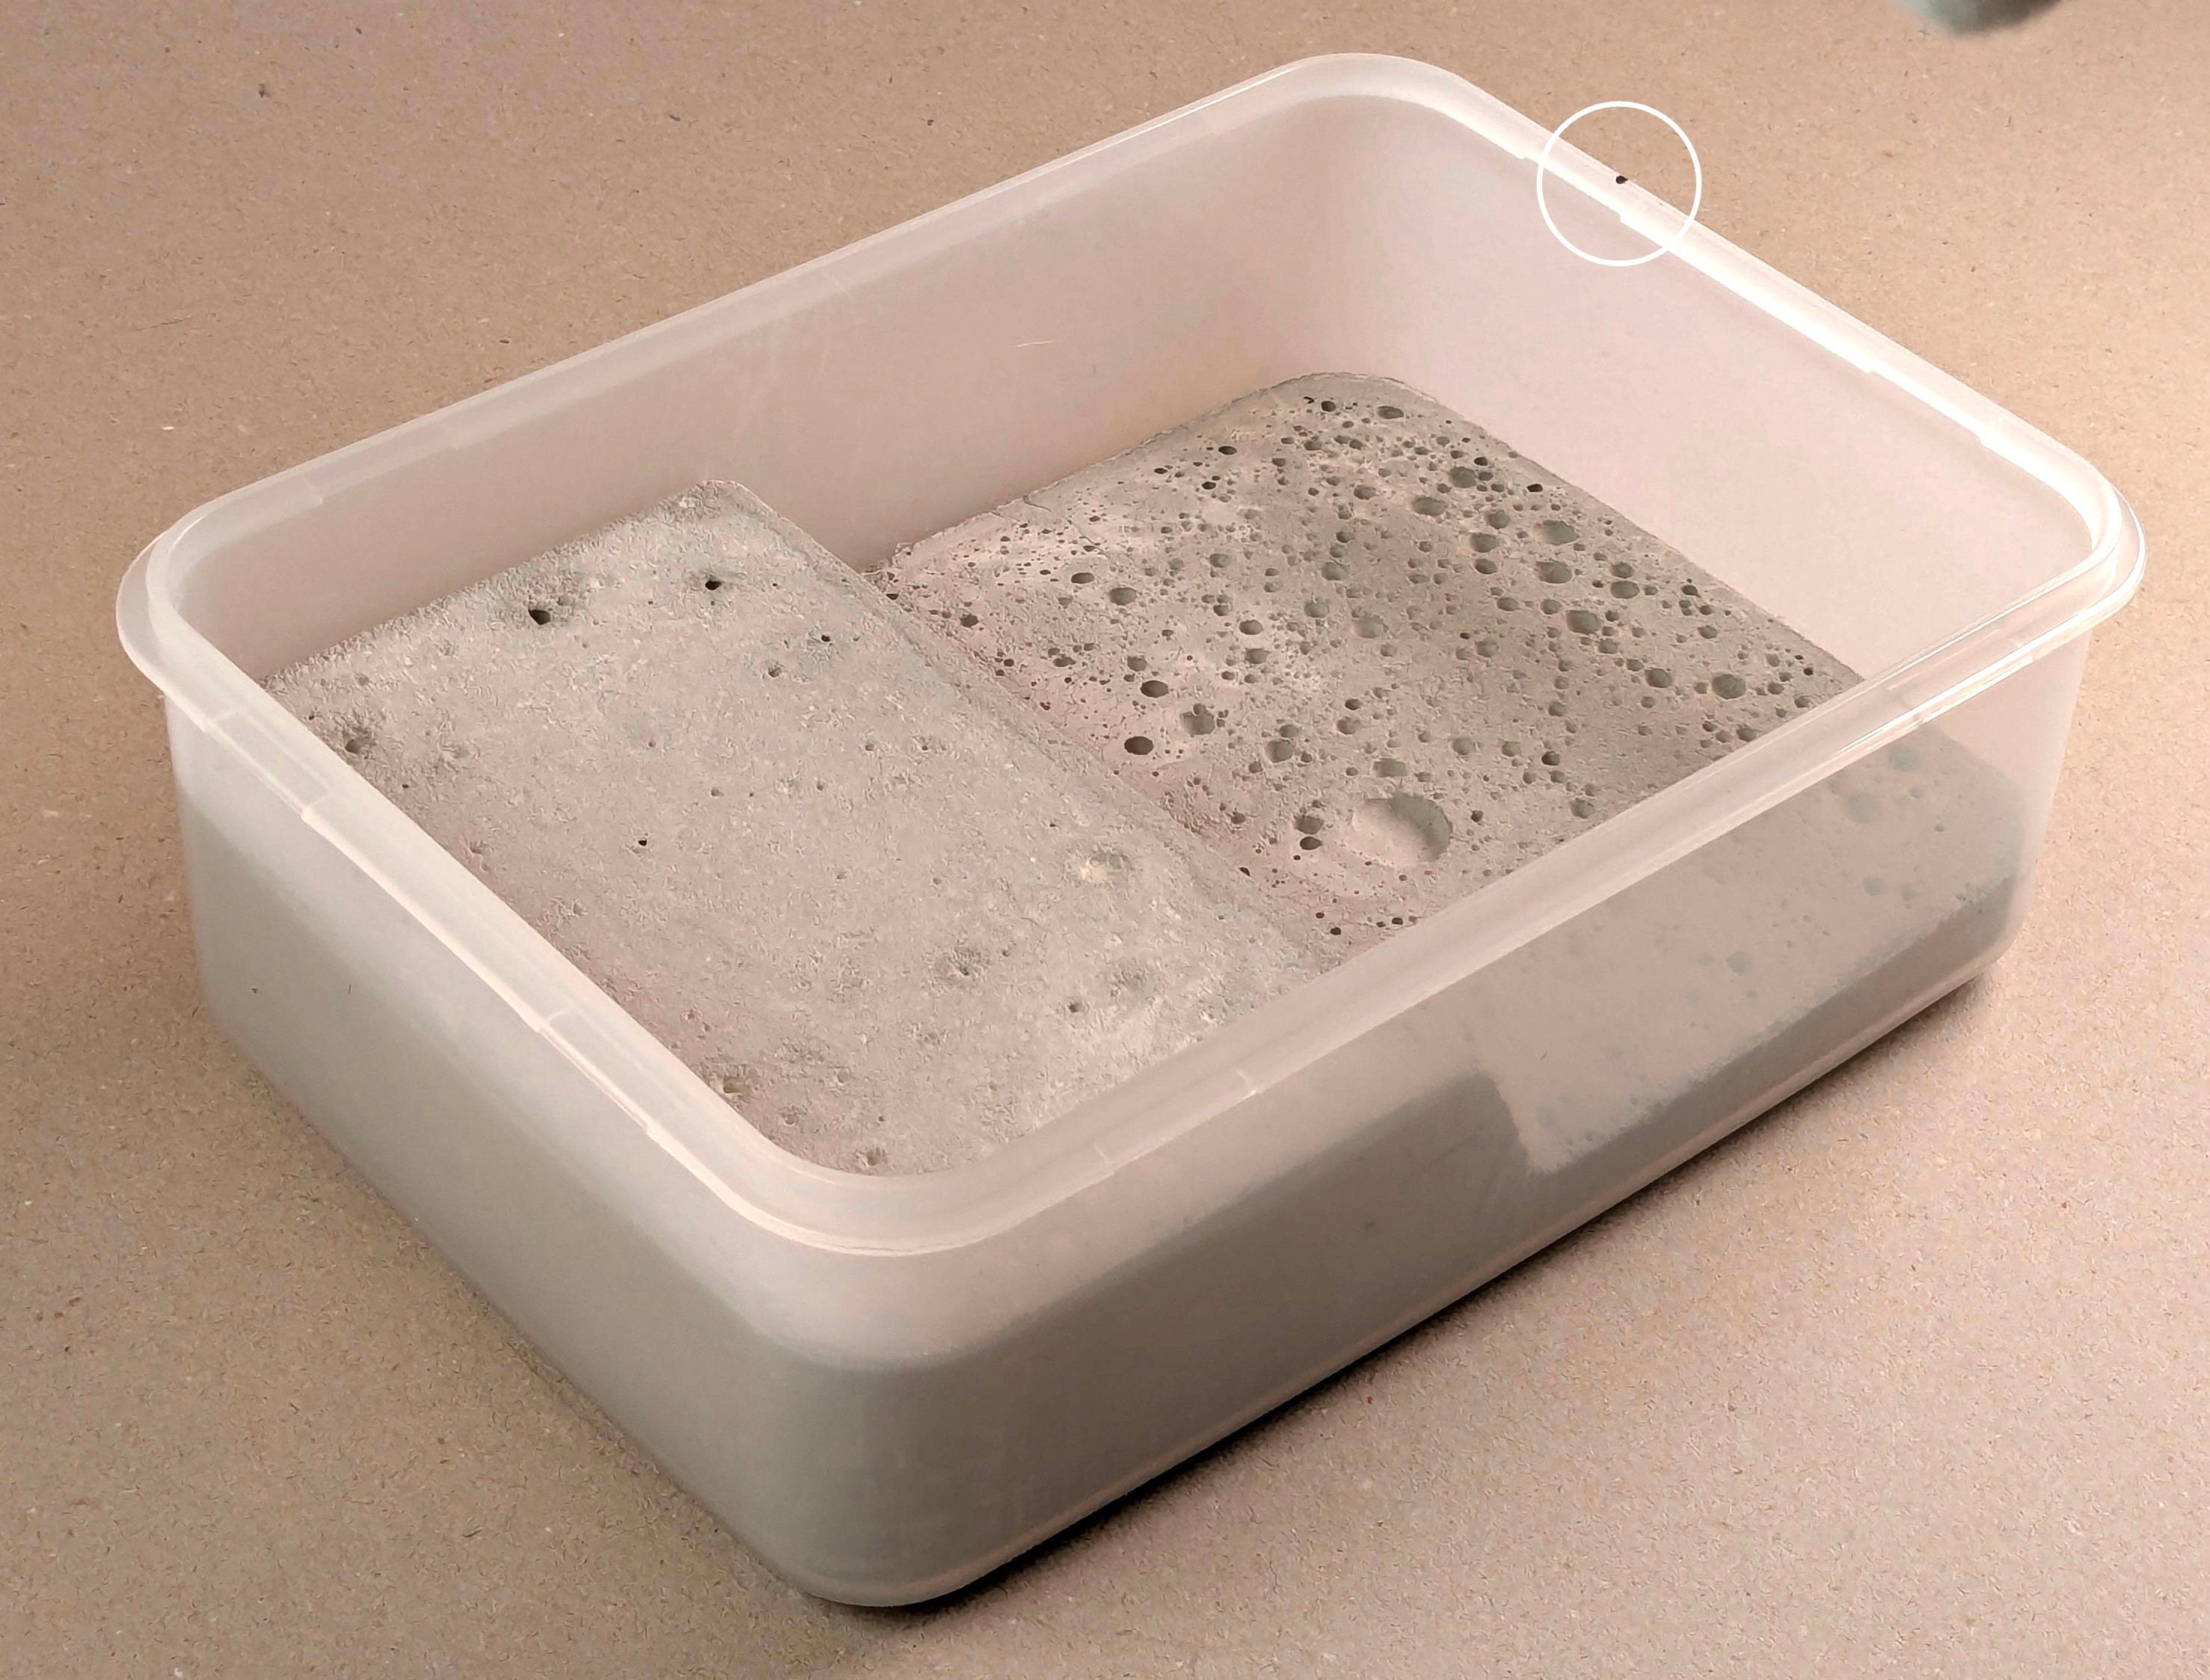
Next, cut out a half circle in the upper wall. You can do this by sawing in a V-groove first (or simply one groove), and then rounding by using a round file of the same diameter, or by wrapping a piece of sandpaper around the steel bar of the roller. Be sure to not go further than the vertical wall, which would weaken the box structure!


The lid has ‘clamps’ on all four sides. On the front side, where the handle sticks out, we could simply cut it, but a better option is to reduce it so a smaller clamp remains, sufficient however to keep the lid closed and let no air through.
Start by putting a mark on the tray a few mm left of where the handle sits.
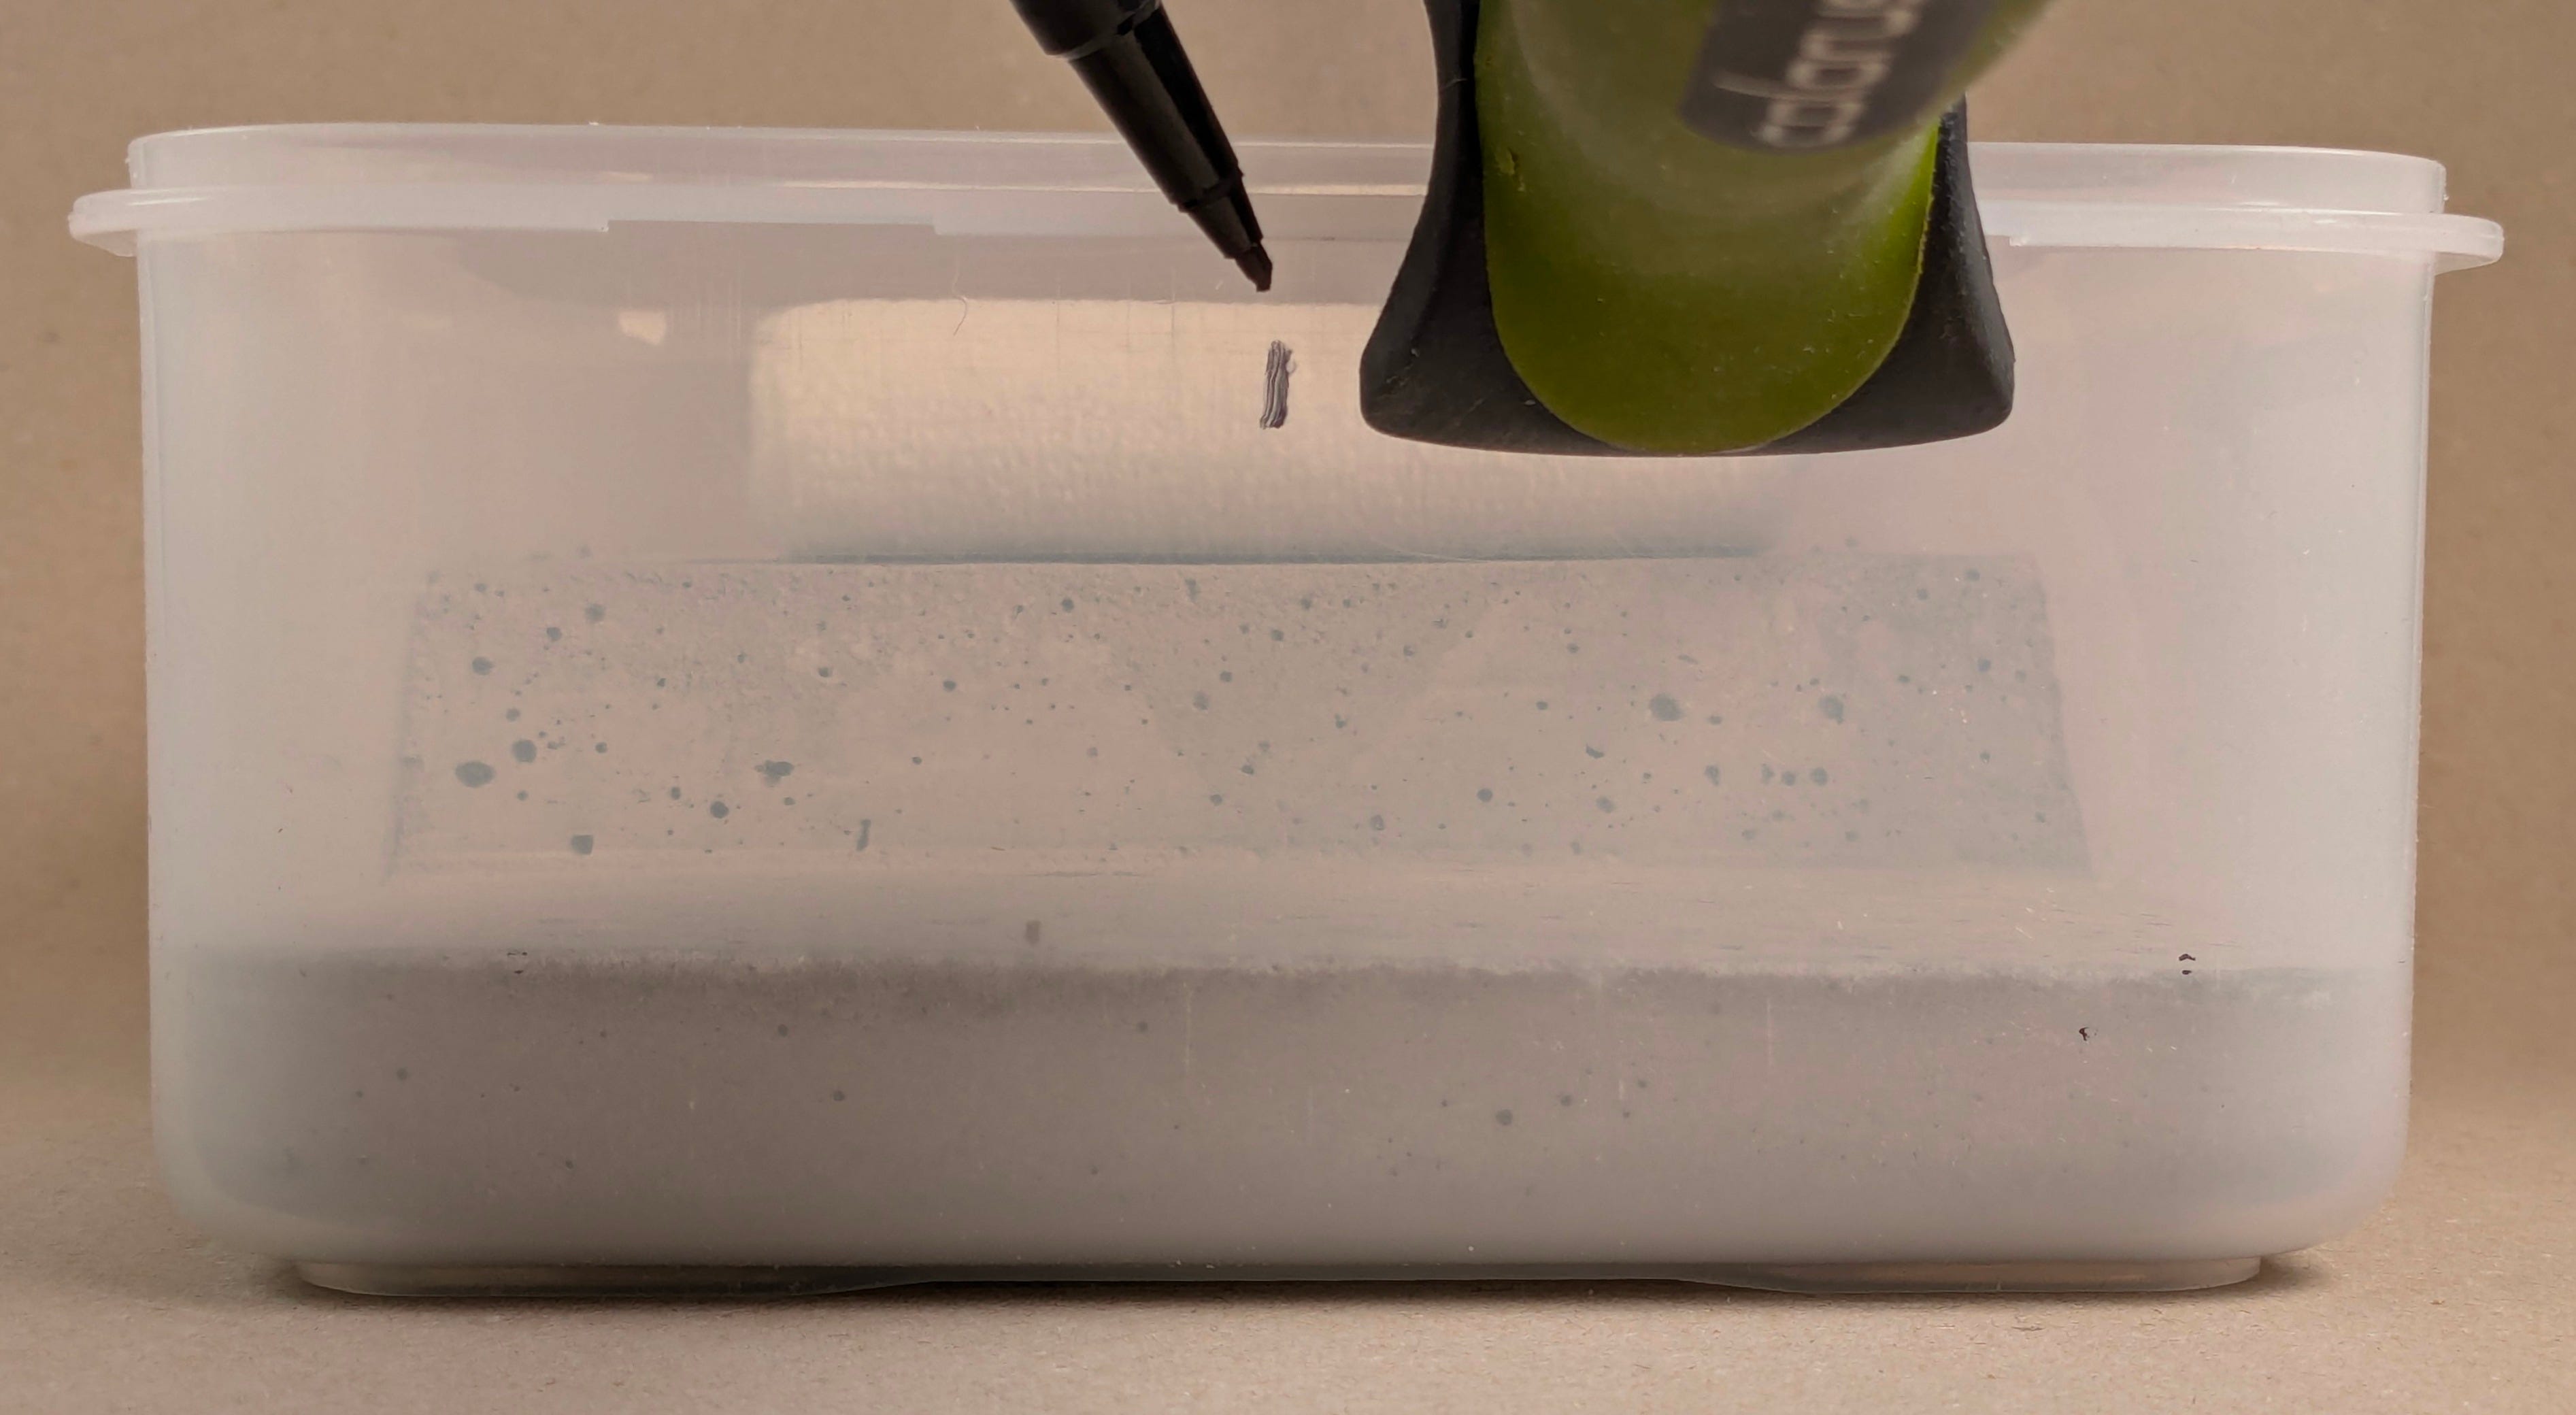
Then, put the lid back on and transfer the point to the lid. Then copy the shape of the clamp starting at this point.


Cut the clamp. To do so, use a craft knife to cut along the lid, a coping saw for the curved shape, and sandpaper to smooth it out.


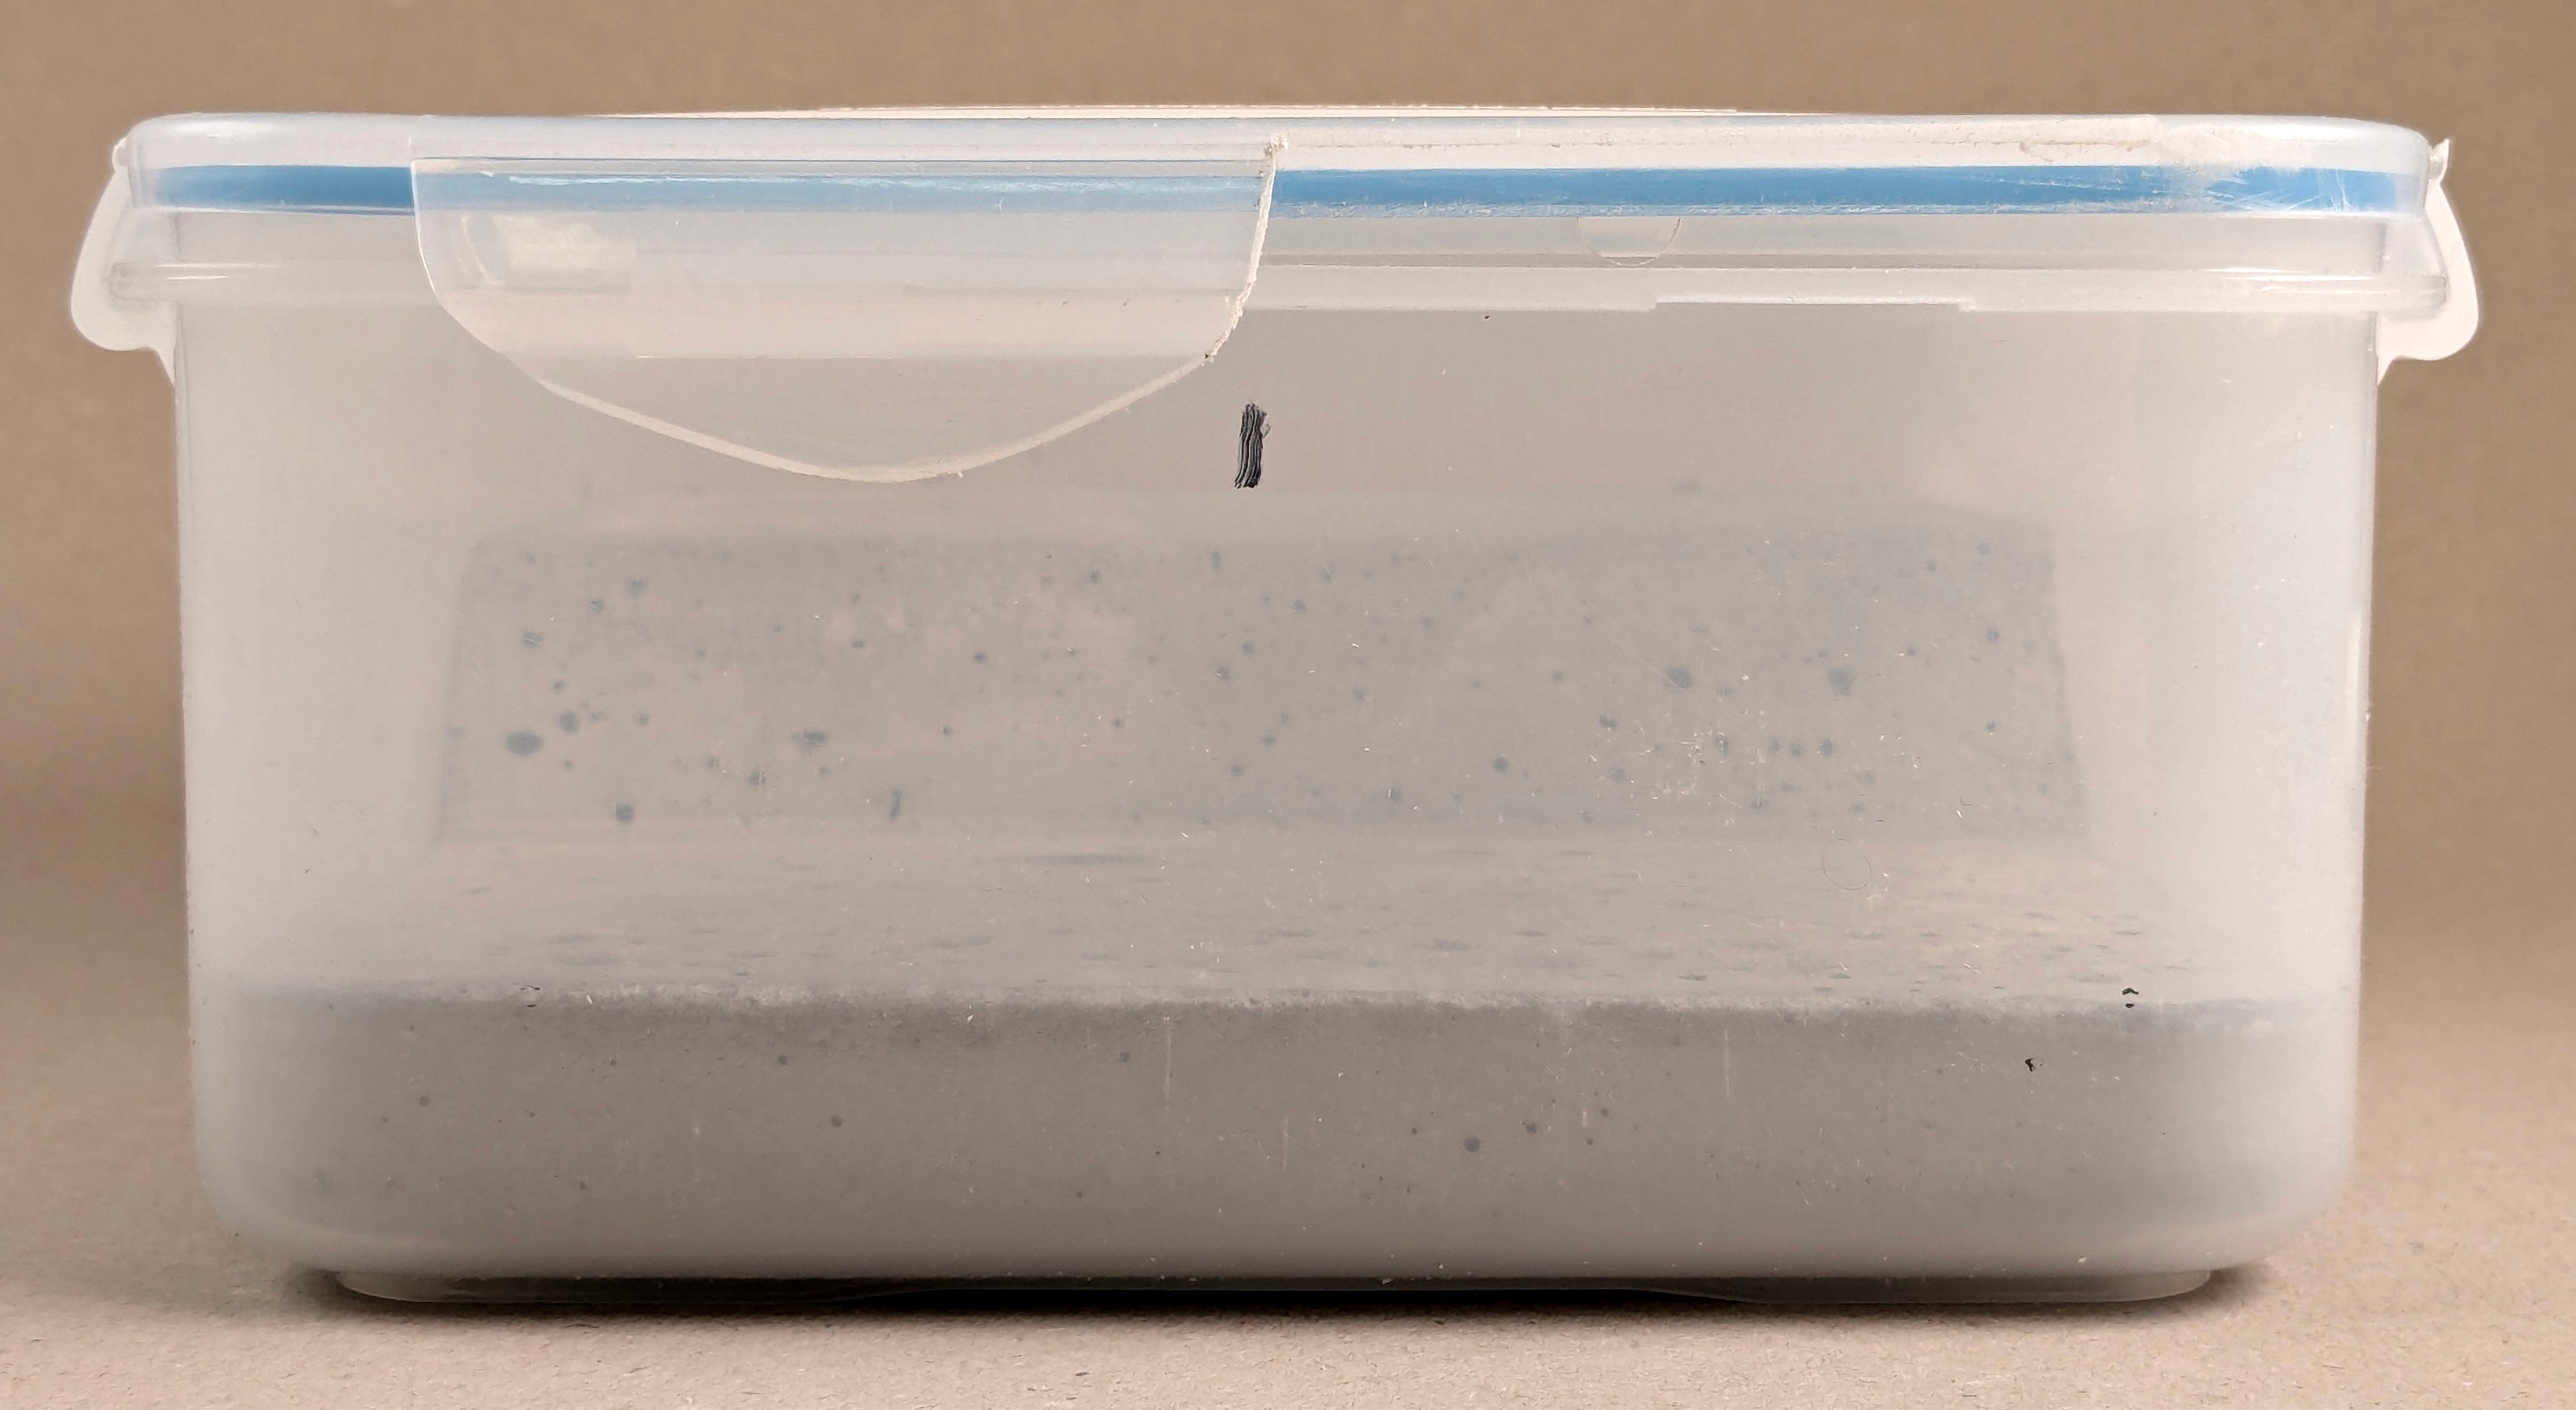
Next, put the lid back on, close the clamps, and complete the circle in the tray by drawing a half circle on the lid.


Remove the joint
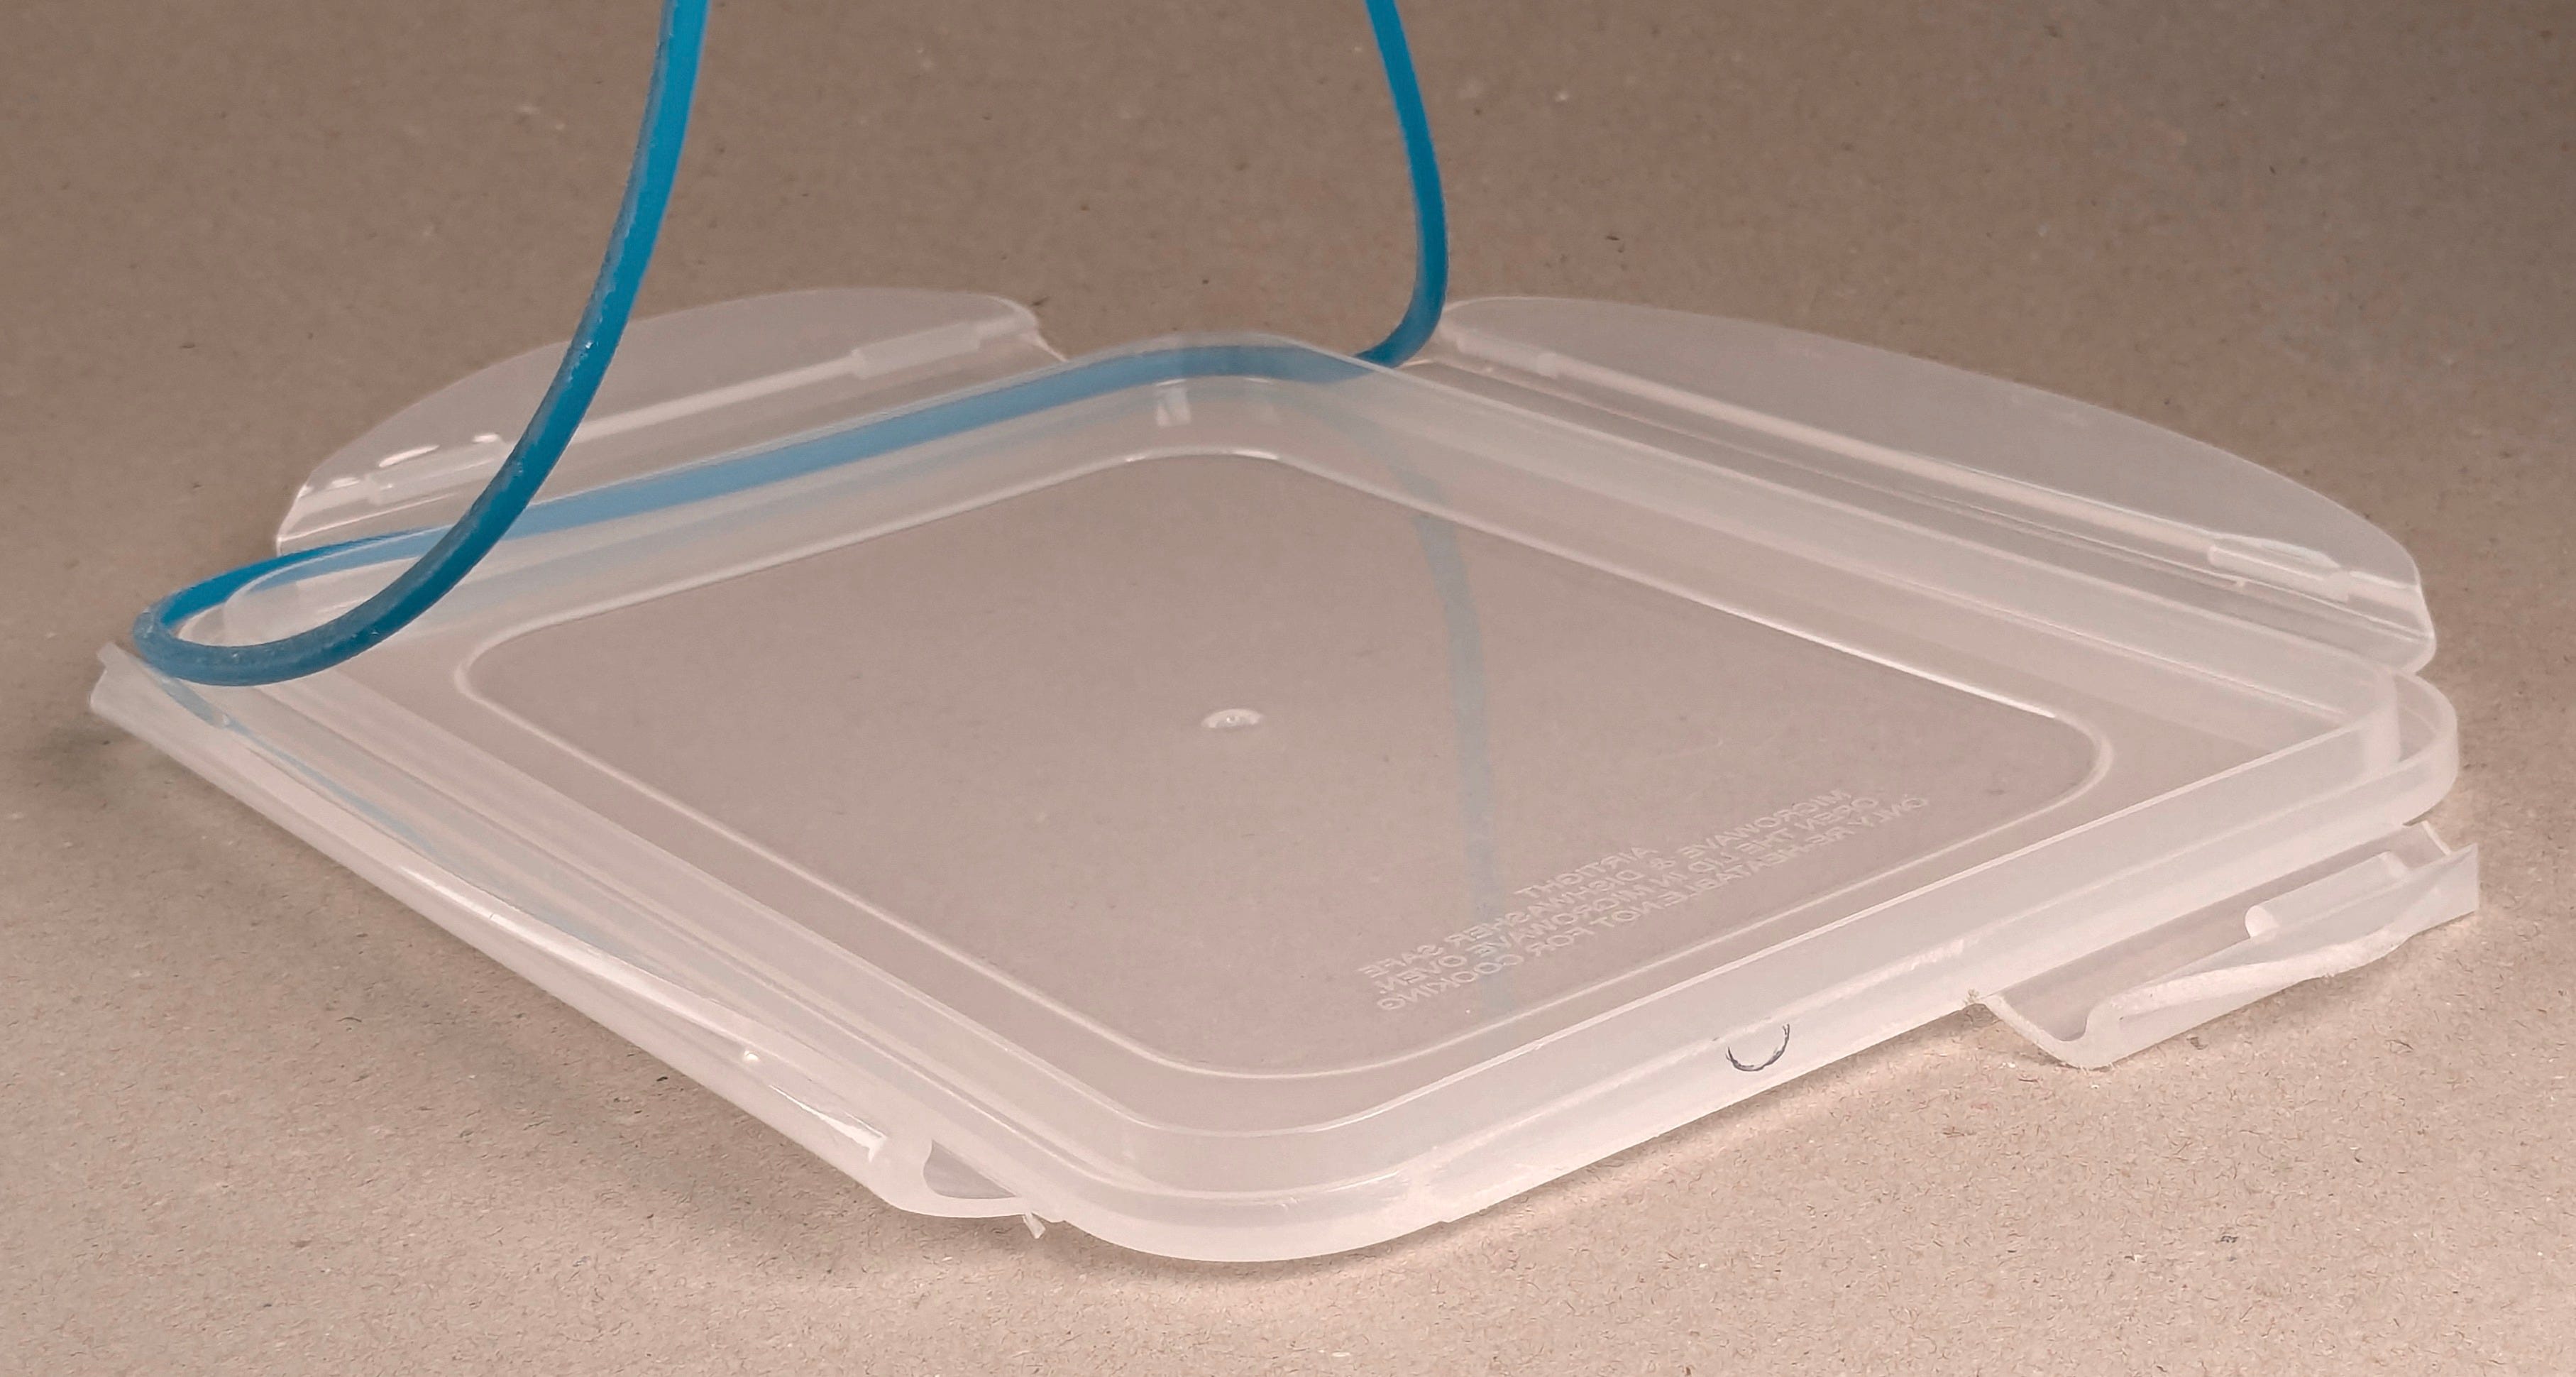
And extend the mark of the half circle to the inner wall of the lid
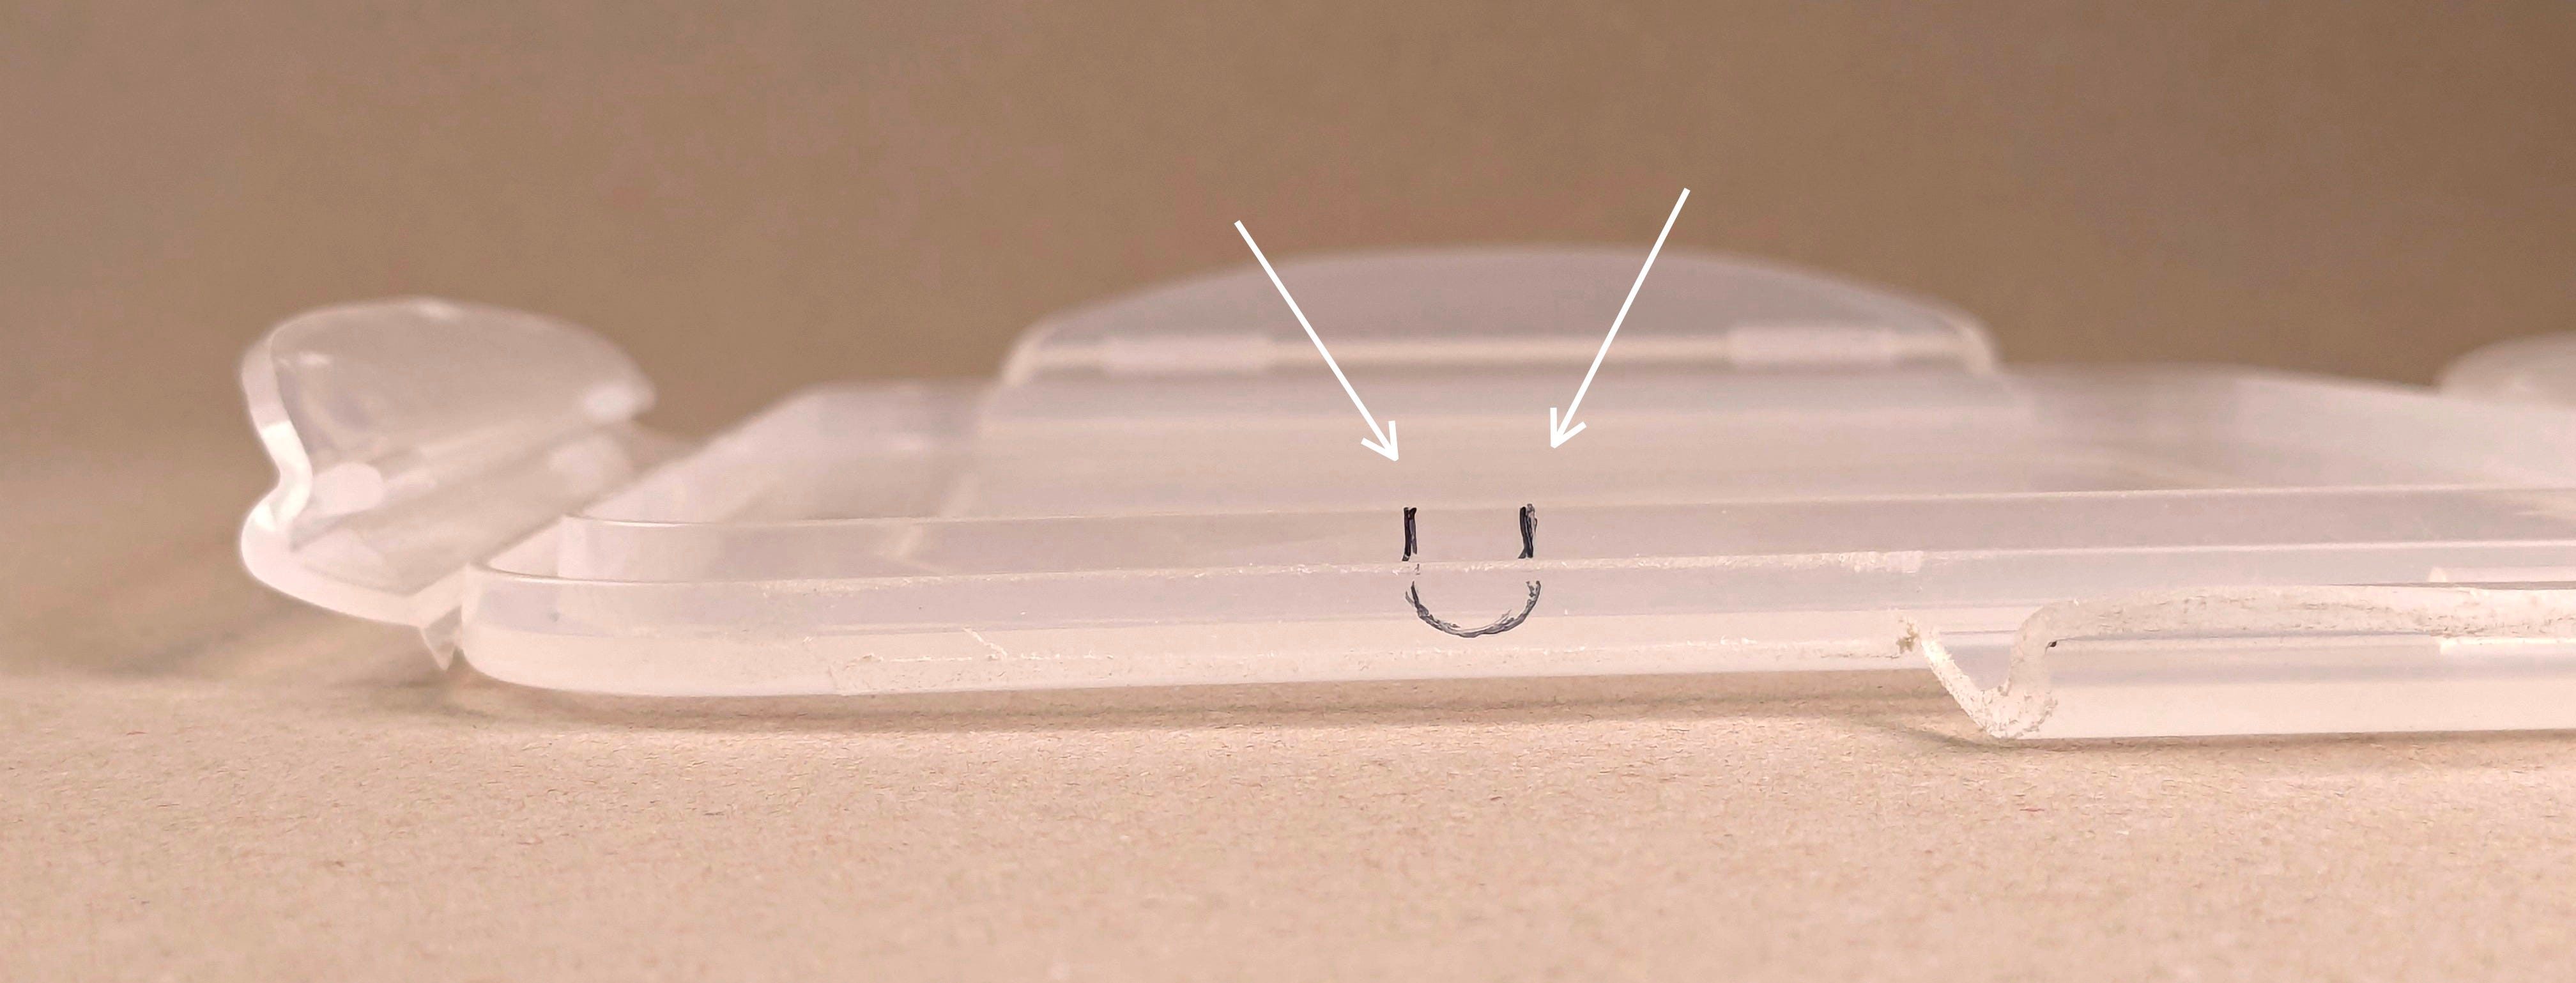
Now, cut away this half circle using a coping saw and sandpaper around the roller bar again (or a round file if you have it)


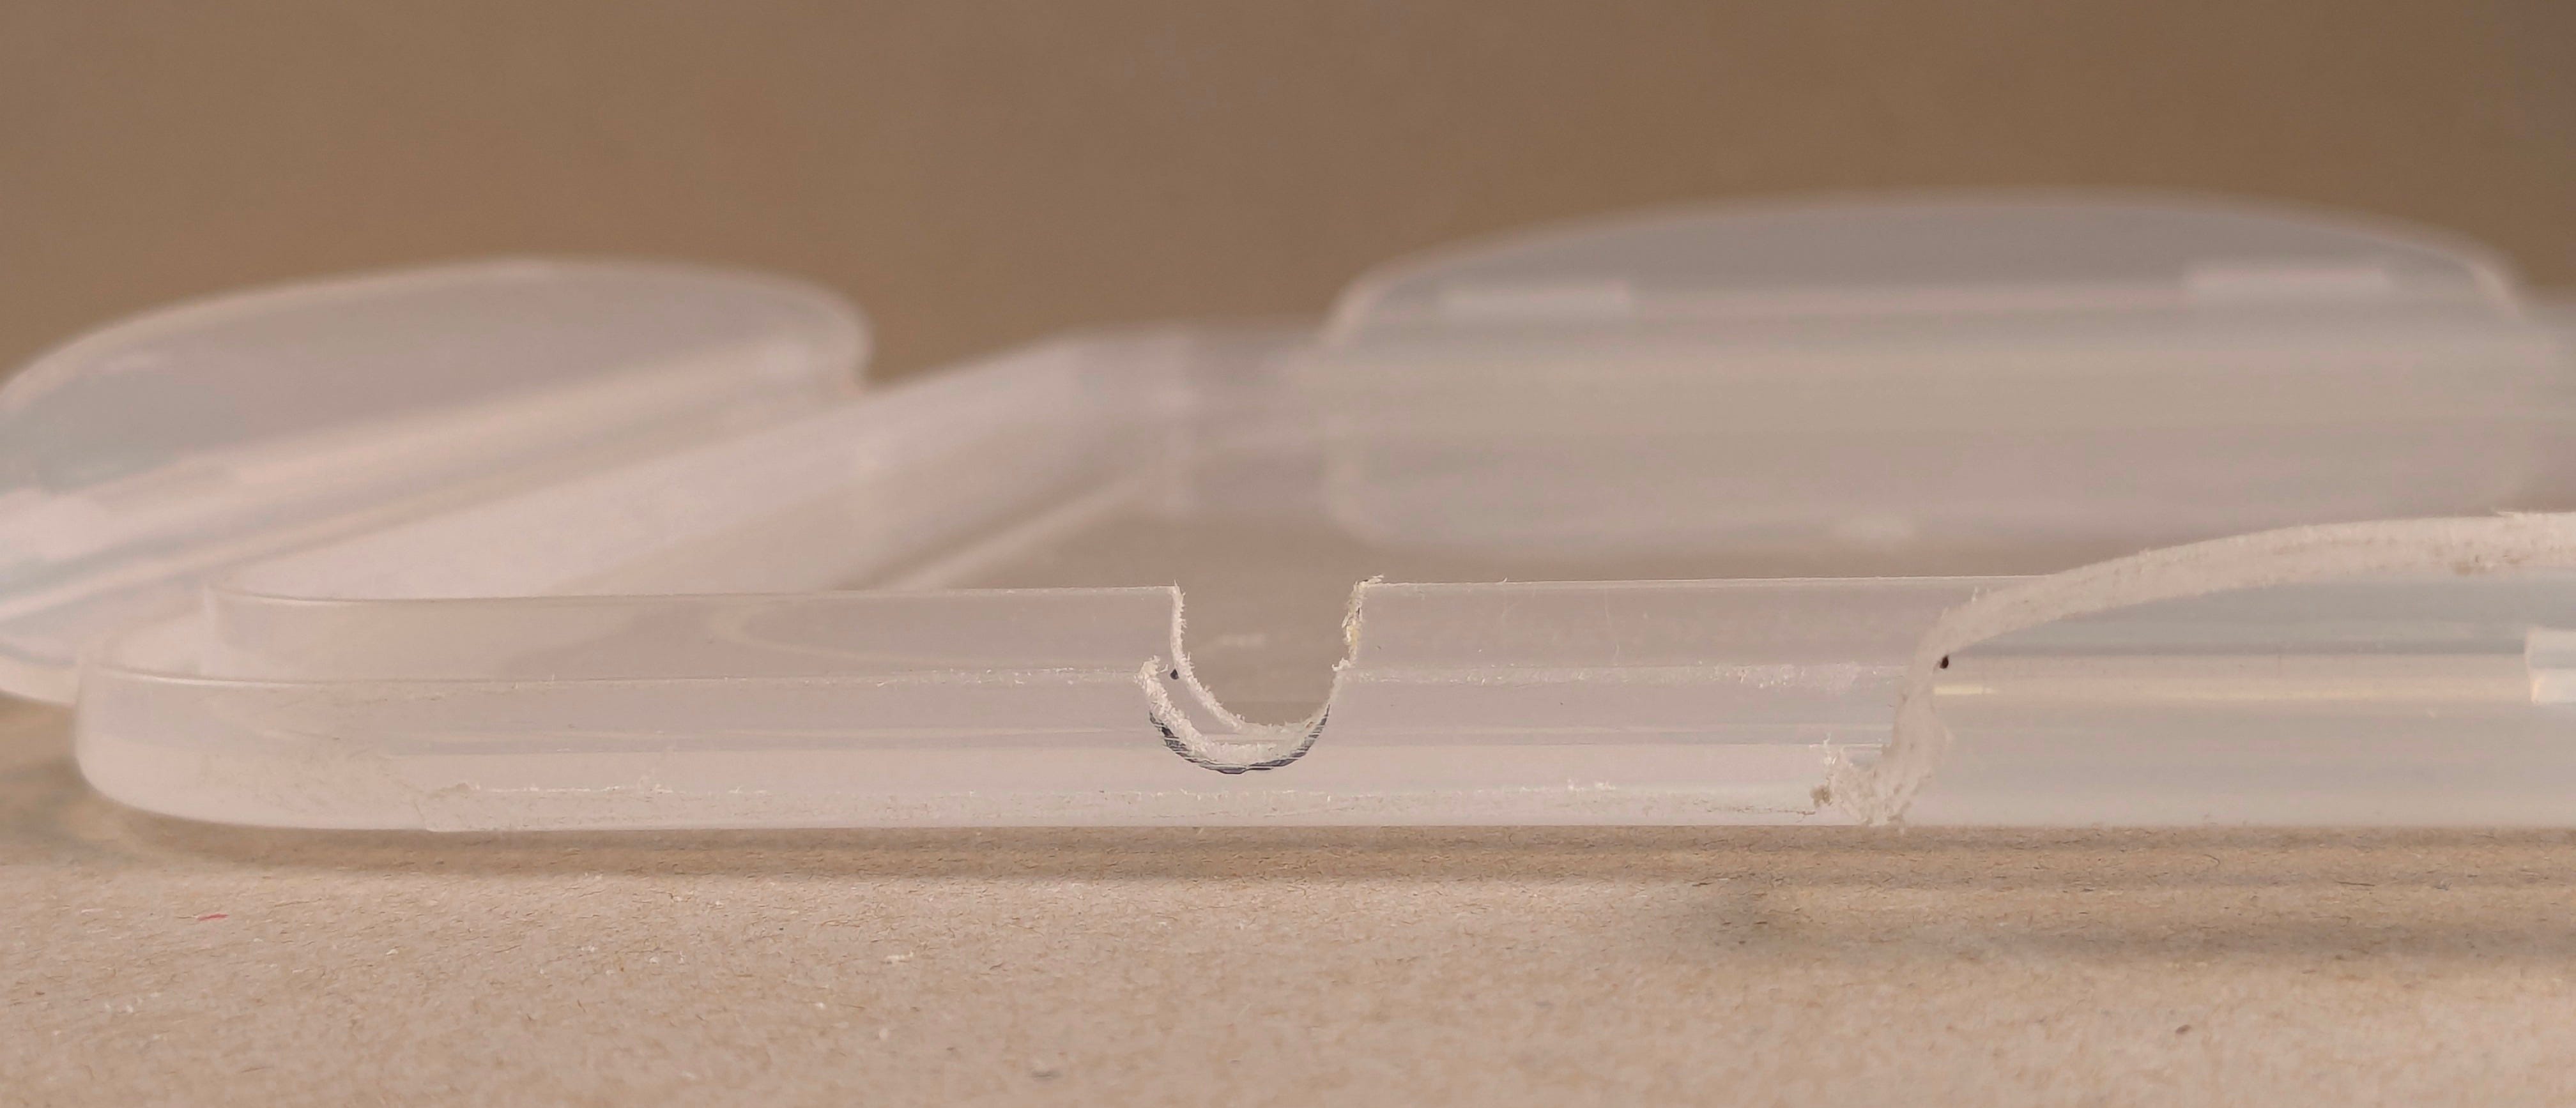
Now you can put the joint back in and see if it all works as planned, hopefully it does.


You can now fill the tray with glue
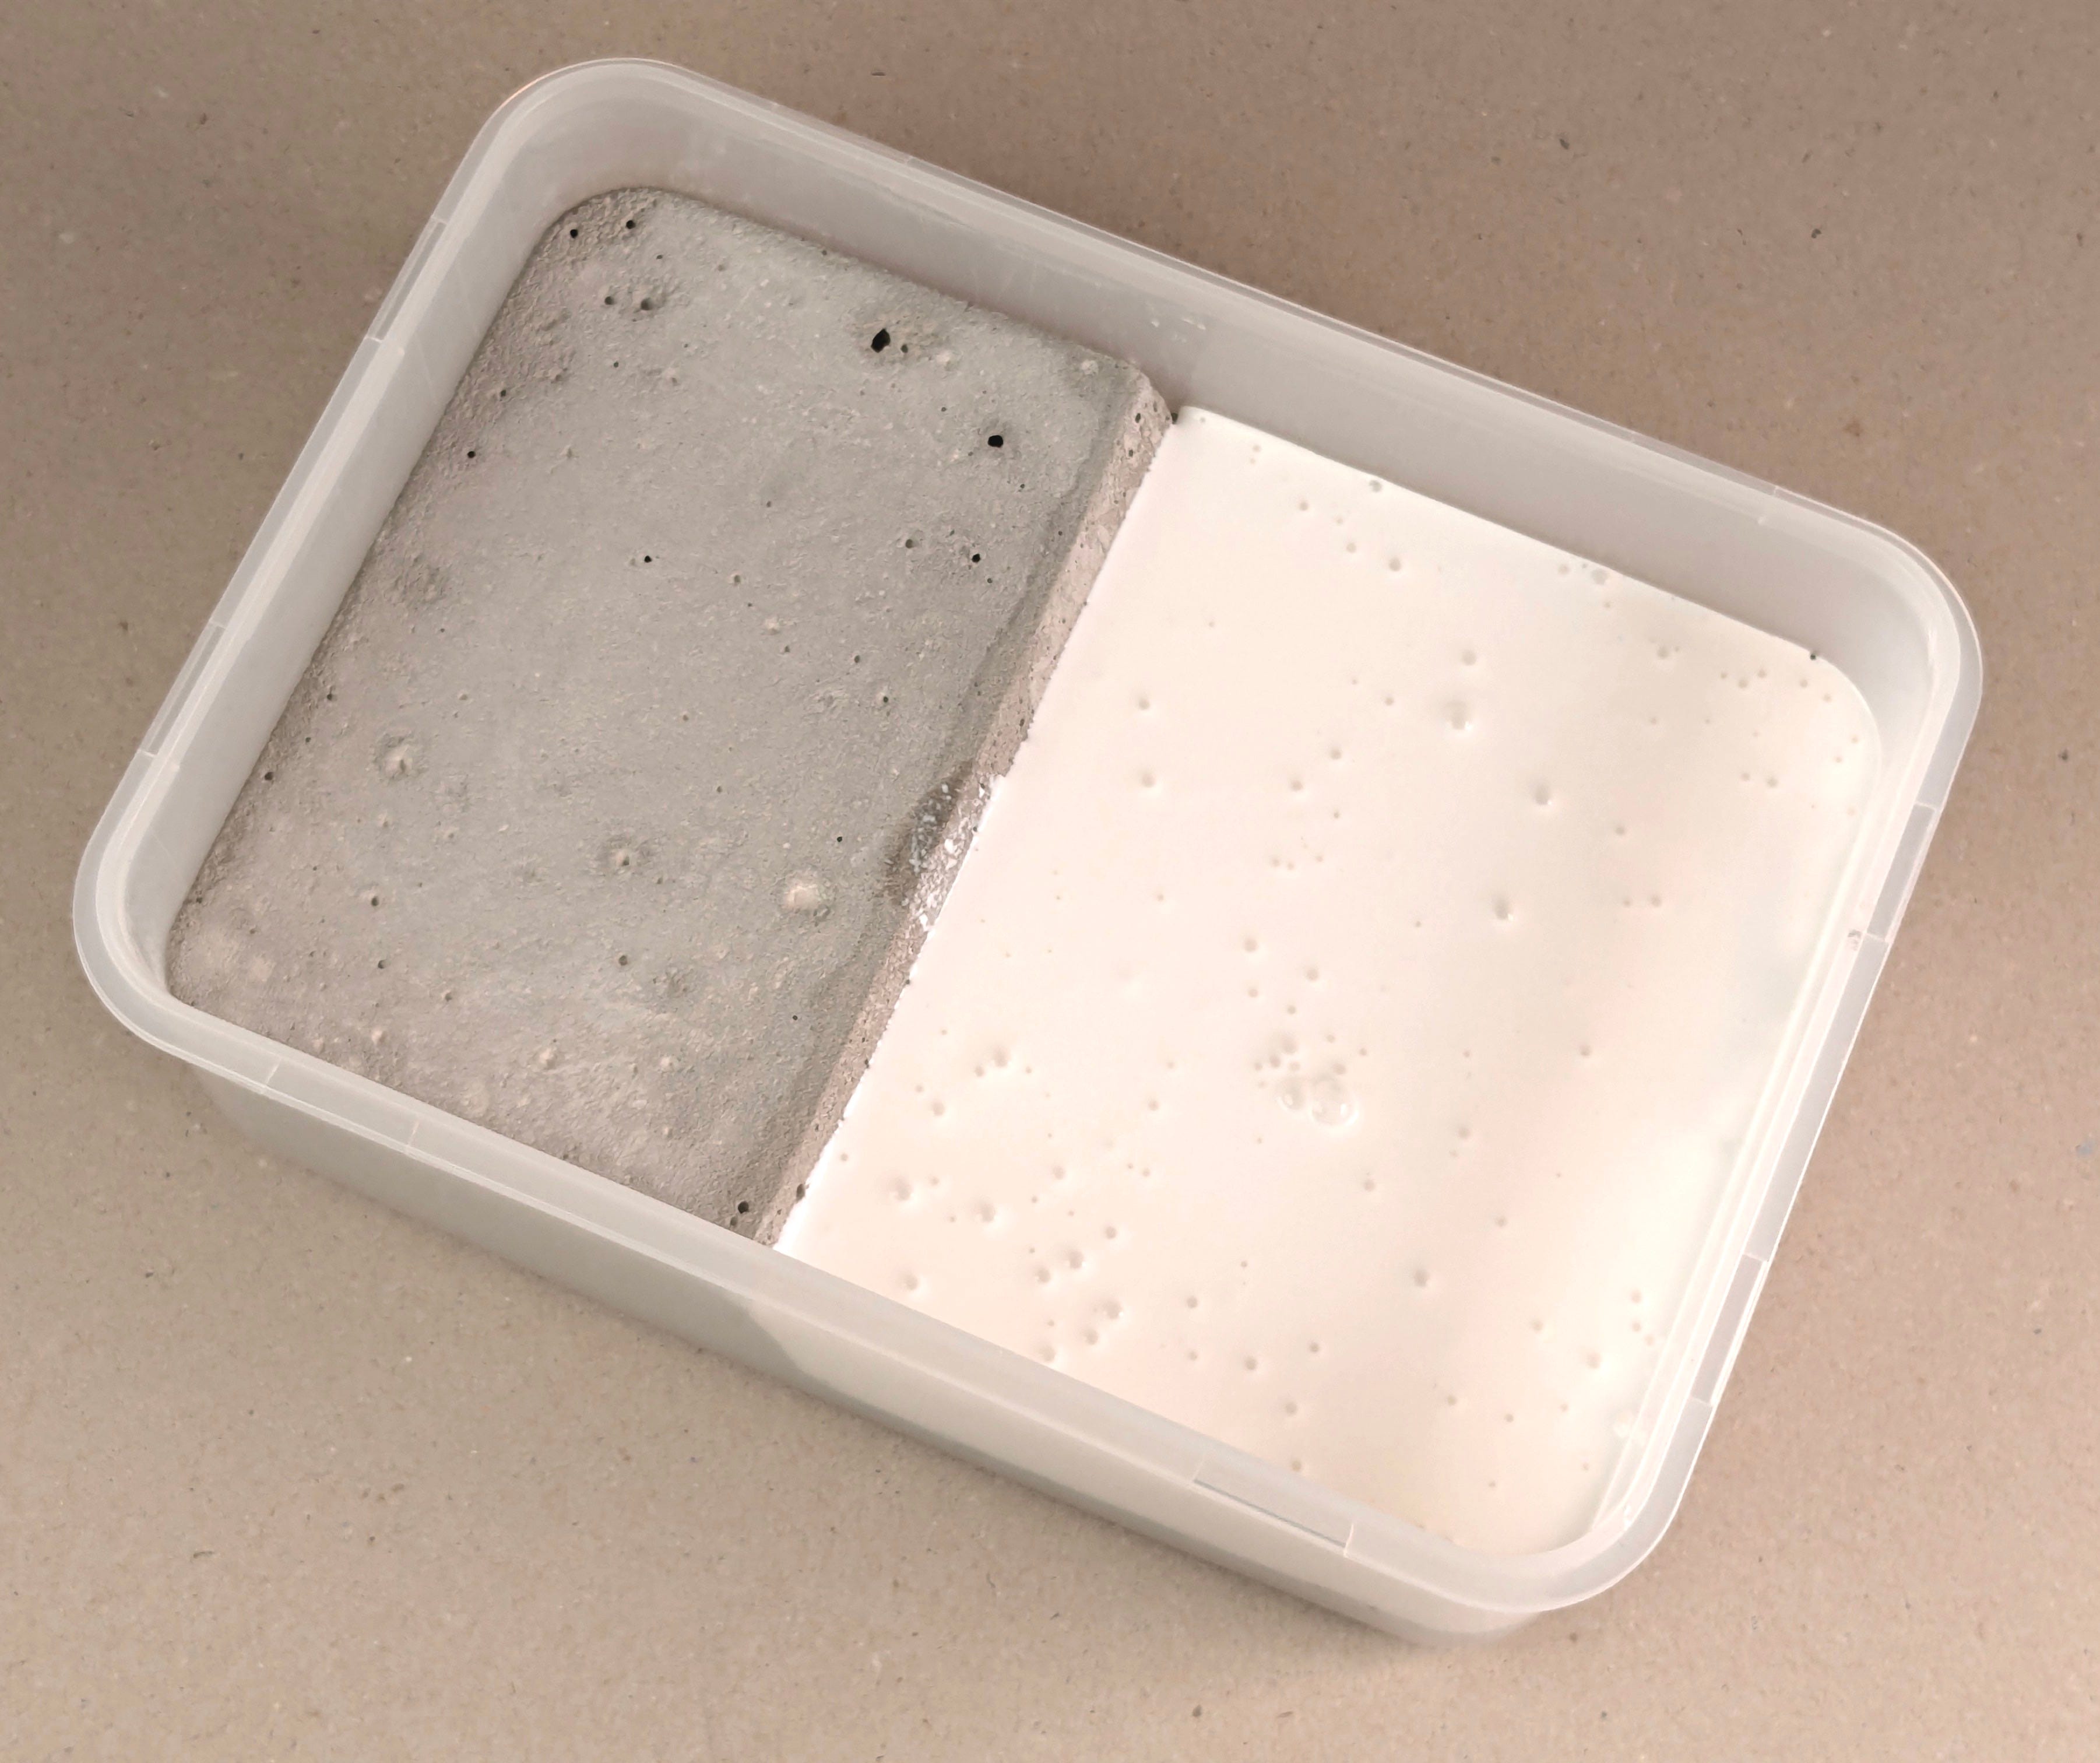
And start gluing!
Conditions of use
I kindly remind you that any reproduction or distribution of this tutorial, whether in whole or in part, is strictly prohibited without my authorization. I also ask that you do not disclose any construction details of this product on social media or elsewhere, nor teach in any form without my express permission.
Respecting these conditions is essential to the sustainability of our business and allows us to continue publishing quality content. I am counting on your understanding and thank you in advance.
If you have any question or doubt about this do not hesitate to get in touch at ben@elbel-libro.com.
Yours, Ben Elbel
Copyright 2025 - Benjamin Elbel
